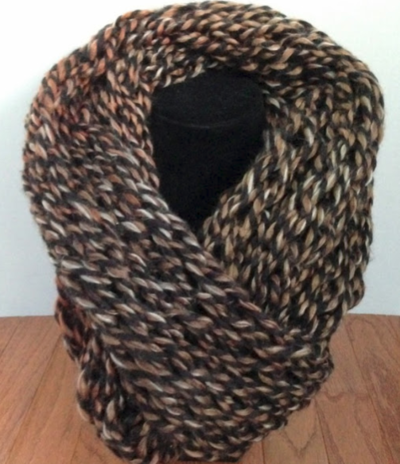
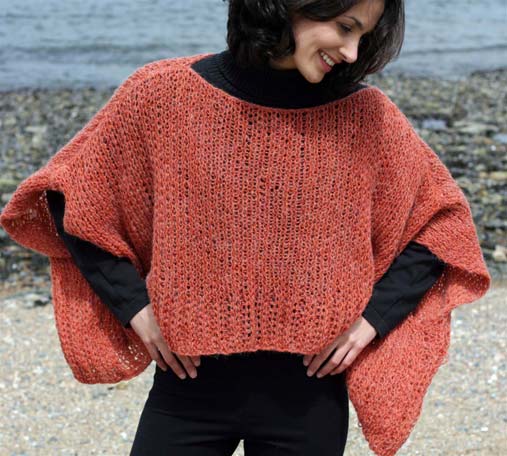
Open Weave Knit Poncho
An oversized, relaxed fit makes this a very comfortable poncho from Authentic Knitting Board. The fast and design design makes it perfect for beginning knitters.
Size: sml/m or (lg-X-lg)
Stitches: Stockinette and Rib
Materials:
- Yarn: Yarn used is JAEGER Luxury Tweed 50 gm skeins, Yarn needed=5 (6) skeins or 900 (1050) yards.
- 28” knitting board with spacers set at 1” (4” bolts)
- Knit hook
- Crochet hook
- Large sewing needle
Gauge: 2 st=1” 3 rows=1”
Measurements:
- Shoulder to Hemline will be aprox 22” (25”).
- Hemline will be aprox. 40” (46”) across the front of finished poncho.
Front and Back of Poncho are the same. (Knit 2)
Instructions:
- Cast on 74 (84) stitches. This means one complete circular and hook over. Lay anchor yarn across stitches. This should be a contrasting color of yarn aprox 3 times the length of your cast on stitches. Let the ends of yarn dangle below the board at both ends. Tie on these 2 ends of yarn together under the board.
- Work in rib stitch for 12 (18) rows. (see instructions at end of pattern) Be sure to start each row of hooking at end of board opposite the yarn. This helps keep both edges of knitting even. Weave with a loose hand.
- Change to stockinette stitch. This is only a change of weaving pattern.
- Knit in stockinette stitch for 30 (40) rows.
- Bind off the board with crochet hook. Bind off at the cast on stitches edge.
- BIND OFF: Start at end opposite the yarn. Slip crochet hook into first 3 loops (st 1 front and back, st 2 front). Now pull the loop, closest to hook, thru the other 2. With only 1 loop on hook, pick up 2 more loops which will be st 2 back, and st 3 front. Pull loop closest to hook thru other 2. Now pick up next 2 loops and continue across the board until the piece is free of the board. Pull tail of yarn thru the last loop on hook. Do the same process to the stitches on the anchor yarn, and then, remove the anchor yarn from knitting.
- Now make a second piece for the poncho back.
Shoulder Strips.
- Knit (2) shoulder pieces. This poncho is designed to have a separate strip down the shoulder creating a seam on front and back of poncho. This will also add support to the knit as it flows from the shoulders. The neckline is formed between the shoulder strips by simply leaving the seams un-sewn.
- Cast on the same number of st for the shoulder strip as you did to cast on for the poncho front.
- Knit in Rib stitch for 6 (10) rows. Bind off. Make 2. Photo does not show this shoulder strip. If you are not using the shoulder strip, you would just sew the front of poncho to the back of poncho.
Sewing it Together:
- The rib edge of your pieces will be the bottom of the poncho. Sew shoulders to stockinette edges.
- Sew one long side of shoulder strip to front, long side of poncho . Do this with a whip stitch.
- Sew one long side of shoulder strip to back, long side of poncho.
- Lay front and back together on flat surface with rib edges as your hemline.
- Sew the side seams together from the hemline up to arm opening. Arm opening should be 10” (12)” from top of shoulder.
- Now sew the shoulder seams together leaving the head opening between the 2 strips.
- This opening can vary based on your preference between 12” to 15” or more.
- Not using the shoulder strips? Just sew the front to back leaving the head opening.
- Stockinette Stitch: Wrap yarn starting with needle 1, top board, down to needle 2 on bottom row. Weave back and forth across the 2 rows of needles skipping every other needle. At end, turn board around, and continue weaving, picking up the needles that were skipped the first pass. Work only on the needles that were used at cast on. Hook over all needles starting with the needles at end of board opposite the yarn attachment.
- Ribbing Stitch: Wrap yarn starting with needle 1, top board, down to needle 3 on bottom row. Weave back and forth across the 2 rows of needles skipping every other needle.
- Last 2 needles will be done consecutively. At end, turn board around, and continue weaving, picking up the needles that were skipped the first pass. Be sure to cover all needles with weaving. Now hook over all needles starting with the needles at end of board opposite the yarn attachment.
Up Next:
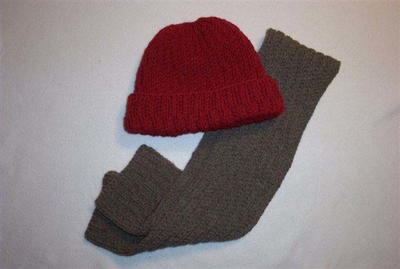
Read NextMade to Fit Double Knit Slippers
Your Recently Viewed Projects

Thanks for your comment. Don't forget to share!
CreativityGoddess
Oct 04, 2011
Hi dmd681 8754430 - If you're looking to save any of your patterns, you can simply click on the "save pattern" button at the top of the project. This will add the project to your collection of craft projects which you can access by clicking where it says "My Craft Projects" in the top left corner of your screen. Hope this helps! -The editors of FaveCrafts
Report Inappropriate Comment
Are you sure you would like to report this comment? It will be flagged for our moderators to take action.
Thank you for taking the time to improve the content on our site.