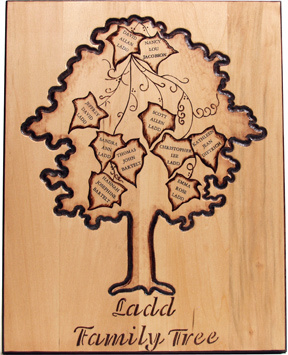
Woodburned Tree Rings
With some wood burning tools and a little creativity, you can make these adorable Woodburned Tree Rings for you or someone you love. These would make sweet anniversary or wedding gifts, too. This is simple and easy to make jewelry from Maureen Wilson.

Materials:
- 1-inch wooden disks
- Ring backs
- Scrap wood (for practice)
- Adhesive (Gorilla Glue)
- Clear varnish -or- nail polish
- Fine grit sandpaper
- Wood burner with medium-point tip
Tips on Materials:
- There are two basic types of woodburners: a solid point, single temperature pen, and a detail burner with temperature control. I’m using a solid point pen that I bought at a craft store. It cost $10 with several tips included.
- You’ll need some wooden disks. These cost $1.30 for six. Make sure the wood is unfinished. It’s also helpful to have a piece of scrap wood to practice on. Do not burn on wood that has been stained or painted, and do not burn on MDF or particle board, as these contain chemicals that are released while burning.
- You’ll also need an adhesive that can bond wood and metal. I prefer Gorilla Glue because it contains a rubberized medium that is more flexible than SuperGlue. You can buy it in the hardware section of Wal-Mart.
- You’ll need some ring backs. Some craft stores carry them in the jewelry making section. If you have a hard time finding them locally, you can find many different styles at wholesale prices on Etsy.
Video:
Instructions:
- I’ll be using a medium point tip for this project. Screw in the tip before you plug in the tool. It’s important that your woodburning tool is well-heated before you begin. Wait at least five minutes before using.
- I’m making a simple heart for this project. If you find it helpful, you can draw it lightly on the wood with pencil first. Start with a light burn, and go back over it to make it darker. Add initials in the center. If you’d like, you can add an arrow, or diagonal shading.
- Add the engraved disk to the ring back using strong adhesive. Let it set fully.
- Finally, you can add a coat of varnish for shine and durability. Clear nail polish works pretty well, too.
Woodburning Tips for Beginners:
There are a couple of things for beginners to keep in mind:
- Be aware that it isn’t pressure that makes the image darker. Rather, it’s the length of time the burner is held to the wood. So if you want a darker image, don’t press harder, just move the pen more slowly. Also, it’s a good idea to start out light, and then to go back over the lines if you want them darker.
- Remember to keep the pen moving, especially when starting and ending a line. One analogy I’ve heard is that of a plane coming in for landing… it needs to be moving as it touches down, or it will leave a splat. It’s the same with woodburning; if you start and end abruptly, you’ll get burns that look like ink blots.
- The tip of the tool may collect build-up as you work. They sell special creams and razors for cleaning, but you can also wipe the tip on fine-grit sandpaper. This will shorten the life of the tips some, but you probably won’t want to invest in cleaning supplies unless you’re serious about pyrography.
- Be safe! Work in a well-ventilated area (but don’t work directly by a fan, as that can cool the tip). Remember to be extremely careful, the tool can reach more than 900 degrees and could cause serious injury. Don’t work with children nearby, and don’t leave the tool unattended.
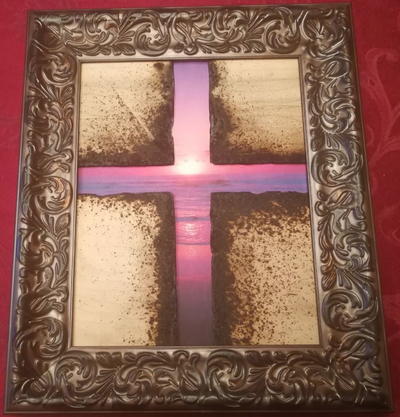
Read NextPurple Sunrise Decorative Cross
Your Recently Viewed Projects

Thanks for your comment. Don't forget to share!
Crafter 8025409
Jun 27, 2012
That is a good idea......... the wood burned rings........... I always wanted something like that when I was younger. I think alot of teenagers would like it.
MomLara
Jun 27, 2012
These would be really cute as tie-on's to the bigger package for the shower as well.
lowcadre
Mar 06, 2012
This was a great tutorial! I learned about a new (to me) product and how to use it. I am excited to give it a try and as soon as I finish this comment I'll get my car keys and be off to the craft store. Thanks a bunch! Rose Anderson
Report Inappropriate Comment
Are you sure you would like to report this comment? It will be flagged for our moderators to take action.
Thank you for taking the time to improve the content on our site.