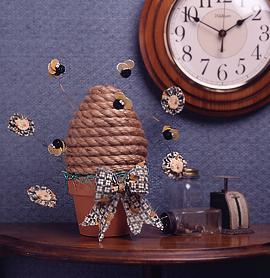
Beeeautiful Bee Decoration
This is a great summer craft to decorate any room. The clay pot is what holds it all together. It makes for a great conversation piece and it's a great DIY project.

Materials:
- STYROFOAM* Brand Products:
- 1- 6" Long Egg
- 1- 4" Clay Pot, 3 1/2" High
- 1 Renuzit® Adjustable Air Freshener
- 24 Gauge Wire:
- Green, 40 " Long / Copper, 30 " Long
- 10 " of 1/2" Natural Rope
- Green Excelsior
- Fabric:
- 1- 6" x 24" Green Print; 1- 2" x 8" Gold Print
- 5 Chenille Bees
- Low-temp glue gun & glue sticks
- Serrated knife
- Sewing needle
- Metal spoon
- Compass
- Paper
- Pencil
- Scissors
- Thread
- Ruler
- Craft snip
Steps:
1. BEEHIVE: Place Renuzit® Air Freshener into clay pot. With serrated knife, cut 1 1/2" off large end of foam egg. Discard 1 1/2" piece. Using metal spoon, carve out inside of egg until it fits over air freshener topper and flat cut edge of egg touches top of pot. Apply glue onto one end of rope to prevent raveling. (NOTE: The first round of rope is glued to the egg; the remaining rounds are glued to the previous round of rope.) Apply a line of glue around lower edge of egg and press rope in place. Continue coiling and gluing rope around egg to reach the top. At top center of egg, cut off excess rope, apply glue and tuck in end.
2. FLOWERPOT: Cut excelsior into approximately 4" lengths. Apply glue to inside top edge of clay pot. Press ends of excelsior into glue, allowing excelsior to drape over clay pot edge. Place beehive on top of air freshener.
3. BOW: Tear or cut a 1 3/4" x 24" strip green fabric. Tie strip into bow and glue to pot.
4. BEES: Remove silver wire from the bees. Using craft snip, cut five 4" to 6" lengths copper wire. "Scrunch" copper wire and then slightly straighten. Attach one copper wire to each bee by applying glue and inserting 1/2" end into bottom of bee. Glue wire ends and randomly insert bees into beehive.
5. YO-YO FLOWERS: Use compass to draw four 1 3/4" diameter circles on gold fabric, four 3 1/2" diameter circles on green fabric, cut out all circles. On large green circle, using needle and thread knotted on end, run a gathering stitch 1/8" from edge. Pull basting thread snugly, knot and trim thread ends. Manipulate circle to center the gathers and flatten the yo-yo. Repeat to make a total of eight yo-yos. Scrunch and bend green wire to add character. Spiral wire by loosely wrapping around a large marker or your finger. Cut wire into four varying lengths. To assemble one flower, place a green yo-yo on work surface with gathered center up. Glue gold yo-yo gathered center down, onto center of green yo-yo, sandwiching end of one green wire between circles. Repeat to make four flowers. Glue wire ends and randomly insert flowers into beehive.
6. GEL REPLACEMENT: When the original gel is depleted, simply replace with a new air freshener. For future projects: if your project base is decorated, remove dried gel. From a new container, remove new, non-toxic gel, then slip it over the post of the decorated base and reposition the decorated topper.
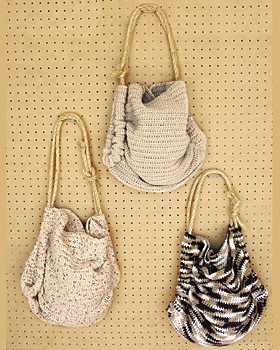
Read NextCrochet Summer Tote
Your Recently Viewed Projects

Thanks for your comment. Don't forget to share!
Bronze Hazel
Feb 03, 2017
Brilliant! I think this would be great even without the air freshener inside. We keep bees and this would be such a great ornament to have in our home. It seems like it would require a bit of extra effort to complete all of the different components, but, then again, you could make it as complex or as simple as you like.
Report Inappropriate Comment
Are you sure you would like to report this comment? It will be flagged for our moderators to take action.
Thank you for taking the time to improve the content on our site.