How to Make Bias Tape (4 Yards from A Fat Quarter)
Learn how to make 4 yards of bias tape from one fat quarter with this clever tutorial from sewing expert Caroline Critchfield. Homemade bias trim is higher quality, way cuter, and now costs less than buying the packaged kind. This quick tutorial shows step-by-step instructions on how to make a whole bunch by sewing only two seams. Two folding and ironing methods are shown, including the fast and easy way of using an inexpensive bias maker tool found in the quilting section of your local fabric superstore.
Instructions:
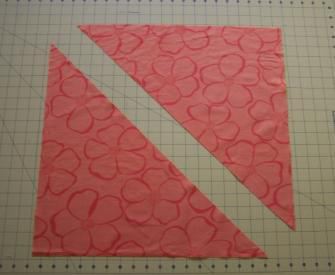
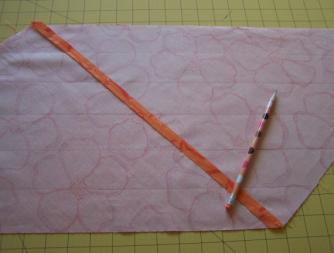
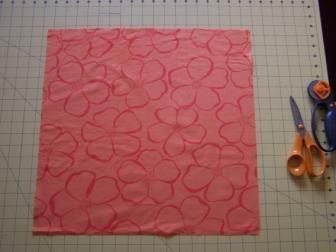
- Wash and dry your fat quarter. Iron, if necessary. Cut 4” off of the longer edge so that you start with an 18” square.

- Cut your square into two triangles.
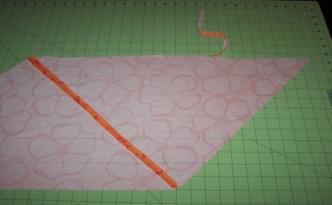
- Lay one triangle on top of the other, right sides together and matching up two of the shorter edges. Pin. Stitch with a ¼” seam allowance.
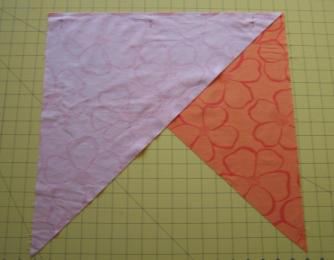
- Open it up and you have a trapezoid. Press seam open. Starting at the bottom, draw lines 2” apart until you reach the top. You will have to trim about ½” off the top to make 6 equal strips.
- Fold the trapezoid, right sides facing, putting the short ends together. Here’s the trick – don’t match the strips up exactly.
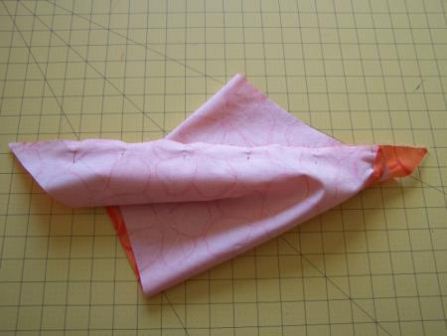
Match up the lines, but offset them by one strip. One little triangle corner will hang off each end.
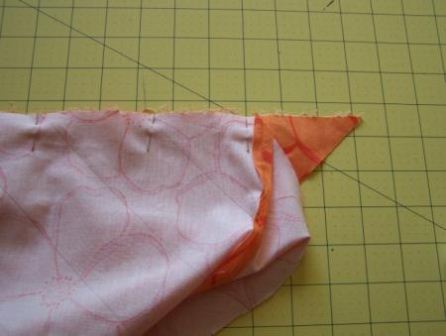
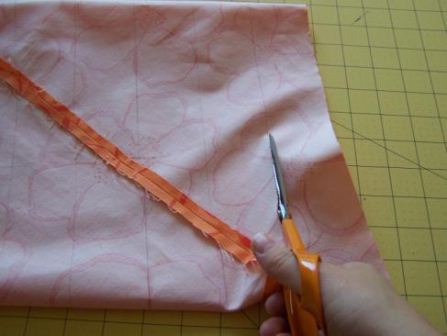
- The fabric won’t lay flat on your table, but it will stitch up fine. Sew with a ¼” seam allowance. Press seam open.
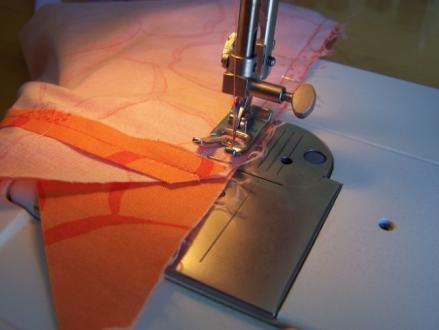
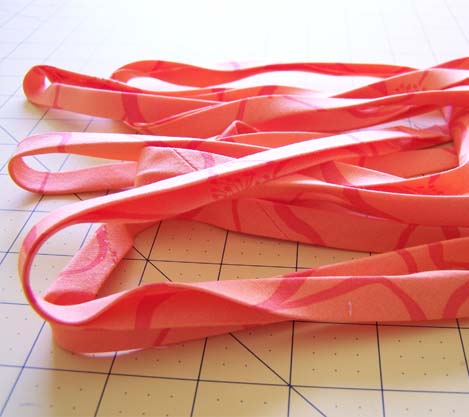
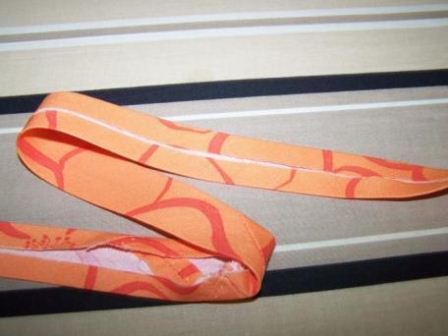
- Cut along the lines you drew, and magic… One long bias strip!
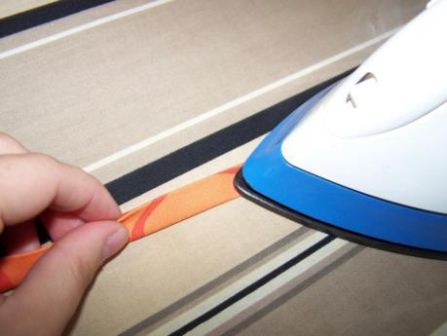
- Press the bias strip into single or double fold bias tape. There are two methods: Old School (lots of ironing and burned fingers) and Gadget Girl style (ta daaaa!).
Old School method:
Fold the bias strip along the loooong middle. Press it a bit at a time until you get to the end. Then go back to the beginning. Open it up and fold the edges to the middle. Press.
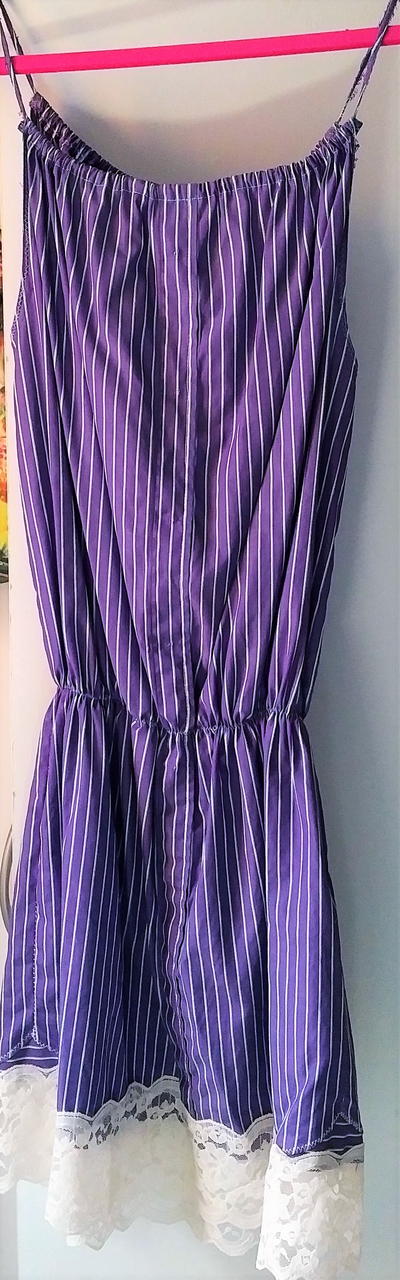
This is now single fold bias tape. I used it for embellishing the dress in the pictures. You may want to save some for that.
The trim used on the edges of the dress/top is double fold bias tape, so take your single fold tape, fold it in half again, and press. There you go!
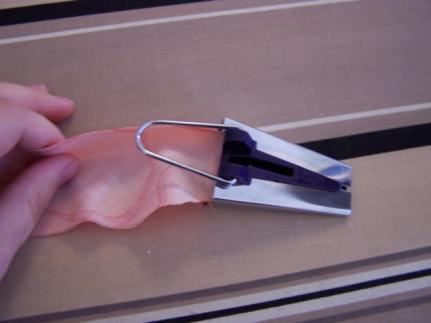
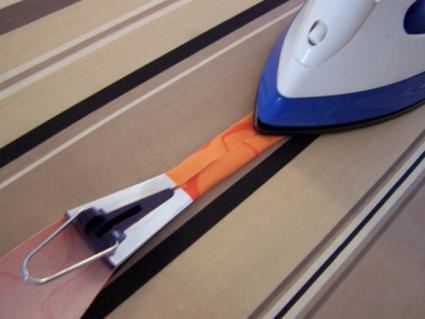
Gadget Girl style:
Insert one end of your bias strip into the fat end of your handy-dandy little bias tape maker. Use a pin if you need to to push it all the way through.
Iron the bias tape as it comes out the other end. The bias tape maker only makes single fold bias tape. Use the old school method above (fold it in half) to make double fold bias tape for your dress or top.
You just made over 4 yards of 1” single fold or ½” double fold bias tape! (And I’m sure yours is way cuter than plain old store-bought bias tape.
- LAST THING… sooner or later you will need to attach two bias strips. This is how: Open up the pieces of bias tape and pin them right sides together, forming a 90 degree angle. You should offset the edges by ¼” so that when you sew a ¼” seam you stitch from here to here.
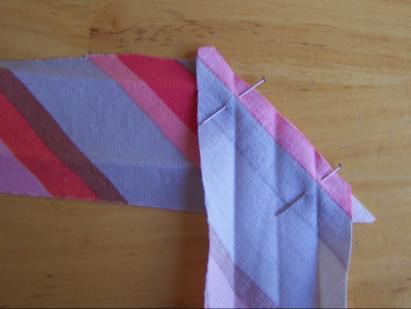
Stitch. Press the seam open, clip the stray corners, and you’re set!
 Want to learn more about bias tape? Check out this Intro to Sewing with Bias Tape video tutorial.

Read NextEasy Potholder With Pocket


Thanks for your comment. Don't forget to share!
Marilyn B
Jan 14, 2017
This has got to be the best tutorial ever! Such an easy way to make bias tape. Ugh, I remember cutting strip after strip along the bias on the cutting board and it took forever and tons of table room! Thank you so much for sharing this great method that will save tons of time, fabric and frustration! And even looks fun!
CraftyLil
Jun 10, 2013
Thanks so much for this tutorial... Somewhere in the depths of my brain I knew it was possible (to do it like this - rather than cutting endless strips and then joining those together) You've saved me. Many thanks... ;)
pioneerloftprimiti ves 7487385
May 12, 2013
Thanks so much for this post! I learned how to do this about 25 yrs ago, lost my directions and couldn't remember how when I wanted to do this recently. Getting old is for the birds! LOL! Anyway, I am THRILLED to have this info so clearly explained! Thanks!!!
lheck7
May 13, 2012
This is a great method to do. Have a few quilts that need binding, am definitely going to try this method. Easier than some others I have tried for sure.
DanitaGma
Mar 24, 2012
Wonderfully helpful! I just learned something new! Thank you very much!
Miss B
Apr 21, 2011
Wonderful way to make bias. I will pass this along to family who do quilts.
carol55432 6287137
Mar 01, 2011
I was always afraid to try and make my own and I tried this. I have made several today to go with some baby projects I am making. I am thrilled to to have matching bias tape to on the projects! Thank you so much!!!!
granny40
Feb 20, 2011
I can't believe how how brilliant this is!! I've never seen it before and have never made bias strips but with this it'll be so much easier than any other method I've seen. Thanks so much! I put it in my list.
mbryner10 0159126
Feb 12, 2011
I learned how to do this bias tape from an aunt 40 years ago. I have taught many people to do this. It is the best thing I have ever seen. Glad to see it in print.
metro1953 0725584
Jan 09, 2011
Love it - will use again and again - great directions - thank you
Member 5944403
Jul 14, 2010
Best directions I have seen! Your large colored pictures and easy-to-follow directions are awesome. Thanks!
Report Inappropriate Comment
Are you sure you would like to report this comment? It will be flagged for our moderators to take action.
Thank you for taking the time to improve the content on our site.