This project was submitted by one of our readers, just like you.
Foldable Market Tote

Foldable Market Tote
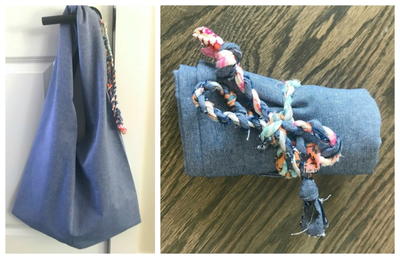
"There are lots of ways to go green, but perhaps one of the easiest ways to love the planet is to simply use a reusable grocery bag. And this foldable market tote is both easy to make and easy to carry. I've seen this concept before, but this pattern - in my opinion – is the most simplified and easiest version. It is especially cute when paired with handmade fabric twine as an embellishment. "
NotesSee this post on my blog for more instructional photos for this project.
Project TypeMake a Project
Time to CompleteUnder an hour
Sewn byMachine

Materials List
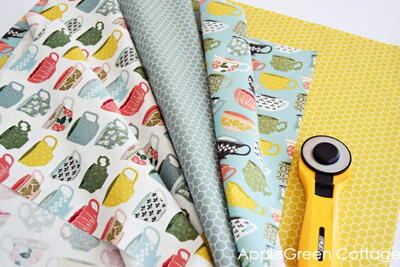
- 1 yard cotton fabric, pre-washed
- 30″ strip of ribbon, bias tape, or fabric scrap twine
Instructions
-
From the fabric, cut two rectangles that each measure 20″ x 30″. Next, fold one rectangle in half lengthwise; place a pin at the top of the fabric six inches from the long folded side; next place another pin on the raw edged side 17 inches down from the top of the fabric.
-
Fold the fabric from the top pin to the bottom pin and press to create a crease. Using this crease as a guide, cut a diagonal line from pin to pin, cutting off the top right corner. Repeat this process for the second rectangular piece of fabric.
-
Along the two angled sides, fold the edge in then fold in again, creating a narrow hem. Stitch down; press. Repeat for the second piece of fabric.
-
Place the two pieces on top of each other with right sides together. Stitch the center seam, as shown below, beneath the hemmed angled sides. Stitch the other center seam in the same fashion. Then press the seams open.
-
With right sides together and the center seams aligned neatly in the middle, stitch a seam across the bottom of the bag. Reinforce by stitching over it a second time.
-
To sew a French seam at the top of the handle, first turn the bag right sides out. Stitch a 1/2″ seam allowance across the top of the handle.
-
Now turn the bag inside out and press the top. Then, with wrong sides together, stitch a 1″ seam allowance across the top. (This hides the raw edges from the first seam as well as creates a casing.)
-
Next press this seam to one side, as shown below. Then stitch the very edges of the seam (where it is pinned in photo below.)
-
If you’ve never sewn a French seam before, you’ll find they are not difficult at all and create a polished look.
-
A 30″ piece of ribbon, twill tape, or bias tape works well for a tie. For a bohemian touch, I used a strip of fabric scrap twine that I made recently. Use a large safety pin to help guide it through the casing. I love how the tie creates a loosely gathered handle. The ties also keep the bag rolled up when not in use.

Read NextEasiest Bag, Purse Or Pouch