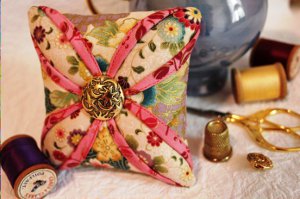
Cathedral Pin Cushion
This Cathedral Pin Cushion is perfect for storing all your pins. Make one for yourself and all your friends! Cute and unique pin cushions like this make great gifts and are easy and fun ways to use up any fabric scraps you have lying around.
Materials:
- Fabrics of your choice
- Pins
- Scissors
- Ruler
- Marking Pen
- Buttons
- Thread
- Batting
- Pattern 1
- Pattern 2
- Pattern 3
- Pattern 4
Instructions:
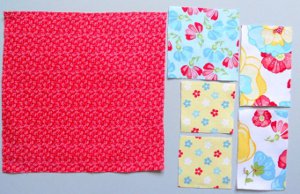
- Gather all materials including pattern, fabrics, pins, scissors, a ruler, marking pen, buttons, thread and batting. (Batting not shown)
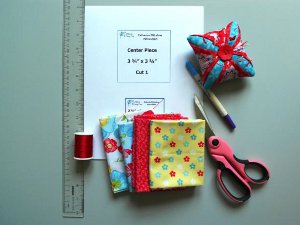
- View of printed template patterns. For illustration purposes I have shown a template for the large piece. You do not have to use templates at all. Just measure and cut your pieces. Make sure you have them squared.
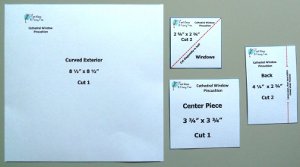
- View of all pattern pieces cut, pressed and ready to start.
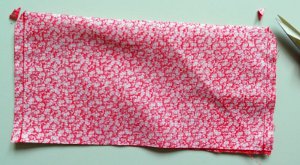
- Fold the exterior piece in half RST and stitch a ¼” seam allowance on the short ends. Clip corners off to near stitching.
- Press the seams open.
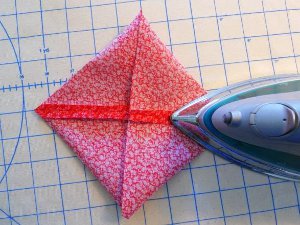
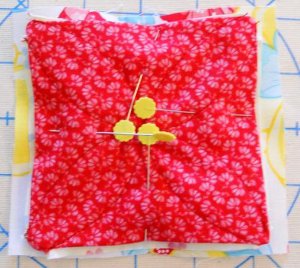
- Pull the other ends up to middle and match the first sewn seams. Pin.

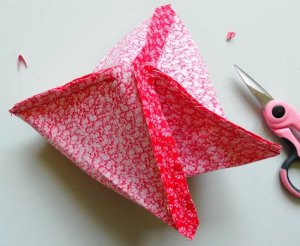
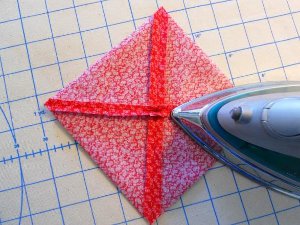
- Stitch a ¼” seam allowance from one corner to within 1” of middle. Turn and repeat from the other end. Pull the back center away from your seams as you stitch. It will look somewhat like a pyramid or German bell. Clip corners.
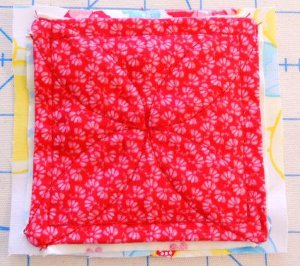
- Press seams open. It should now be square and lay flat. Center will be open for turning.
- Pull the exterior square right side outwards through the opening.
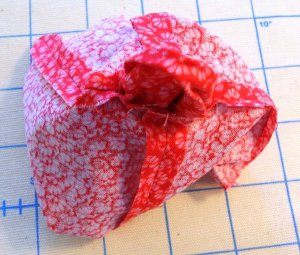
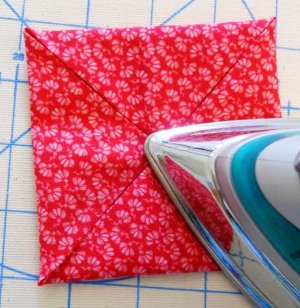
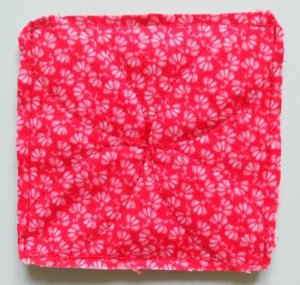
- Press.
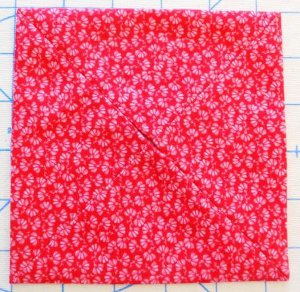
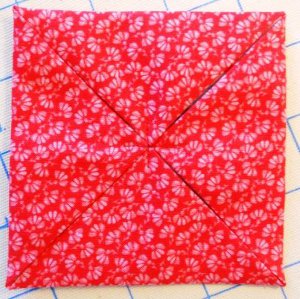
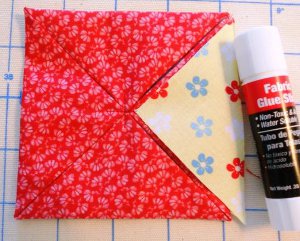
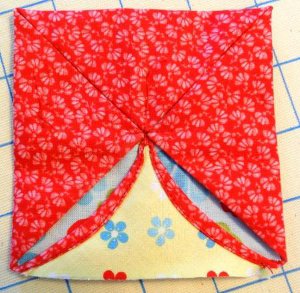
- Fold one point over to center and press. Repeat with opposite corner.
- Fold the remaining two corners to center and press.
- Unfold points
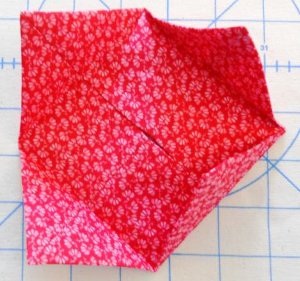
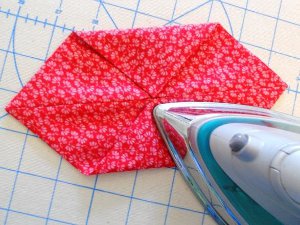
- Using water soluble fabric glue lay the center square on the exterior piece. Line up the square so that there is approximately a 1/8” margin between the center piece and the folds. If not, take off center piece and trim all sides then proceed again.
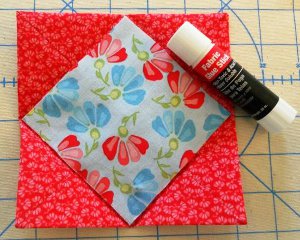
- Fold the points back to center and tack in place.
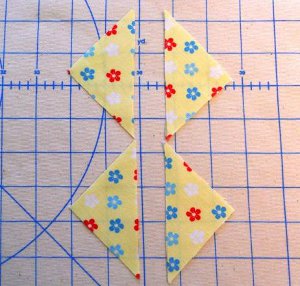
- Cut the window panes diagonally in half. See template.
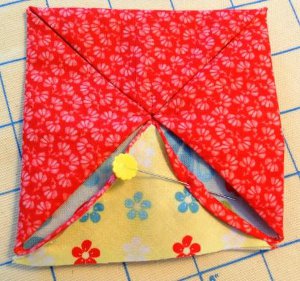
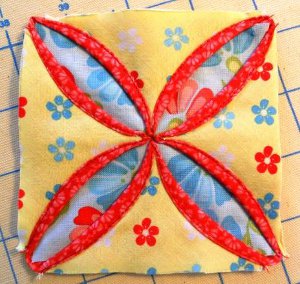
- Fabric glue the first window pane triangle to the exterior square. Pull the triangle down from the center so that there is a 1/8” margin on the edges. Do not worry about the triangle hanging over the edge. The purpose in leaving a margin is that in the next step when the fabric folds over then the pane will not show. Add more glue to the very edges of the pane and exterior.
- Start in the middle, pull and fold the exterior window fabric out over the pane ¼” and pin. Roll the fabric to the points in a curve
- Starting at the tip, stitch on the edge of the rolled curve from tip to tip as close to the edge as you can manage.
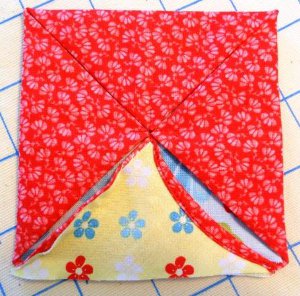
- Repeat on the other side. Be sure to add glue generously to edges to help you hold it in place.
- Repeat steps 17 – 20 on remaining sides.
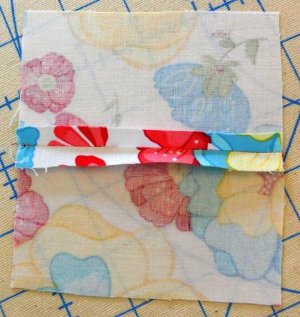
- Place back pieces RST and stitch a ½” seam on the long edges. Leave a 2” opening in the center.
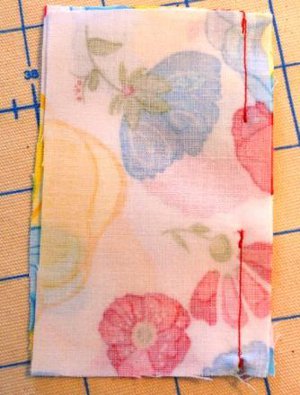
- Press seam open.
- Place the window on top of the back RST. Center the window on the back fabric. Extra fabric will hang over. It will be trimmed away later. Pin in place.
- Stitch around window with a ¼” seam allowance. Pivot at corners and be sure to back stitch at each corner. This is the stress point. It is a good idea to just double stitch around.
- Trim excess fabric and seam allowance to 1/8” and clip corners.
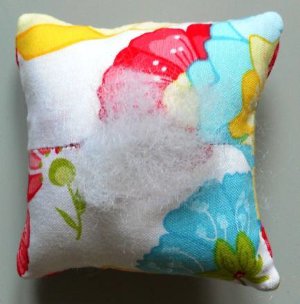
- Turn right side out and push out corners with a turning tool. Fill tightly with fiber fill.
- Close opening with a needle and heavy thread. Squeeze opening shut as you stitch to make a nice invisible seam.
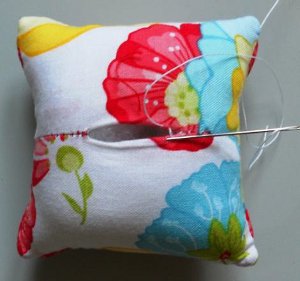
- View of back with opening sewn up.

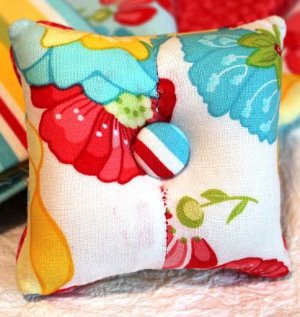
- Select a button or use a covered button as I have here. Sew button into center of window, pulling the thread tightly to indent the center. Knot on back side but do not cut thread.
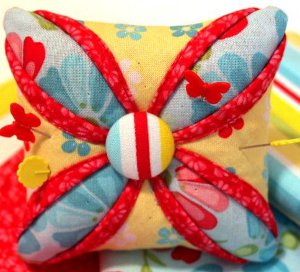
- Add a smaller button to the back side. This is the most tedious part. You will have to thread the needle up to the front and come out at the side of the button on top, but not where it can be seen. Lift up the top button just enough to pull the threads tight and go back down and up several times to secure bottom button. Knot thread under top button and cut.
Read NextSmall Quilt Tutorial
Your Recently Viewed Projects
Thanks for your comment. Don't forget to share!
DCWa106
Dec 06, 2012
Bravo ! c'est une superbe ide. Je vais en confectionner un pour mes besoins.
Its Sew Hawaiian
Jun 29, 2012
I've been making Cathedral Quilt pillows for years. They are beautiful. I've never thought of make just one square and making a pin cushion. It makes an elegant sewing accoutrement.
Report Inappropriate Comment
Are you sure you would like to report this comment? It will be flagged for our moderators to take action.
Thank you for taking the time to improve the content on our site.