This project was submitted by one of our readers, just like you.
Quilted Puzzle Play Mat
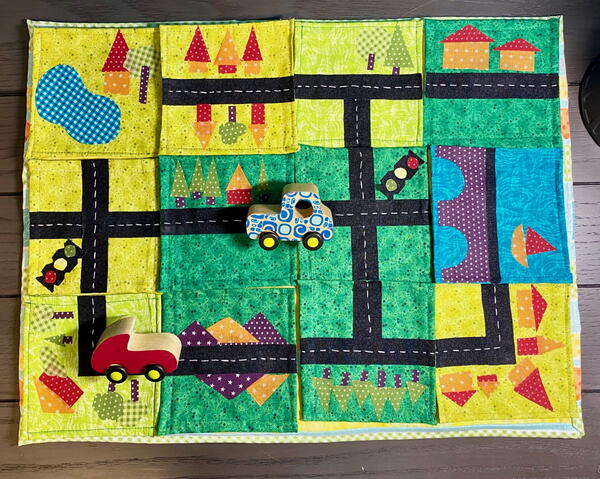
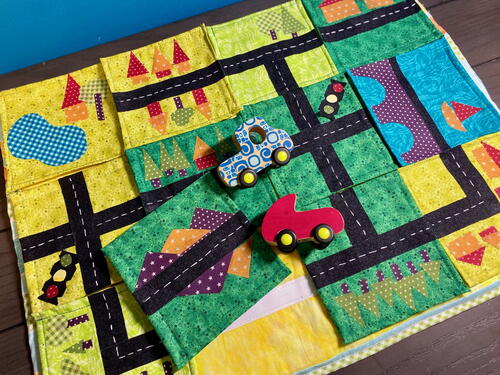
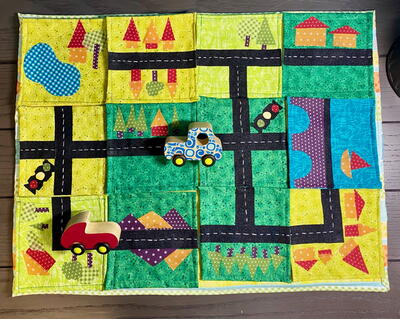
"Who doesn’t love driving their toy cars through the city? What if you could change that city every time you drove through it?? Created with colorful fabric, fusible interfacing, Velcro©, and some DIY iron-on appliqués, this Quilted Puzzle Play Mat is sure to be ever-changing fun for your little ones. The best part, it folds up to fit in a diaper bag or backpack! Little one doesn’t play with cars? Instead of appliquéing a city….how about a jungle scene with toy animals, a castle scene or alien planet to land on with your spaceship... the only limit is your imagination!"
Primary TechniqueQuilting

Materials List
- Fabric by Clothworks-Coordinating pieces of cotton. Think bright colors as well as pieces to create applique's with.
- Heat n Bond Fusible Interfacing by Therm-o-Web
- Heat n Bond Lite by Therm-o-Web
- 1 package Velcro© Brand -Sleek and Thin™ sew on low profile fastener (6'x3/4")
- Omnigrid Rotary Cutter
- Omnigrid see thru Ruler
- Omnigrid Heat proof mat
- Dritz Quilting Pins
- Dritz Embroidery Needle
- Scissors
- Cutting Mat
- Oliso Craft Iron
- Sewing Machine
Instructions
-
Using your rotary cutter and cutting mat, cut materials to size- For Play Mat- Fabric- 1-18" x 23" 1-16"x21" 12- 5"x5" 12-7"x7" Play Mat Fusible Interfacing- 1-16"x21" 12-5"x5" Velcro©Brand-Sleek and Thin™ Loop side (the fuzzy side) 24-2" lengths Hook Side (the side with tooth) 3-15" lengths (The appliqué fabrics and Heat n Bond will be cut while creating. )
-
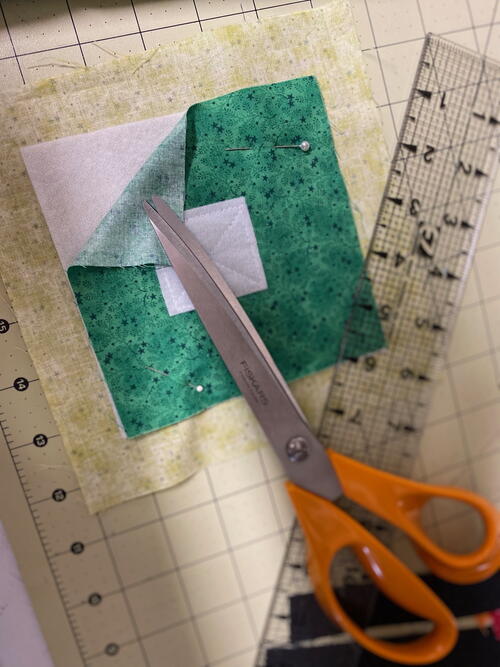
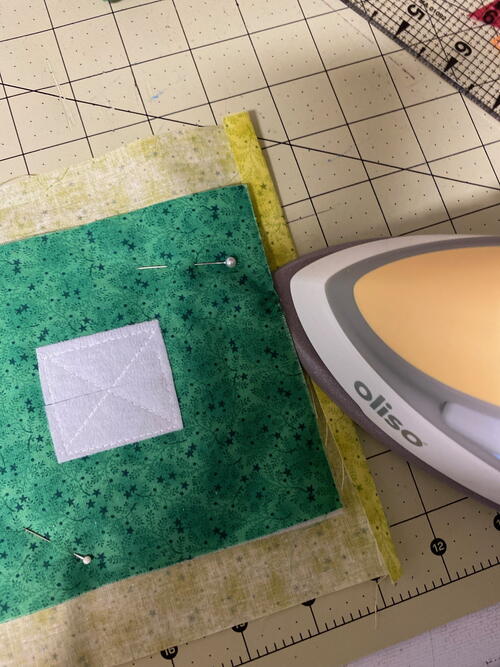
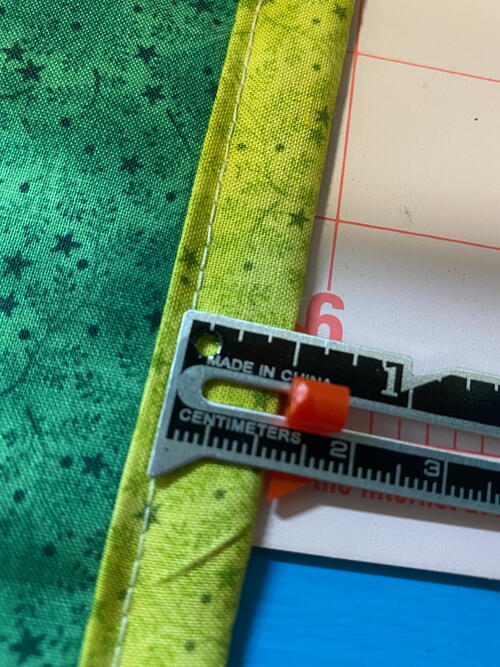
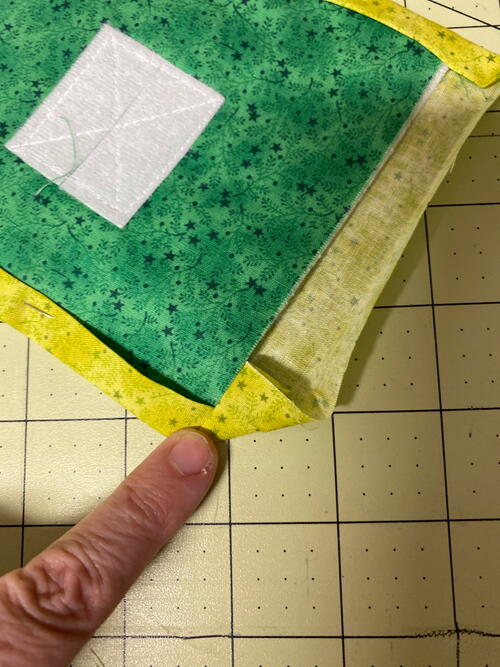
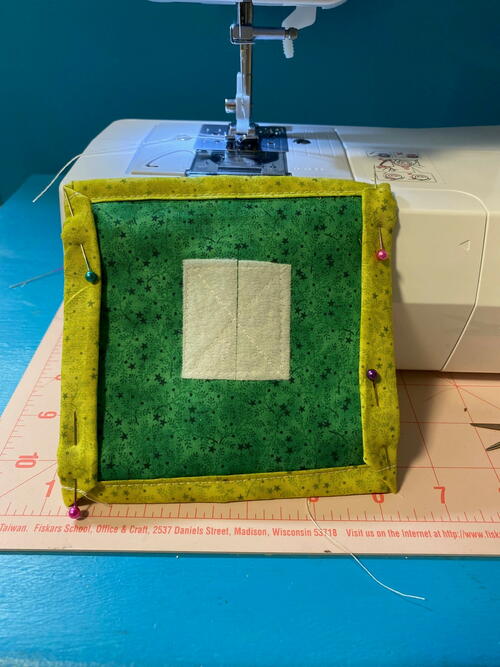
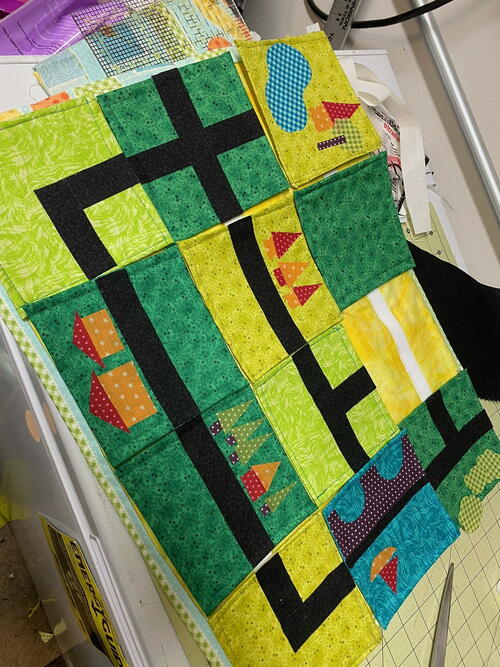
Assemble the puzzle pieces- On the right side center of your 5” x 5” squares of fabric, center two -2” pieces of loop side Velcro©- forming a rectangle, pin in place and then stitch around all four sides and then diagonally down both middles forming an “X”. Repeat with remaining 11 pieces. Match the wrong side of the 5”x5” squares of fabric to the adhesive side of the fusible interfacing. Iron interfacing to fabric following manufacturers instructions. Create your puzzle piece “quilt sandwiches” -Bottom layer 7”x7” fabric square face down, center 5”x5” square face up. Pin together. Repeat with all pieces. (See photo) Iron to prepare for creating a “Double Folded Hem/Binding” (just a note you will be creating a double folded hem/binding for all edges on both the puzzle pieces and the base) Fold raw edge of bottom (larger) square of fabric in 1/2” iron in place. Fold another 1/2” so it now overlaps the smaller piece and iron again. Repeat on all 4 sides and with all 12 pieces. Pin to hold two -parallel sides in place on one square. Stitch through all layers of fabric right next to the folded edge (It will be a “scant” 1/2” seam allowance) backstitch beginning and end of seam.(See photo) On the unsewn sides. Open flat, then fold corners on themselves at a 90 degree angle, then following your iron marks fold the raw edge in on itself to create a mitered corner. Pin to hold then stitch along the fold through all layers of fabric (again using that “scant” 1/2” seam allowance) (see photo) be sure to backstitch beginning and end of seam. Repeat with remaining puzzle pieces. And set aside.
-
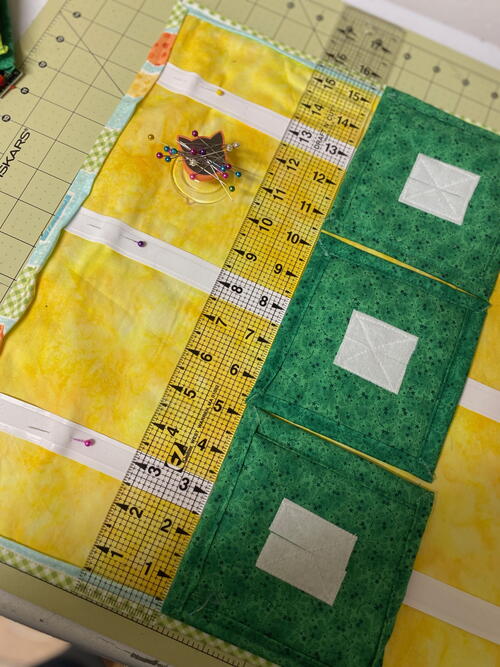
To assemble the puzzle base: Match the wrong side your 16”x21” piece of fabric to the adhesive side of your Heat n Bond interfacing of the same size. Iron to hold in place following manufacture instructions. Create your base “Quilt Sandwich” beginning with face down 18”x 23” piece of fabric. Center the 16”x21” piece over it face up. (you should have 1” border on all sides” ) Pin to hold. Iron piece to prepare for creating a double folded binding (follow the directions listed for the puzzle pieces.) Stitch all sides of puzzle base. Pin the longer pieces of Velcro© centered at the 3”, 8” and 13” marks. (See photo) Stitch all layers of fabric, along either side of the Velcro© strips the entire length of the piece. To give the Velcro© ends a more finished appearance, gently tuck under the folded binding (you might need to trim it ever so slightly.) and stitch the end down through all layers of fabric.
-
Adhere your puzzle pieces to the mat using the Velcro© and begin planning your appliqués to create the scene.
-
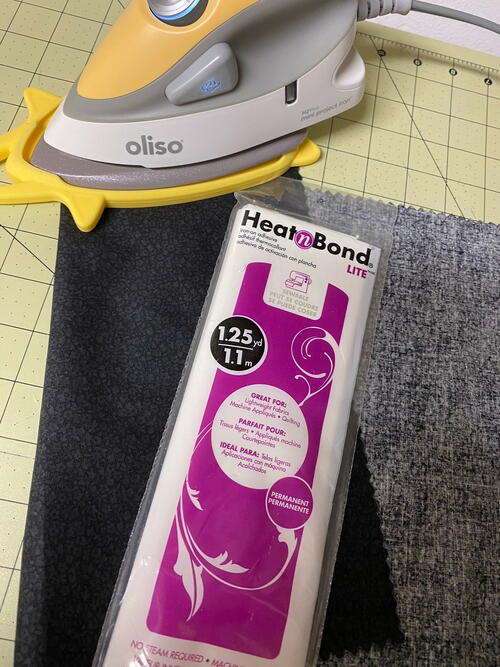
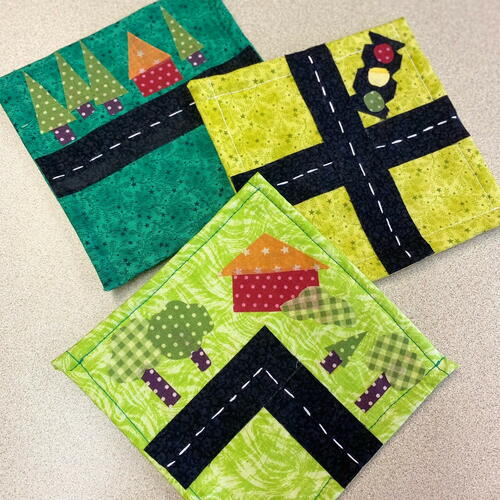
To create the scene on your puzzle you will be making simple iron-on appliqués using fabric treated with the Heatn Bond lite. Simple shapes can be combined to take the form of houses, and trees, and even boats, bridges and mountains…Don’t worry a child’s imagination will take care of the rest! Iron Heat-n-Bond to Black fabric following instructions, repeat with colored scraps of fabric. (Tip even though the feature pieces are small, you will use more fabric scraps than you think. )
-
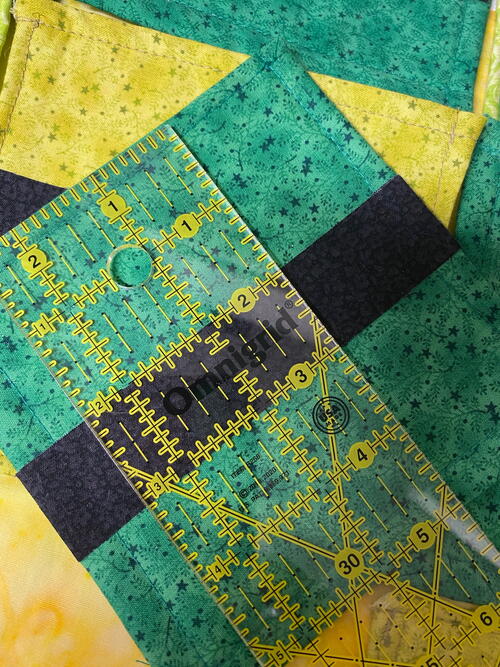
Design your city- To create roads: cut, 1” x 5 strips of black fabric backed with Heat n Bond lite. Iron the road strips to the top side of the puzzle squares. If you desire for all roads to be interchangeable, be sure to iron the strips between the 2” and 3” mark. ( See photo.) A see-thru ruler is really helpful to line pieces up properly. Placing the roads at this point assures that all pieces can connect no matter how the piece is turned. Make some pieces single roads, some cross roads. A variety of pieces makes your city more interesting. (See finished photo for ideas.) For landscape and other features- Cut up your colored pieces of Heat n bond-ed fabric. Let out your inner child and keep shapes simple. Create trees out of triangles and small strips. Or cloud shape and strips. Triangles become mountains. A rectangle and triangle put together becomes a house or a building. A small strip of black and some circles becomes a stop light… The possibilities are endless! Iron all Heat n Bond backed fabric pieces in place following manufacturer instructions.
-
Finishing Touches Using embroidery floss, add lines to your roads. Hide the ends of the floss in the backside folded binding and do your stitching only through the top layers.
-
Press entire project one last time
-
Find a couple of cars and a lucky child and let them play!
Read NextLearn to Foundation Paper Piece
Your Recently Viewed Projects
Report Inappropriate Comment
Are you sure you would like to report this comment? It will be flagged for our moderators to take action.
Thank you for taking the time to improve the content on our site.

