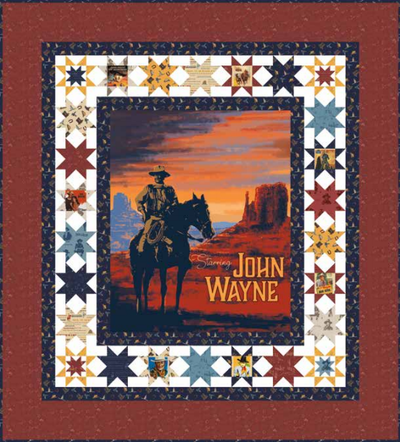
The Duke John Wayne Quilt Pattern

The Duke John Wayne Quilt Pattern is the perfect quilt for a family who loves Westerns! Make a quilt honoring fond memories watching John Wayne movies. This gorgeous quilt would make a lovely wall hanging or bedspread. It's perfect to curl up with while watching one of these old timey Westerns! The star border is gorgeous and pulls from all the colors in the central motif just beautifully. This is a relatively quick quilt to complete since the focal image is so massive! Celebrate your love of John Wayne with a nostalgic and lovely new quilt.
NotesMeasurements include ¼” seam allowance.
Sew with right sides together unless otherwise stated.
Please check our website www.rileyblakedesigns.com for any revisions before starting this project. This pattern requires a basic knowledge of quilting technique and terminology. The quilt and block diagrams portrayed are virtual images. The layout and look of your project may differ when using actual fabric.
Project TypeMake a Project
Quilt Size77 1/4 inches wide x 85 1/4 inches long
Time to CompleteLonger than a weekend
Materials List
- 1 John Wayne Panel (P8576)
- 2 yards red bandana (C8574 Red)
- 1 2/3 yards putty solid (C120 Putty)
- 1 yard navy accessories (C8573 Navy)
- 1 fat quarter bundle (FQ-8570-17)
- Binding 2/3 yard
Instructions
Cutting Requirements
Please read instructions first before cutting. Seam allowances vary so measure through the center of the quilt before cutting border pieces.
Quilt Center
Trim panel to measure 35” x 43”.
Border 1
Cut 4 strips 3 3/8” x WOF from navy accessories.
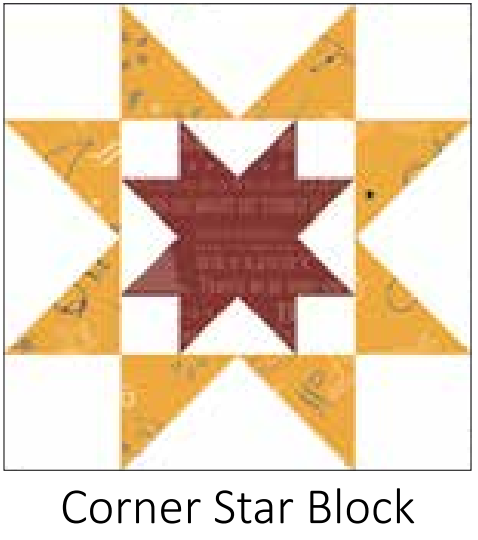
Border 2 Corner Star Block
Cut 8 squares 1½” x 1½” from each of the following:
navy quotes, red quotes, red western landscape & blue silhouettes
Cut 1 square 2½” x 2½” from each of the following:
navy quotes, red quotes, red western landscape & blue silhouettes
Cut 16 squares 1½” x 1½” from putty solid.
Cut 16 rectangles 1½” x 2½” from putty solid.
Cut 32 squares 2½” x 2½” from yellow bandana.
Cut 16 squares 2½” x 2½” from putty solid.
Cut 16 rectangles 2½” x 4½” from putty solid.
Border 2 Star Block
Cut 88 squares 2½” x 2½” from putty solid.
Cut 88 rectangles 2½” x 4½” from putty solid.
Cut 2½” squares in the corresponding number from the following prints:
8 – red silhouettes, 24 – tan silhouettes, 8 – blue silhouettes, 8 – red western landscape, 16 – blue western landscape, 16 – tan accessories, 16 – yellow accessories, 16 – navy accessories, 16 – red bandana, 16 – navy bandana, 8 – red quotes, 16 – tan quotes and 8 – navy quotes
Cut 4½” squares in the corresponding number from the following prints:
7 – tan main, 1 – red silhouettes, 1 – tan silhouettes, 1 – blue silhouettes, 1 – red western landscape, 2 – blue western landscape, 1 – tan accessories, 2 – yellow accessories, 1 – navy accessories, 1 – red bandana, 1 – navy bandana, 2 – tan quotes and 1 – navy quotes
Border 3
Cut 6 strips 3” x WOF from navy accessories.
Border 4
Cut 7 strips 8½” x WOF from red bandana.
Assembly
Refer to quilt photo for placement of blocks.
Star Block
-
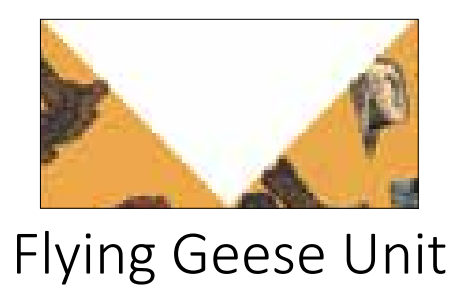
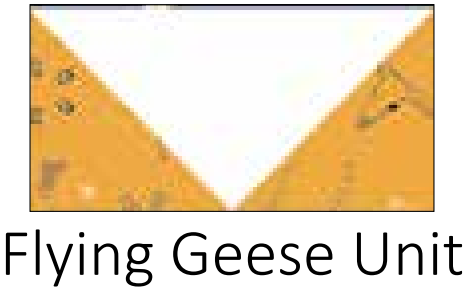
These instructions are to make 1 block. Refer to the Star Block diagram for piece placement. Draw a line from corner to corner on the wrong side of a 2½” assorted print squares. Place the square in the corner of a 2½” x 4½” putty solid rectangle and sew on the drawn line. Leave a ¼” seam allowance and trim excess. Press. Repeat on the other side of the rectangle. This will make 1 Flying Geese Unit. Repeat to make 4 Flying Geese Units.
-
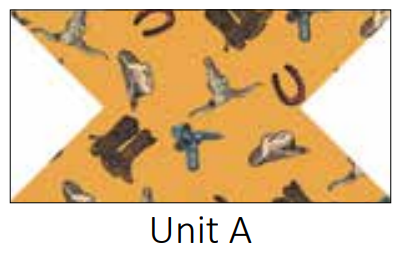
Sew a Flying Geese Unit to each side of a 4½” assorted print square to create Unit A.
-
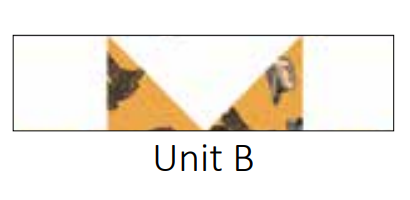
Sew a 2½” putty solid square to each side of the 2 remaining Flying Geese Units to create 2 Unit Bs.
-
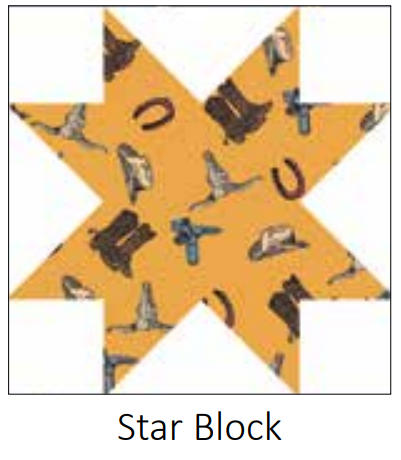
Sew a Unit B to the top and bottom of Unit A to create the Star Block. Repeat to make a total of 22 Star Blocks.
Corner Star Block
-
These instructions are to make 1 block. Refer to the Corner Star Block diagram for piece placement. Draw a line from corner to corner on the wrong side of a 1½” assorted print squares. Place the square in the corner of a 1½” x 2½” putty solid rectangle and sew on the drawn line. Leave a ¼” seam allowance and trim excess. Press. Repeat on the other side of the rectangle. This will make 1 Flying Geese Unit. Repeat to make 4 Flying Geese Units.
-
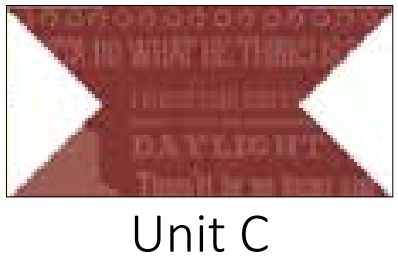
Sew a Flying Geese Unit to each side of a 2½” assorted print squares to create Unit C.
-
Sew a 1½” putty solid square to each side of the 2 remaining Flying Geese Units to create 2 Unit Ds.
-
Sew a Unit D to the top and bottom of Unit C to create the Corner Star Center. Repeat to make a total of 4 Corner Star Centers.
-
Draw a line from corner to corner on the wrong side of a 2½” Yellow Bandana squares. Place the square in the corner of a 2½” x 4½” putty solid rectangle and sew on the drawn line. Leave a ¼” seam allowance and trim excess. Press. Repeat on the other side of the rectangle. This will make 1 Flying Geese Unit. Repeat to make 4 Flying Geese Units.
-
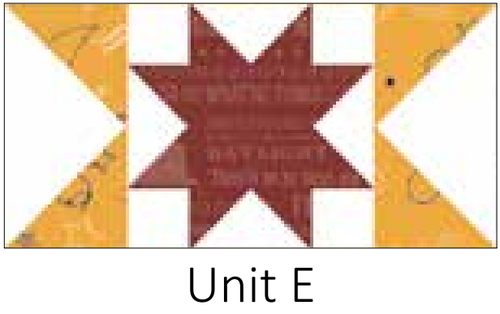
Sew a Flying Geese Unit to each side of a Corner Star Center to create Unit E.
-
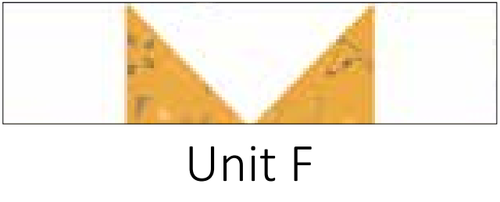
Sew a 2½” putty solid square to each side of the 2 remaining Flying Geese Units to create 2 Unit Fs.
-
Sew a Unit F to the top and bottom of Unit E to create the Corner Star Block. Repeat to make a 4 Corner Star Blocks.


Quilt Center Assembly
See quilt photo for quilt center and border placement. Sew borders around the quilt center. Sew the side borders first. Sew the top and bottom borders.
Borders
Seam allowances vary so measure through the center of the quilt before cutting border pieces. Sew side borders first.
Border 1
Side borders should be 43”. Top and bottom borders should be 403/4”.
Border 2
Sew 2 rows with 6 Star Blocks together. Sew one row to each side of the quilt. Sew 2 rows with 5 Star Blocks. Sew a Corner Star Block to each end. Sew a row to the top and bottom of the quilt.
Border 3
Side borders should be 64½”. Top and bottom borders should be 56½”.
Border 4
Side borders should be 70”. Top and bottom borders should be 78”.
Finish quilt by layering the quilt top, batting, and back. Bind with your favorite Riley Blake fabric from the John Wayne Collection. Have fun with your colors and enjoy the journey of making your quilt.
Which iconic stars would you incorporate into a quilt?
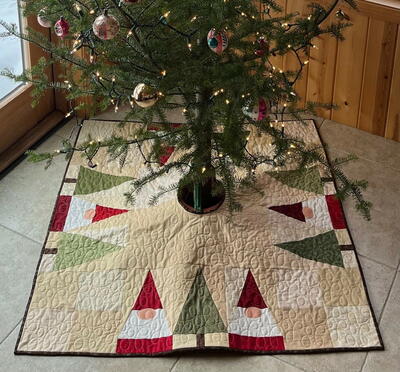
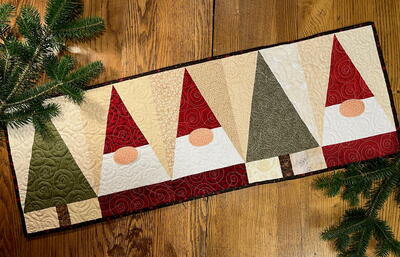
Read NextBalsam Gnomes Table Runner Quilt
Your Recently Viewed Projects
Thanks for your comment. Don't forget to share!
karawaldner 306086 2
Jul 27, 2019
Not too sure I would incorporate a star into my quilt project but this is very nice, I know my dad would have loved it, he was a fan.
trixsmoke 5911312
Jul 23, 2019
Growing up my dad would always make me and my sisters watch John Wayne movies mainly because he didnt have any sons yet lol so we all grew up loving his movies even after my brother came along even to this day Saturday and Sundays are John Wayne Days
navyhawkins 214696 8
Jul 18, 2019
This looks beautiful. My dad would love this. But I also think other stars of the 1950's and 1960's Audrey Hepburn would make a good one. Also, Lucille Ball, I think in one of her iconic skits would be great. This is a great keepsake gift for sure.
Report Inappropriate Comment
Are you sure you would like to report this comment? It will be flagged for our moderators to take action.
Thank you for taking the time to improve the content on our site.