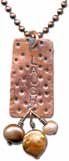
How to Make Stamped Metal Charms
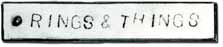
Stamped metal charms are a great addition to jewelry craft projects and other homemade charms. They are also a fun embellishment for journals and other papercrafts. Follow this tutorial from Rings & Things to create your own.
Materials:
- Nylon/steel block
- metal snips
- chasing hammer
- utility hammer
- rubber mallet or nylon hammer
- 2-hole metal punch,
- letter stamps
- brass brush
- 0000 steel wool
- metal file
- masking tape
- ink pad
- ruler
- oxidizing agent or patina solution
Note: This technique works well for sterling silver, solid copper, and solid brass sheet or “dog tags.” Each metal will have its own unique characteristics, and if possible it is best to practice on a scrap of metal prior to making your actual project.
Instructions:
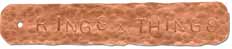
- Use your letter stamps with an ink pad and a piece of paper to pre-layout your script. Plan your letter layout and spacing for your metal tag.
- Using metal snips, indelible marker and a ruler, cut a piece of 24-gauge sheet metal to the desired size and shape.

- File the corners and any rough edges and punch hole(s) into tag and flatten.

- Label one side of your steel block as “rubber” and one side as “steel.” The rubber side is used for flattening with a leather or rubber mallet. The steel side is used for hammering or stamping.
- On the “steel” side of your steel block, tape your metal tag in place with masking tape. This will hold your tag securely while you stamp, and can act as a guide for letter placement.
- If your letter stamps do not have a directional mark, place a dot with Wite-out® to indicate the top side of each letter. This will aid in keeping all of your letters directionally correct. Use your stamped paper guide to plan the position of the first letter on your tag.
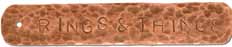
- Line up the first stamp. In a standing position, hold the stamp perpendicular to the metal tag. With a utility hammer, strike the stamp firmly just once, straight down with one hard hammer blow. Repeat for each letter until your word or phrase is complete.

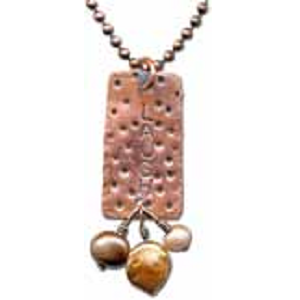
- If desired, add texture to your piece, such as hammering. Remember the antique patina will enhance any indentations on the metal.
- After you have stamped and textured your tag, finish the edges by using the peening edge of a chasing hammer to lightly dapple all around the edges of the tag. File any rough points.
- Dip tag and findings (split/jump rings, head/eye pins, etc.) into the oxidizing agent or patina solution. Once desired patina has been achieved, rinse in cool water and dry. Use 0000 steel wool and brass brush to clean your piece.
- Assemble into finished jewelry piece.
Tip: Have fun, and don't expect perfection; little oddities will give your tag charm and uniqueness. For additional decoration try adding design stamps, or metal forms you create yourself using 14 gauge stainless steel wire (available at hardware stores).
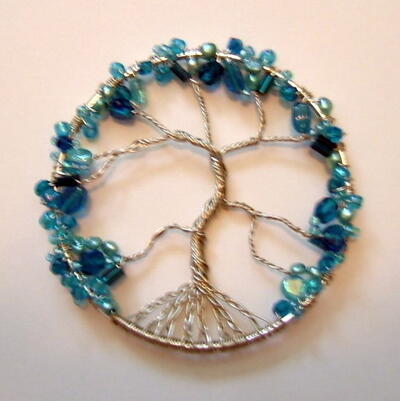
Read NextTree of Life Ornament or Pendant
Your Recently Viewed Projects
Thanks for your comment. Don't forget to share!
flowergirl
Feb 15, 2018
I've always wanted jewelry with my name on it and recently I found an online store that sells them but they charge extra for stamping your name on the necklace. With this tutorial in hand I don't think I'll be paying extra for my favorite pieces anymore. Thank you
Mixed Kreations
Oct 21, 2011
Thank you for the great tutorial. I recently bought a pack of letter stamps but haven't had time to try them out yet. Great tips for keeping letters straight. And labeling your steel bock is a great ideal, I never thought of that, and mines getting a little beat up. Thanks
Report Inappropriate Comment
Are you sure you would like to report this comment? It will be flagged for our moderators to take action.
Thank you for taking the time to improve the content on our site.