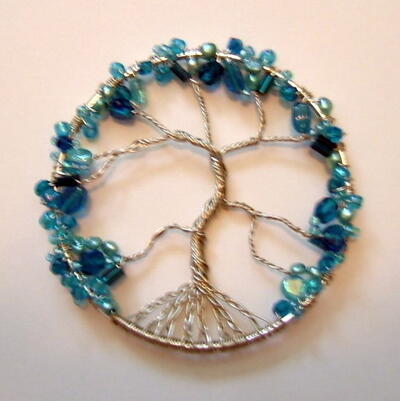
Tree of Life Ornament or Pendant
Make a fabulous tree of life ornament to hang in your house, hang on your tree or turn into a pendant for jewelry purposes. Use some fun colored seed beads and make a fun new piece.

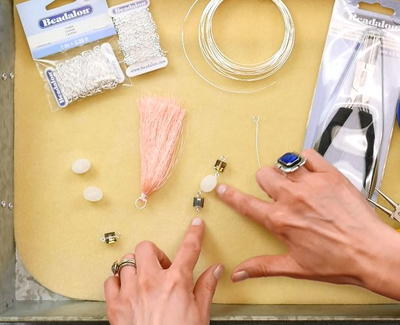
Materials:
- 6mm beads and smaller, including seed beads (see next image)
- A 4-inch metal ring
- Two (2) pairs of needle nose pliers
- A pair of wire cutting pliers
- Twelve (12) 12-inch strands of 24-gauge wire
The variety of beads used for this particular ornament, including the following: 4mm pearls, 4mm glass rectangle beads, 2 sizes of seed beads, 4mm crystals, 6mm & 4mm faceted glass rounds, and 6mm shaped glass beads.
Instructions:
- Take one strand of the wire and thread it through the wire ring, making sure the 2 sides are even. Wrap each side around the ring twice for a total of four coils. Make sure they are pulled tight around the ring.

- Repeat step 2 with the remaining 11 wires. Pull all wires to one side of the ring and verify the coils are nice and tight and close together.

- Start on one side of the wires and begin braiding the first 3 strands. You'll want to create a braid that is approximately 1-inch. Once braided, flip up and move on to the next 3 strands. Continue this process until all wires have been braided. You should end up with 8 braids.

- Gather the braids as shown in this photo and begin to twist them together.

- Twist up a little ways until you're ready to separate your first branch. Take 2-4 strands, depending on how thick you want this branch to be, and separate it from the group of wires.

- Repeat Step 6 until you have the beginnings of a tree with many branches and all of your wires have been used. Personally, I like to split my tree in two at some point and then separate the branches again.

- Now twist these branches, just like you did the big group of wires, but don't twist them to the ring...yet. You'll want to also start breaking your larger branches into smaller ones. See the picture for ideas on how to break down branches. This is when you'll need to twist the branches to within about 1/4"-1/2" from the ring.

- Separate the individual wires and make sure they are some-what distributed evenly around the ring. NOTE: If you've twisted the wires too far, do not un-twist them! They will probably break later on! Instead put bends in the branches; this use more wire and pull them towards the center of the ring. (see the final image to see how I did this.)

- Add a bead or beads to the first wire next to the roots. Wrap the wire around the ring once.

- Add another bead to this wire. Wrap again and add another bead. This is to cover the ring from view and make it appear to just be beads. Finish this branch by wrapping it around the ring 3 times, clip off the excess, and pinch tight with pliers.

- Repeat Step 11 for the remaining wires on this branch. Push the finished section tight against the roots. This will make room for the rest of your branches.

- Repeat steps 11 and 12 on the other side of the roots. Continue repeating these two steps, changing sides after each branch.

- Continue this process for the rest of your branches and remember to push them tight against the roots. The last couple branches will be the most difficult because you'll be running out of room on your ring, but this is good because you'll have a nice full tree.

OPTIONS:
Pendant Size Tree: If you need to make a smaller Tree of Life for a pendant or even a tiny one for earrings, you'll simply want to use a smaller ring and also decrease the number of wires used. Just remember, you'll always want to have a multiple of three (3, 6, 9...) because you'll be braiding the roots of the tree.
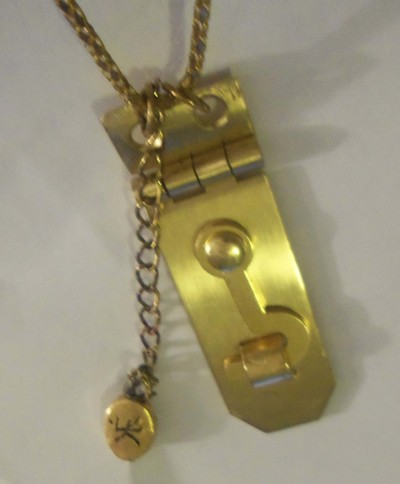
Adding charms: If you'd like to add charms to your tree, just add them while your twisting the branches or before you add beads to the branch, depending on where you want the charm to hang.
Fuller Trees: If you prefer the fuller looking trees, don't twist the branches as close to the edge as I did here. You're beads will then thread closer to the center of the tree and it will appear fuller. The style in this tutorial is just a personal preference of appearance.
Read NextTree of Life Ornament or Pendant
Your Recently Viewed Projects
Thanks for your comment. Don't forget to share!
flowergirl
Feb 15, 2018
Last year I was obsessed with the boho vibe that I made every craft I could. This tree of life ornament was simple to make. I used green Crystal and see beads and an embroidery hoop to make a tree of life Dreamcatcher but you can make a smaller one and just use it as a pendant for your necklaces or hang it in your car.
Report Inappropriate Comment
Are you sure you would like to report this comment? It will be flagged for our moderators to take action.
Thank you for taking the time to improve the content on our site.