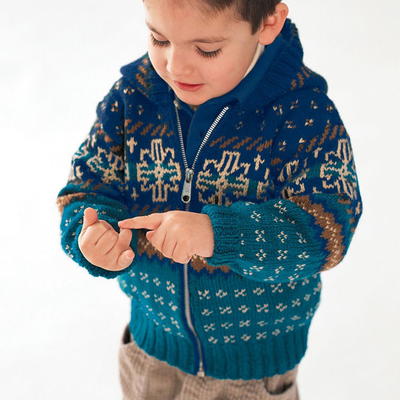
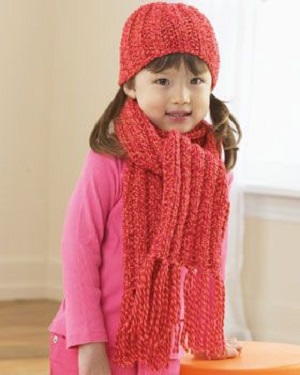
Fun Folks Sweater and Hat
Show some love for the little people in your life with this cute cardigan and matching hat from Patons! The patterns are adorable and make for a fun knitting project.

MATERIALS:
Jacket and Hat
Sizes: 2 (4-6)
- Patons® Astra (50 g)
- Main Color (MC) (Blue) 7 (8-9) balls
- Contrast A (Pink) 1 (1-1) ball
- Contrast B (Yellow) 1 (1-1) ball
- Contrast C (White) 1 (1-1) ball
- Knitting Needles: Sizes 3¼ mm (U.S. 3) and 4 mm (U.S. 6) or size needed to obtain tension.
- 5 buttons.
Pattern [pdf]
SIZES
Chest measurement
- 2: 21 ins [53.5 cm]
- 4: 23 ins [58.5 cm]
- 6: 25½ ins [65 cm]
- Finished chest
- 2: 28 ins [71 cm]
- 4: 30 ins [76 cm]
- 6: 31½ ins [80 cm]
TENSION
22 sts and 30 rows = 4 ins [10 cm] with larger needles in stocking st.
INSTRUCTIONS
The instructions are written for smallest size. If changes are necessary for larger sizes, the instructions will be written thus ( ).
Note: When working from charts, wind small balls of the colors to be used, one for each separate area of color in the design. Start new colors at appropriate points. To change colors, twist the two colors around each other where they meet, on WS, to avoid a hole. Small areas of color in charts may be worked using duplicate stitch if desired.
JACKET
BACK
With MC and smaller needles, cast on 77 (83- 87) sts.
1st row: (RS). K1. *P1. K1. Rep from * to end of row.
2nd row: P1. *K1. P1. Rep from * to end of row.
Rep these 2 rows (K1. P1) ribbing for 1½ (1½- 2) ins [4 (4-5) cm] ending on a 2nd row.
Change to larger needles and work Chart I in stocking st until row 64 (68-68) of chart is complete, reading knit rows from right to left and purl rows from left to right.
Shape armholes: Keeping cont of Chart I, cast off 5 (5-6) sts beg next 2 rows. 67 (73-75) sts.
Cont working Chart I until row 108 (116-120) of chart is complete.
Shape shoulders: Cast off 22 (25-25) sts beg next 2 rows. Cast off rem 23 (23-25) sts.
LEFT FRONT
**With MC and smaller needles, cast on 37 (41-43) sts.
Work 1½ (1½-2) ins [4 (4-5) cm] in (K1. P1) ribbing as given for Back, ending on a 2nd row and inc 1 (0-0) st in center of last row. 38 (41- 43) sts.**
Change to larger needles and work Chart I in stocking st until row 64 (68-68) of chart is complete, reading knit rows from right to left and purl rows from left to right.
Shape armhole: Keeping cont of Chart I, cast off 5 (5-6) sts beg next row. 33 (36-37) sts.
Cont working Chart I until row 70 of chart is complete.
Shape Front: Next row: (RS). Work Chart I to last 3 sts. Sl1. K1. psso. K1.
Work 1 row even.
Keeping cont of Chart I, rep last 2 rows 5 times more, then dec 1 st at front edge on following 4th rows until there are 22 (25-25) sts.
Cont working Chart I until row 108 (116-120) of chart is complete. Cast off.
RIGHT FRONT
Work from ** to ** as given for Left Front.
Change to larger needles and work Chart I in stocking st until row 65 (69-69) of chart is complete, reading knit rows from right to left and purl rows from left to right.
Shape armhole: Keeping cont of Chart I, cast off 5 (5-6) sts beg next row. 33 (36-37) sts.
Size 2 only: Cont working Chart I until row 70 of chart is complete.
All Sizes: Shape Front: Next row: (RS). K1. K2tog. Work Chart to end of row.
Work 1 row even.
Keeping cont of Chart I, rep last 2 rows 5 times more, then dec 1 st at front edge on following 4th rows until there are 22 (25-25) sts.
Cont working Chart I until row 109 (117-121) of chart is complete. Cast off.
SLEEVES
With MC and smaller needles, cast on 43 (45- 47) sts.
Work 1½ (1½-2) ins [4 (4-5) cm] in (K1. P1) ribbing as given for Back, ending on a 2nd row and inc 8 sts evenly across last row. 51 (53-55) sts.
Change to larger needles and work Chart II in stocking st to end of chart reading knit rows from right to left and purl rows from left to right, noting side incs on 5th and following 6th rows until there are 67 (73-77) sts.
Place markers on side edges of Sleeves ¾ (¾-1) inch [2 (2-2.5) cm] down from cast off edge.
Front Edging and Collar
Sew shoulder seams.
With MC and smaller needles, cast on 11 sts.
1st row: (RS). K2. (P1. K1) 4 times. K1.
2nd row: K1. (P1. K1) 5 times.
Rep last 2 rows until edging (when slightly stretched) fits up Left Front edge to beg of front shaping, sewing in position as you work and ending with RS facing for next row.
Mark positions for 5 buttons evenly spaced with bottom button ½ inch [1 cm] above cast on edge, top button ½ inch [1 cm] below beg of front shaping and rem 3 buttons spaced evenly between.
Shape Collar: Keeping cont of ribbing, inc 1 st at seam edge (beg) of next and every following row until there are 17 sts, then on following alt rows until there are 29 (29-31) sts, taking inc sts into ribbing. Cont sewing in position as you work and place a marker on Left Front edge at this point. Place a corresponding marker on Right Front edge.
Cont even in ribbing until Collar (when slightly stretched) measures length to fit up rem of Left Front edge, across back neck edge and down Right Front edge to marker, ending with RS facing for next row and sewing in position as you work.
Keeping cont of ribbing, dec 1 st at seam edge (beg) of next and every following alt row until there are 17 sts, then on every row until there are 11 sts.
Cont even in ribbing down Right Front edge to lower edge, working buttonholes to correspond to button markers as follows:
1st row: (RS). Rib across 5 sts. Cast off 2 sts. Rib to end of row.
2nd row: Rib, casting on 2 sts over cast off sts.
Cast off in ribbing.
FINISHING
Sew in sleeves, placing rows above markers along cast off edges of Fronts and Back to form square armholes. Sew side and sleeve seams. Sew buttons to correspond to buttonholes.
HAT
First Ear Flap:With MC and smaller needles, cast on 5 sts.
1st row: (RS). (K1. P1) twice. K1.
2nd row: Inc 1 st in first st. P1. K1. Inc 1 st in next st. P1. 7 sts.
3rd row: Inc 1 st in first st. (K1. P1) twice. Inc 1 st in next st. K1. 9 sts.
4th row: *K1. P1. Rep from * to last st. K1.
Seed st pat is now in position.
Cont in seed st pat, inc 1 st each end of needle (as before) on next and following alt rows until there are 23 (23-25) sts, taking inc sts into seed st pat.
Cont even in seed st pat until Ear Flap measures 3¼ ins [8.5 cm] ending with RS facing for next row. Break yarn. Leave these sts on a spare needle.
Second Ear Flap: Work as given for First Ear Flap but do not break yarn.
Proceed as follows for remainder of Hat:
With smaller needles, cast on 11 sts. [(K1. P1) 5 times. K1] across these 11 sts. [(P1. K1) 11 (11-12) times. P1] across 23 (23-25) sts from Second Ear Flap. Turn and cast on 30 sts. Turn and [(K1. P1) 11 (11-12) times. K1] across 23 (23-25) sts from First Ear Flap. Turn and cast on 11 sts. 98 (98-102) sts.
Next row: *P1. K1. Rep from * to end of row.
Work a further 6 rows in seed st pat.
Work 4 rows stocking st, inc 1 st in center of last row. 99 (99-103) sts.
Change to larger needles and work Chart III in stocking st to end of chart, noting 24 st rep will be worked 4 times, reading knit rows from right to left and purl rows from left to right.
With MC, beg with a purl row, work 5 rows stocking st, dec 1 st in center of last row. 98 (98-102) sts.
Shape top: 1st row: (RS). K1. Sl1. K1. psso. *K20 (20-21). K2tog. Sl1. K1. psso. Rep from * twice more. K20 (20-21). K2tog. K1. 90 (90-94) sts.
2nd and alt rows: Purl.
3rd row: K1. Sl1. K1. psso. *K18 (18-19). K2tog. Sl1. K1. psso. Rep from * twice more. K18 (18-19). K2tog. K1. 82 (82-86) sts.
5th row: K1. Sl1. K1. psso. *K16 (16-17). K2tog. Sl1. K1. psso. Rep from * twice more. K16 (16-17). K2tog. K1. 74 (74-78) sts.
6th row: Purl.
Continue in this manner, dec 8 sts evenly around next and following alt rows, as before, until the row ‘K1. Sl1. K1. psso. *K2 (2-1). K2tog. Sl1. K1. psso. Rep from * twice more. K2 (2-1). K2tog. K1’ has been worked. 18 (18-14) sts.
- Sizes 2 and 4 only: Next row: *P2tog. Rep from * to end of row. 9 sts.
- Size 6 only: Next row: *P2tog. P2. Rep from * twice more. P2. 11 sts.
- All Sizes: Work 6 rows stocking st. Break yarn leaving a long end. Draw end through rem sts tightly and fasten securely. Sew center back seam.
Read NextEasy Kids Knit Poncho
Your Recently Viewed Projects

Thanks for your comment. Don't forget to share!
Report Inappropriate Comment
Are you sure you would like to report this comment? It will be flagged for our moderators to take action.
Thank you for taking the time to improve the content on our site.