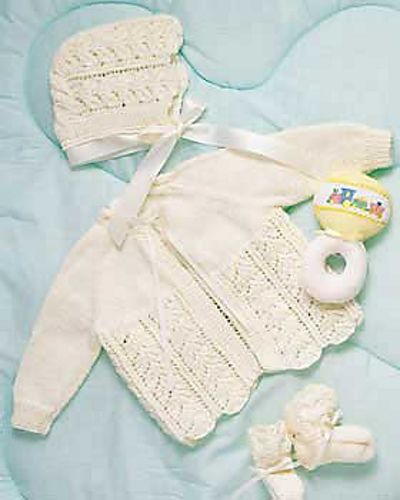
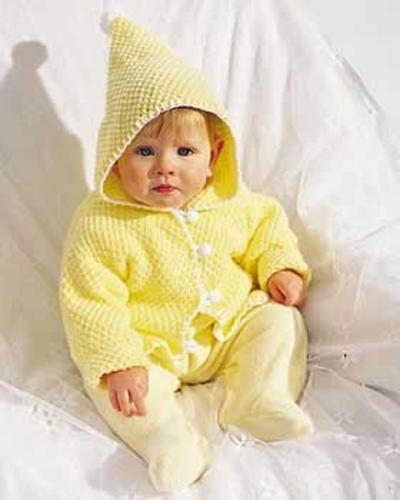
Garter Stitch Matinee Knit Baby Jacket

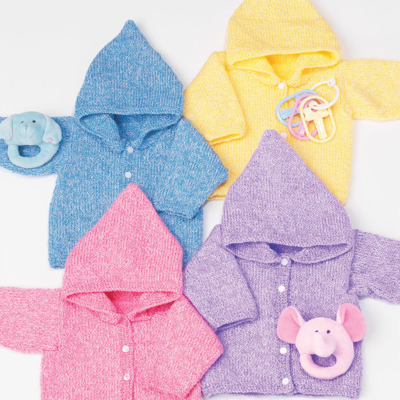
Learn how to make an adorable Garter Stitch Matinee Knit Baby Jacket. This is a relatively easy pattern for beginners to knitting garments. If you've never made a knit baby jacket before, this is a fantastic pattern to start with. Worked up almost entirely in garter stitch, this cozy pattern is simple and lovely for baby. The ribbon closure is a wonderful finishing touch. This pattern comes in sizes 3-6 months, 6-9 months, and 9-12 months. This project is perfect for baby to wear on a nice occasion.
NotesThe quantities of yarn are based on average requirements and are therefore approximate. It is essential to work to the stated tension and you should always knit a tension square before starting. If you have too many stitches to 10cm/4in your tension is tight and you should change to a larger needle. If there are too few stitches, your tension is loose and you should change to a smaller needle. We cannot accept responsibility for the finished product if any yarn other than the one specified is used. Instructions given are for the first size, with larger sizes in round brackets. Where only one figure or instruction is given this applies to all sizes. Work all directions inside square brackets the number of times stated. See ball band for washing and pressing instructions.
Knitting Needle Size3 or 3.25 mm
Yarn Weight(3) Light/DK (21-24 stitches to 4 inches)
Gauge25 sts and 50 rows to 10cm/4in square over garter st using 31 ⁄4 mm (US 3) needles
Finished SizeSee chart
Materials List
- 3(4:5) 50g balls of Debbie Bliss baby cashmerino in Pale Blue 202
- Pair 3 1/4 mm (US 3) knitting needles
- 1m/1yd narrow ribbon
Instructions
Standard Abbreviations
alt = alternate
beg = beginning
cont = continue
dec = decrease
foll = following
inc = increase
k = knit
kfb = knit into front and back of st
m1 = make one st by picking up the loop lying
between st just worked and next st and working
into back of it
p = purl
pfb = purl into front and back of st
patt = pattern
psso = pass slipped st over
rem = remaining
rep = repeat
skpo = slip 1, knit 1, pass slipped stitch over
sl = slip
st(s) = stitch(es)
st st = stocking stitch
tbl = through back loop
tog = together
yf = yarn forward
yon = yarn over needle
yrn = yarn round needle
USA Glossary
cast off = bind off
moss stitch = seed stitch
tension = gauge
stocking stitch = stockinette stitch
yarn forward, yarn over needle, or yarn round needle = yarn over
Measurements

BACK
-
With 3 1/4 mm (US 3) needles cast on 72(82:92) sts.
-
Work in garter st until back measures 14(15:16)cm/ 51 ⁄2(6:61 ⁄4)in from cast on edge, ending with a wrong side row.
-
Dec row K2 * skpo, yf, k2tog, k1; rep from * to end. 58(66:74) sts.
-
Cont in garter st until back measures 16(17:18)cm/ 6 1/4 (6 3/4:7) in from cast on edge, ending with a wrong side row.
-
Shape sleeves Cast on 38(45:52) sts at beg of next 2 rows. 134(156:178) sts.
-
Work straight until back measures 26(28:30)cm/ 101 ⁄4 (11:113 ⁄4)in from cast on edge, ending with a wrong side row.
-
Next row K47(57:67), cast of next 40(42:44) sts, k to end.
-
Leave these 2 sets of sts on holders.
LEFT FRONT
-
** With 31 ⁄4 mm (US 3) needles cast on 36(41:46) sts. Work in garter st until front measures 14(15:16)cm/51 ⁄2 (6:61 ⁄4)in from cast on edge, ending with a wrong side row.
-
Dec row K1 * skpo, yf, k2tog, k1; rep from * to end. 29(33:37) sts. **
-
Cont in garter st until front measures 16(17:18)cm/61 ⁄4 (63 ⁄4:7)in from cast on edge, ending with a wrong side row.
-
Shape sleeve Cast on 38(45:52) sts at beg of next row. 67(78:89) sts.
-
Work straight until front measures 26(28:30)cm/101 ⁄4 (11:113 ⁄4)in from cast on edge, ending with a wrong side row.
-
Next row K47(57:67), cast off next 20(21:22) sts. Leave these sts on a holder.
RIGHT FRONT
-
Work as Left Front from ** to **.
-
Work in garter st until front measures 16(17:18)cm/ 61 ⁄4 (63 ⁄4:7)in from cast on edge, ending with a right side row.
-
Shape sleeve Cast on 38(45:52) sts at beg of next row. 67(78:89) sts.
-
Work straight until front measures 26(28:30)cm/ 101 ⁄4 (11:113 ⁄4)in from cast on edge, ending with a wrong side row.
-
Next row Cast off 20(21:22) sts, k to end. Leave these sts on a holder.

TO MAKE UP
-
Left shoulder Place sts on two needles with points facing the cuff edge, then with wrong sides facing, knitting one st from each needle together, cast off 14(18:22) sts, now, with one st on right hand needle, turn knitting so that right sides are now facing and cast off rem sts. This reverses the seam for the cuff
-
Right shoulder Work to match left shoulder, reversing seam for turn back.
-
Join underarm seams, reversing seam on last 6(7:8)cm/21 ⁄4 (23 ⁄4:31 ⁄4)in for cuff.
-
Thread ribbon through eyelets to tie at centre front.

What is your favorite variety of yarn to use?
Your Recently Viewed Projects

Thanks for your comment. Don't forget to share!
sharonbjordan5 644 2615
Jul 20, 2019
This would make a lovely gift for Angels Above Baby Gowns who make burial packages for families. I am still new to knitting but I think I could make this. Thank you for the pattern
Report Inappropriate Comment
Are you sure you would like to report this comment? It will be flagged for our moderators to take action.
Thank you for taking the time to improve the content on our site.