This project was submitted by one of our readers, just like you.
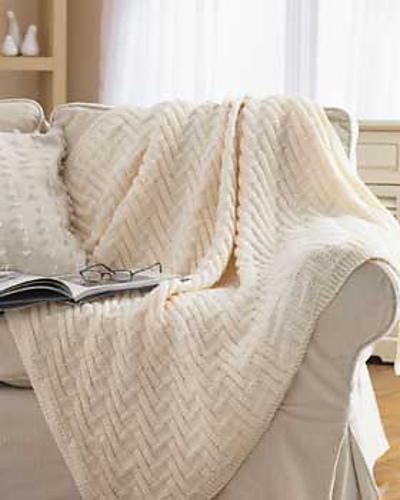
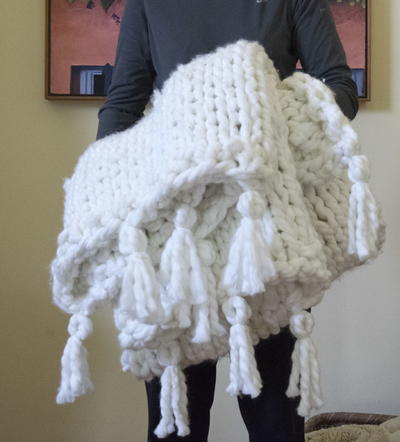
Diagonal Basket Weave Knit Blanket
This diagonal basketweave knitting pattern is snuggly and practical!

Diagonal Basket Weave Knit Blanket
From the Designer: "I have had this blanket on my 'want to make' list ever since I discovered the Diagonal Basket Weave stitch last year. I used it to make some washcloths and fell in love with the woven pattern it creates and the simplicity of the stitch. It really is not much harder than a stockinette stitch, but the end product looks so unique and looks much more difficult than it actually is. So, when I found myself needing to stay off my feet recently, I took advantage of that time to make this blanket. All told I probably spent the evenings over 2 1/2 to 3 weeks to make this blanket, which is just perfect on the foot of my bed."
NotesI made a quick video showing the knit and purl side of the stitch, as well as the beginning and end of a row. Pop over to the blog to see the video.

Knitting Needle Size19 or 15 mm
Yarn Weight(6) Super Bulky/Super Chunky (4-11 stitches for 4 inches)
Finished Size59″ by 69″
Materials List
- 22 skeins Plymouth Yarn Encore Mega, in #208
- US 19 (15mm) Circular Needles
- US 15 or 17 Needles for Casting off
Instructions
-
Cast on 151 stitches (or a multiple of 2 stitches plus 1)
-
1st and 2nd Row: K1P1 and repeat for remainder of 1st row, ending with a K1
-
For the next row and every subsequent knit row; K1,P1,K1 then skip next stitch (but leave the stitch on left-hand needle) and K tbl the subsequent stitch, leaving that stitch on the left-hand needle. Then bring your right hand needle up front, knit the stitch that you initially skipped and let both stitches slip off of your needle. Repeat this pattern until the last two stitches and P1K1.
-
Then, for the 2nd row and every subsequent purl row; K1,P1,K1. Skip next stitch (but leave on the left-hand needle) and purl the subsequent stitch, leaving that stitch on the left-hand needle. Then purl the stitch you initially skipped and let both stitches slip off of your needle . Repeat this pattern until the last two stitches remain and P1K1.
-
Work until desired length (I worked mine until it 59″).
-
Work a seed stitch (K1P1) on the next 2 rows.
-
Switch to your smaller needles to cast off. This will help reduce any flare on the cast off edge.
-
That’s all there is to it!
What knitting technique are you looking to learn?

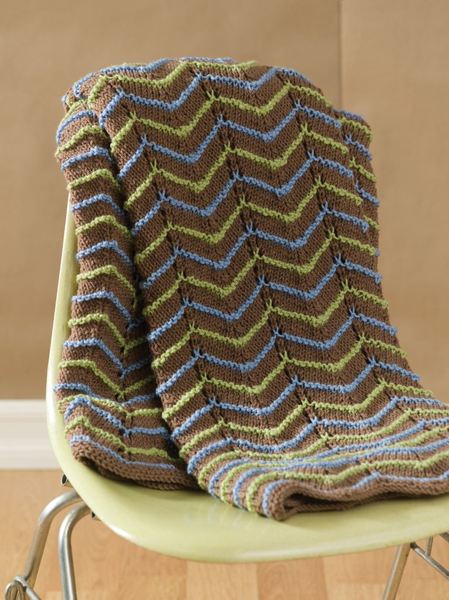
Read NextEarth Tone Knit Afghan
Your Recently Viewed Projects

Thanks for your comment. Don't forget to share!
Gracie
May 30, 2017
Imagine how cozy this blanket would be at the foot of the bed! It looks so cozy. The pattern sounds pretty easy too. The finished size looks big enough for a twin bed, but it would be easy to make the blanket a bit bigger or smaller. I'm putting this on my to-do list in a washable yarn.
Report Inappropriate Comment
Are you sure you would like to report this comment? It will be flagged for our moderators to take action.
Thank you for taking the time to improve the content on our site.