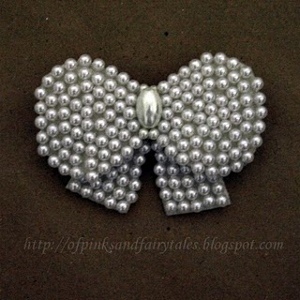
Pretty Pearl Bow
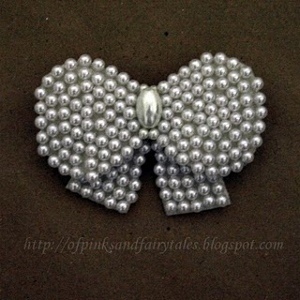
Learn how to make jewelry and trendy accessories like this pretty pearl bow, which can be pinned to a shirt, bag, hat, or anywhere you can think of! Go out in style with these free jewelry patterns.
Materials:
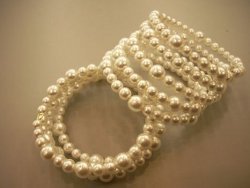
- Small pearl beads (I used what I had on hand... I have a lot of pearl beads left over from when I had my bead jewelry business a few years ago)
- Felt (use a color to match the color of the pearl beads you are using)
- Needle and thread (color to match the color of the felt you are using).
- 1 oval shaped bead (same color as your small pearl beads or a coordinating color).
- Brooch pin.
- A template for the bow, see below for the template I used.
Instructions:
- Draw the shape of the bow you want your pin to look like. I free-handed mine, but I did a rough rendering and you can just download my template below.
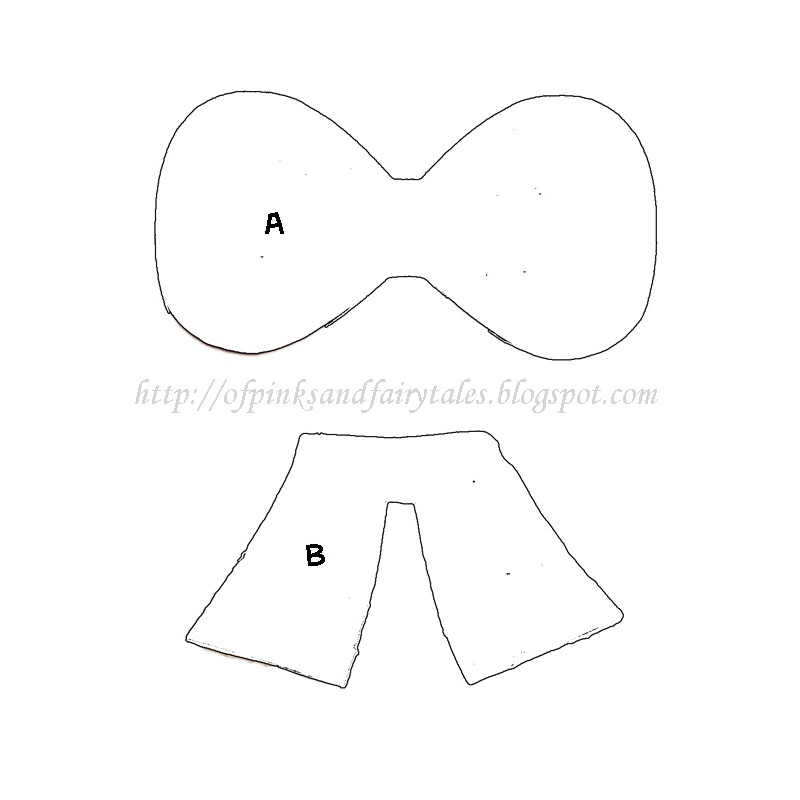
- Cut your drawing/printout and use as pattern to cut the felt. You will need 2 pieces of Part A and 1 piece of Part B.
- Sew the small pearl beads into a piece of Part A. I started from center, then moving to the edges of one side of the bow. The illustration below shows how I filled out one side of the bow. As you get to the center, make sure the beads look evenly spaced and there is no big empty spot. Repeat for the other side of the bow.
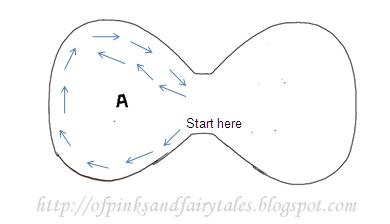
- Sew the center bead or whatever you plan to use for the center of the ribbon.
- Sew beads on to Part B.Sew below the dotted line (see illustration below).
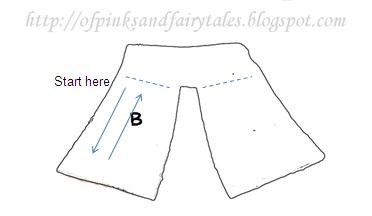
- Use glue to attach the part ABOVE the dotted line of Part B to the back of Part A.
- Glue the 2nd piece of Part A to the back of the combined pieces of Parts A and B.
- Glue the pin to the back. Cut a small piece of felt and glue it across the pin to secure it.
Read NextGarage Sale Necklace Makeover
Your Recently Viewed Projects
Report Inappropriate Comment
Are you sure you would like to report this comment? It will be flagged for our moderators to take action.
Thank you for taking the time to improve the content on our site.

