This project was submitted by one of our readers, just like you.
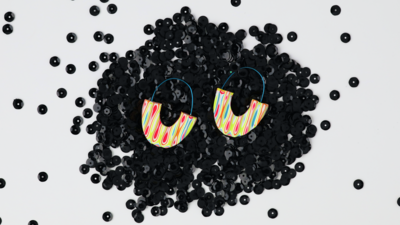
Easy And Exciting Sculpey Premo Earrings

Easy And Exciting Sculpey Premo Earrings
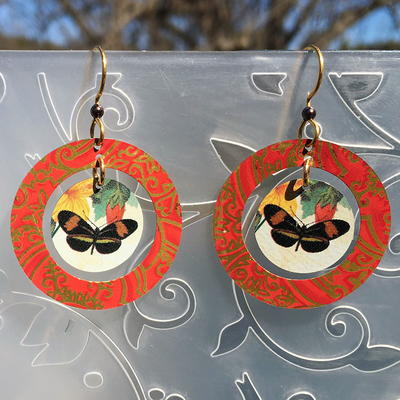
"These fun and eye-catching earrings are a perfect project to liven up your day! The bright colors and design on these awesome earrings will provide your daily dopamine hit, and brighten the day of anyone else that sees you wearing them, too! Plus, you'll learn an easy technique to add texture and color all at once, without a ton of steps or having the manage a ton of difficult details. Give these fun pieces of jewelry a try today!"

Materials List
- Sculpey Premo™ White 2 oz
- Sculpey Premo™ Orange 2 oz
- Sculpey Premo™ Turquoise 2 oz
- Sculpey Premo - Flourescent Yellow
- Sculpey Premo™ Flourescent Pink 2 oz
- Sculpey Tools™ Graduated Cutters: Oval, 6 pc
- Sculpey Tools™ Clay Blades
- Sculpey Tools™ Clay Conditioning Machine
- Beadalon ColourCraft Wire Sapphire Silver Plated 22 gauge
- Wire cutters
- Flat nose pliers
Getting Started:
Please make sure your work area is covered and you are not working on an unprotected surface. We recommend working on the Sculpey® Oven-Safe Work Mat, wax paper, metal baking sheet, or disposable foil. Uncured clay may damage unprotected furniture or finished surfaces. Be sure to cover your crafting area appropriately.
Start with clean hands, unwrap and knead clay until soft and smooth, or condition by running clay though a Pasta Machine. We recommend using a designated machine for clay purposes only. When working with multiple colors, clean hands with soap and water or baby wipes (we have found that baby wipes work best) before switching colors. Shape clay, pressing pieces firmly together. Wash hands after use.
Baking:
Begin by preheating oven to 275 °F (130 °C). After you are done creating; for best results bake clay on an oven-proof surface such metal, aluminum foil, an index card or the Sculpey® Clay Mat at 275°F (130 °C) for 30 minutes per 1/4" (6 mm) thickness according to package directions. Oven safe glass or ceramic surfaces are also acceptable for baking; however please note that the baking times may take longer as the glass or ceramic surfaces take longer to heat up. For best baking results, use an oven thermometer. DO NOT USE MICROWAVE OVEN. DO NOT EXCEED THE ABOVE TEMPERATURE OR RECOMMENDED BAKING TIME.
Instructions
-
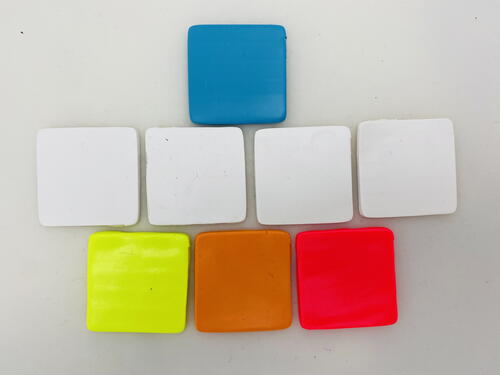
Make equal sized pieces of Turquoise, Flo Yellow, Flo Pink, and Orange. My squares are about 1.5” X 1.5” and 1/8” thick or the thickest setting on the pasta machine. Make four White squares equal in size to the colors above but half as thick - 1/16” thick or #4 on a pasta machine.
-
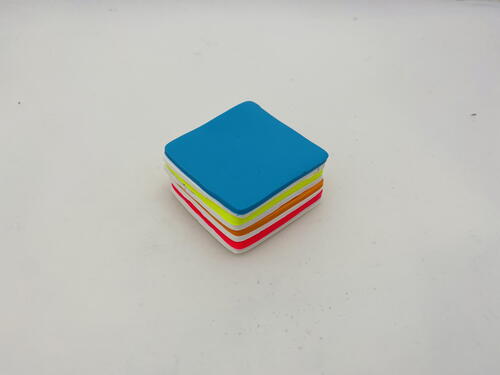
Layer the colors as shown. The reason for all the extra White pieces between layers is to keep the integrity of the fluorescent colors. The fluorescent colors are super bright but when they are thinned (like in this tutorial), they become more translucent and their brightness can be muddied. The White will help maintain their color quality.
-
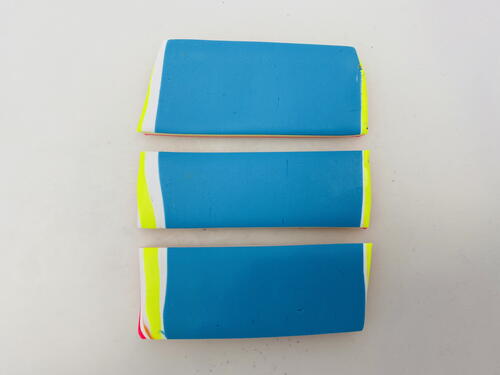
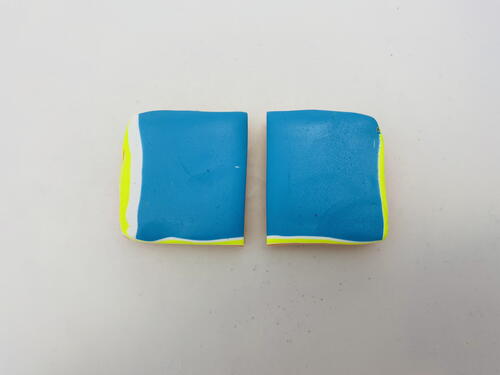
Flatten the stack of colors with the Roller until it is about 1/4” thick. Cut it into three even sections.
-
Stack the sections up again.
-
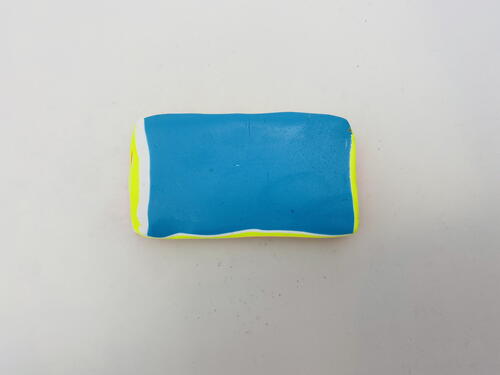
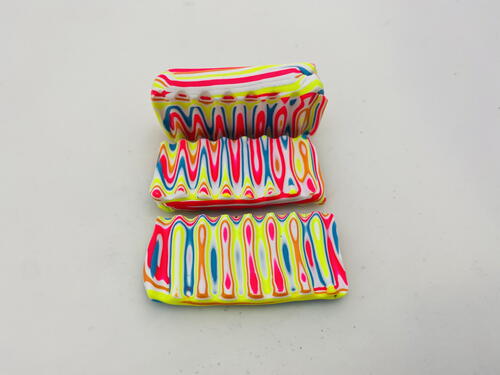
Roll over the stack to press out air bubbles and to thin to 1/4” thick. Cut the stack in half.
-
Pile the two halves together again. Press them together with hand pressure to make a solid loaf. Stand the loaf up on the work surface so that the stripes are perpendicular to the work surface. Cut parallel to the stripes using the Wavey Blade from top to bottom. Try to keep your slices of basically even thickness. This can be a little tricky since we are cutting with a blade that is not straight!
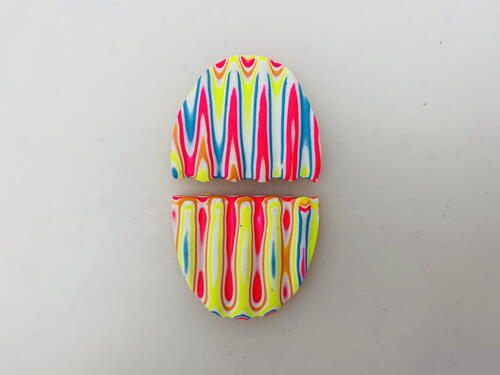
Open up the slices to see the cool wave pattern. -
Select a couple slices that are even in thickness. Cut one half of the largest Oval Cutter from each slice.
-
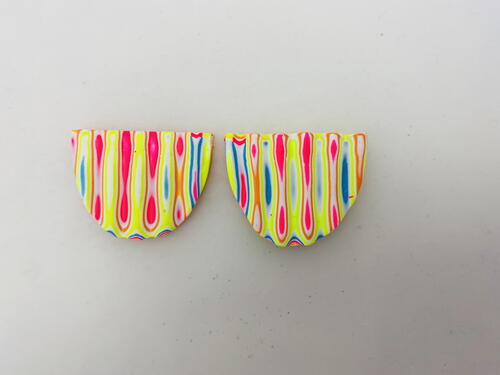
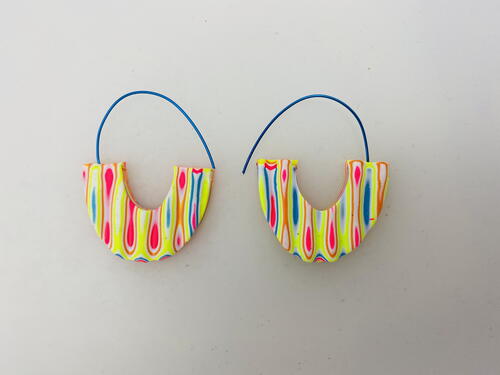
I flipped one of the half ovals over because I thought the patterns made a better pair. At this point, cut out the centers of the ovals with the smallest or next to smallest Oval Cutter. (Please refer to finished photo for a visual.) When removing the center, leave a wide band of the pattern to form the earring shape.
-
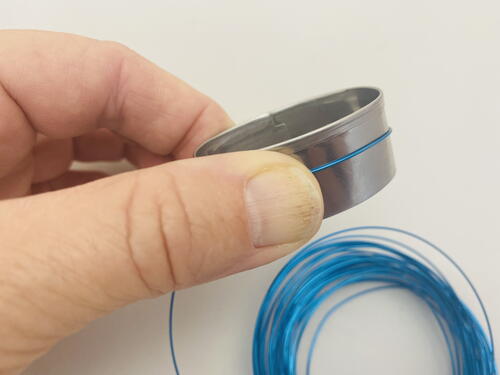
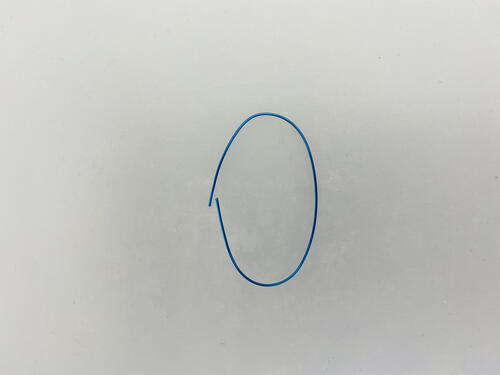
Next, we will make the ear wire which will be embedded into the clay. Using the second largest Oval Cutter as a form, wrap wire tightly around the outside one complete wrap.
-
Trim the excess wire. Carefully remove the oval wire from the cutter.
-
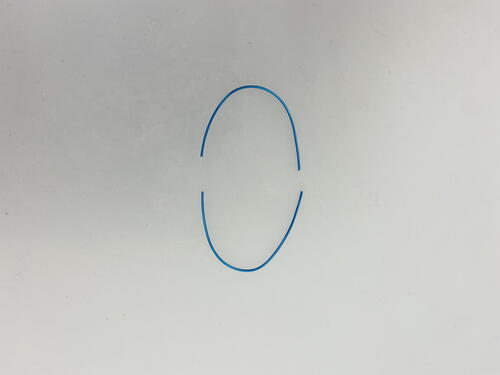
Cut the other side so that you have two half oval wires.
-
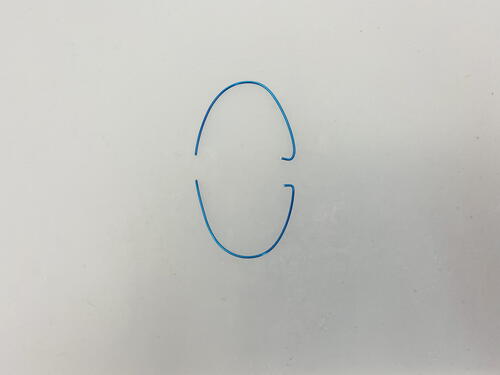
Bend at least a 90-degree tail in one end of each wire. If you like, you can completely pinch this little tail into a fold. The point is to create a barb which cannot easily be pulled out from the baked clay.
-
Carefully push the barbed end of the wire into the clay as shown creating two mirror image earring pieces. Re-shape the areas where the wire was pushed into the clay with your fingertips. Bake the clay pieces following the baking instructions for Sculpey Premo™. Allow them to cool completely and then adjust any kinks in the wire with fingers.


Read NextLeather Dangle Earrings