Cafe de Provence Embroidery Project
This beautiful DIY embroidery tutorial will brighten up your home!

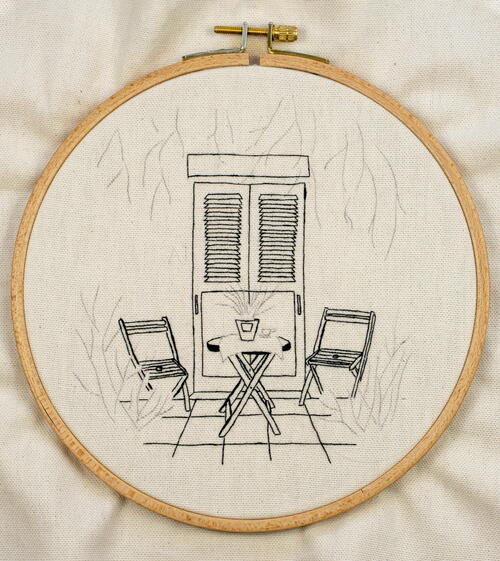
This design embodies relaxation: a morning coffee on the terrace with some newly picked lavender on the table, all while the endless flowers and greenery are enclosing you in the calmness of the French countryside.
It’s a fun design to stitch, with a combination of techniques and colors that keeps you comfortably shifting your mind in the process. With a multicolored thread for the upper flowers, you will also be able to disconnect from the color placement, as the thread will create a natural variation for you!
Main MaterialEmbroidery Thread
Materials List
- Regular printer paper
- Carbon paper (or other preferred transfer method)
- Cotton canvas
- 8-inch (20-cm) diameter wooden hoop
- 1/5 size needle
-
DMC THREAD COLORS
- 890, 90, 51, 3348, 26, 318, 552, 310, 900, 904
BEFORE YOU START
-
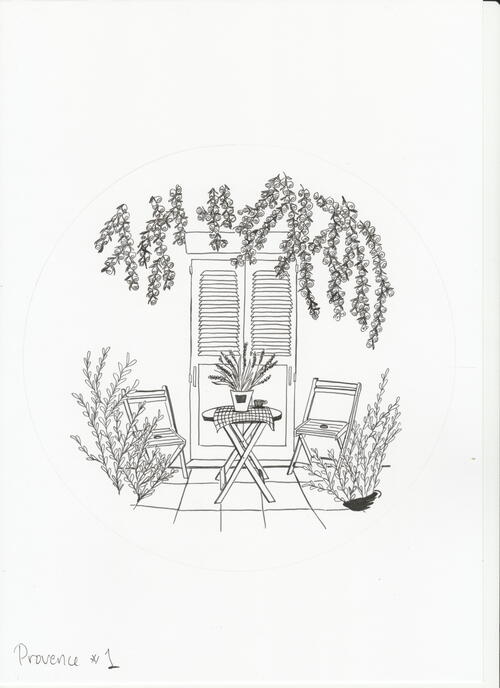
Make a photocopy of the design/pattern sketch on the next page onto regular printer paper. Use the carbon paper to transfer the design from the printer paper onto the fabric.
Click here to download the design/pattern sketch PDF to print. -
The most important thing to know about this design is: Do not transfer the flowers. Rather, transfer only the stem of both of the plants on the ground, as well as the branches of the flowering tree above. The stems and branches will make the natural placement of the flowers and leaves easier, while still remaining a largely freehand element, allowing you to embrace the creative flow of your art.
-
When you finish transferring the parts of the pattern needed, mount the fabric into the hoop.
METHOD
-
Begin with the contour work of the terrace, using a single strand and the backstitch technique. Fill the contours of the veranda door, the chairs, the floor and then the table. You can choose which of the aforementioned elements to stitch first, as they will all be filled out. However, it is always a good idea to begin in the back first. In other words, begin with what is the farthest away from your viewpoint, which would be the wall. The wall with the veranda door is behind the chairs and the table, which in turn are behind some of the greenery.
By stitching the terrace first, you naturally create more space in the design, as it will be easier to add the greenery and flowers on top of the black lines indicated in the background (the door), midground (the chairs and table) and foreground (the greenery). -
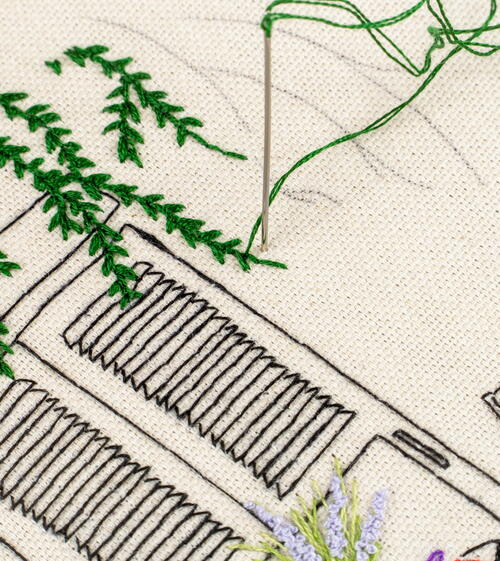
Thereafter, embroider the stems of the hanging flowers. The stems are stitched with two strands and the backstitch technique, following the transfer that you’ve already done.
Once you have the stems, you use that as the baseline from which the leaves grow. Stitch the leaves by embroidering two straight stitches in a “V”-shape out from the stem (with the meeting point being outward). On these upper branches, leave a little bit of space between the leaves to have room for the flowers to come through (see image 2). -
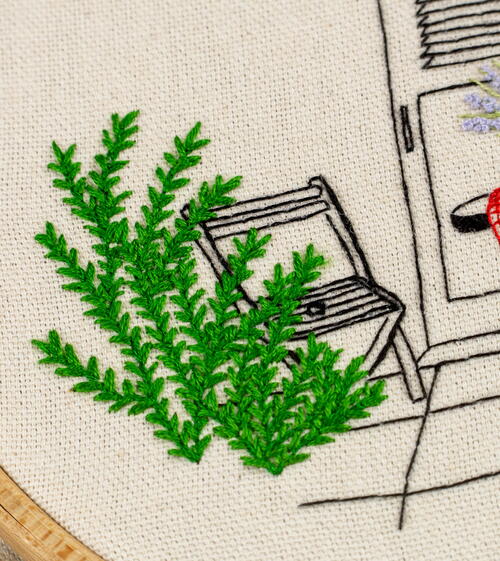
For the greenery on the ground, use the same process as the hanging flowers. The only difference is that you will use the lighter nuance of the green thread and stitch the leaves closer together.
While the upper branches should have a little more space between the leaves for the flowers, on the lower greenery the leaves are the sole focus, so they can be closer together. Don’t be afraid to overlap leaves—it just makes it look even more natural! -
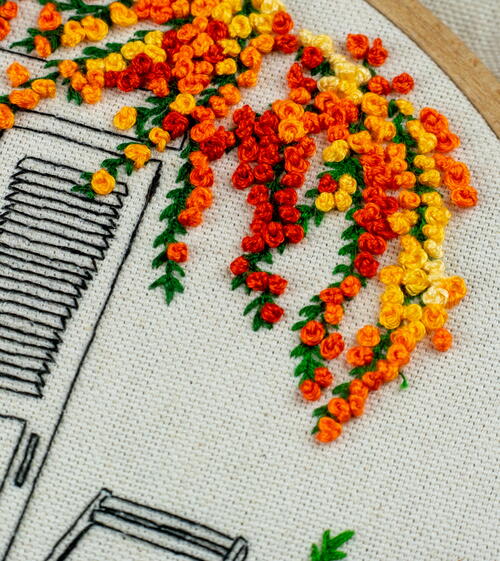
For the florals, we recommend that you keep the full thickness of six strands on your thread. We mostly embroider architectural scenes with fewer strands, but these impressive and large flowers need some volume!
Place the knots between the leaves you already stitched in step 2, and let the thread do its job, creating a natural color variation.
Since these threads vary in nuances of light yellow to dark red, you can feel completely free in the placement and don’t have to consider the light or whether to follow a specific pattern. Let go! If you find it easier to follow branch by branch, then do so. But if you find it more fun to work in more condensed areas—jumping between the rows— then that will be your thing.
You may want to consider placing flowers just farther down on the branch slightly farther away, as a natural indication that the branch is getting thinner and has less space for growth, as it usually happens in nature. -
Last but not least, stitch the setting on the table in steps.
- Begin by stitching single-stranded back- stitches for the tablecloth. Begin with the vertical lines and overlap with the horizontal ones. Observe the shapes of the lines, and notice that they’re far from straight. By bending them along the table, you create more life and realism, which enhances the softness of the tablecloth as it hangs over the sides of the table.
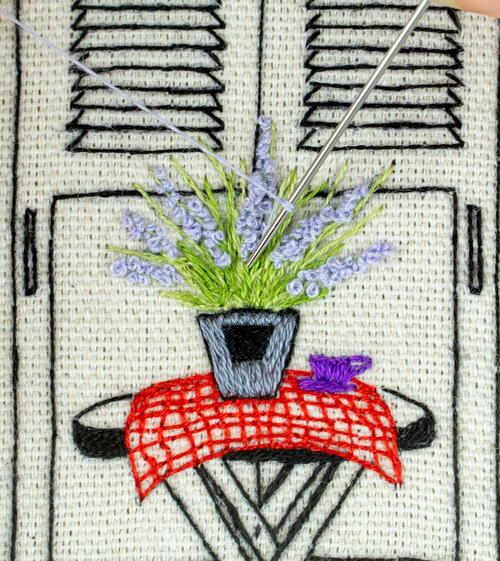
- Embroider the pot with two strands. First, use horizontal satin stitches for the black area, then vertical split stitches for the gray area.
- Prepare your coffee. Start with vertical satin stitches on the cup, make horizontal straight stitches for the small plate and follow the cup’s handle with tiny backstitches. Use only a single strand, as we’re talking about a tiny coffee cup.
- Last, embroider the florals in the pot. Start by making single-stranded backstitched lines to symbolize the stem and leaves. Thereafter, add single-stranded mini French knots in vertical rows around approximately every other stem to get the lavender vibe. You don’t have to think about leaving space for the flowers, but rather feel free to embroider the knots on top of the backstitched lines. As you have used only a single strand, it will still be easy to push through the fabric without too much resistance or thread in the way.
Read NextHow to Embroider on Canvas