Decoupaged Easter Cross
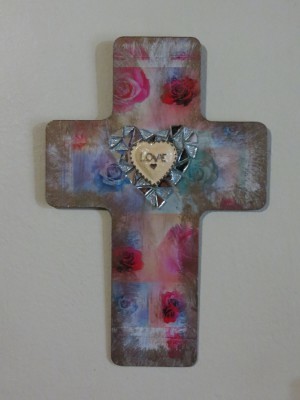
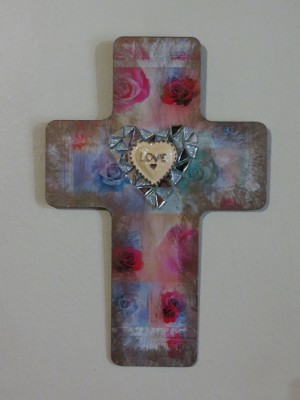
Perfect for Easter, a baptism, or a christening, this Decoupaged Easter Cross is beautiful to hang on the wall or give as a gift. Made using simple decoupage techniques, this religious Easter craft is easy to personalize with a heartfelt message of love and good faith. Use floral papers to give your cross a classic spring look that's perfect for Easter.
Materials:
- Wooden cross, cut from 1/8" plywood
- Suitable decoupage paper
- Regular mirror mosaic tiles
- Crystal ice mirror mosaic tiles
- One white heart, made from Plaster of Paris
- Acrylic paint in the following two colors: flesh and antique bronze
- Mod Podge
- Water-based varnish
- 10/32” paint brush
- Thin paintbrush
- Fan-shaped paint brush
- Hairdryer
- Pair of standard scissors
- Double-wheel tile cutter
- Heart-shaped cookie cutter
- A few sheets of old newspapers to protect the working area
- Clear-drying craft glue
- One-hole wood frame hanger
Instructions:
-
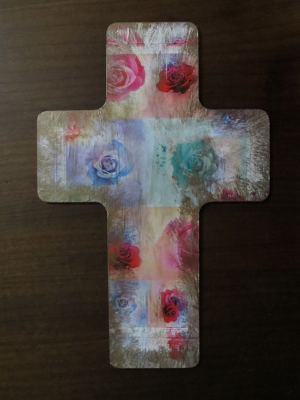
Trace the outline of the cross onto the decoupage paper and cut it out.
-
Use the 10/32” paint brush to paint an even layer of Modge Podge over the front of the wooden cross. Keep the edges and the back of the cross clean.
-
Carefully place the cut-out of the decoupage paper onto the cross.
-
Working from the middle of the cross, and from the inside towards the outside, rub out all the air bubbles and excess Modge Podge from the back of the decoupage cut-out. Be careful not to stretch or tear the cut-out. Regularly dip your finger into the bottle of Modge Podge to keep it wet while rubbing, as this will prevent the cut-out from tearing.
-
Dry the cross thoroughly with the hairdryer, but do not use the highest heat setting on the hairdryer.
-
Cut off any small pieces of decoupage paper that may protrude beyond the edges of the cross.
-
Use the fan-shaped paint brush to give the edges and body of the cross a wash with the antique bronze acrylic paint. Do not use too much paint when using a fan-shaped brush, as this will lose the fan-shaped effect ~ remove excess paint by dabbing it onto a sheet of newspaper before starting to paint.
-
Dry the cross with the hairdryer.
-
With the 10/32” brush, paint a thin layer of Modge Podge over the whole front and edges of the cross. The Modge Podge will protect the cut-out and give the product a smoother finish.
-
Dry the cross with the hairdryer.
-
Repeat steps 9-10 ~ you need to apply at least 6 coats of Modge Podge, but remember that with every layer, the direction in which the Modge Podge is applied, must be changed from horizontal to vertical to horizontal, etc. Also, remember that after every layer of Modge Podge, the cross must first be dried thoroughly with the hairdryer.
-
With the 10/32” brush, add a layer of water-based varnish to the front and edges of the cross. Dry thoroughly with the hairdryer.
-
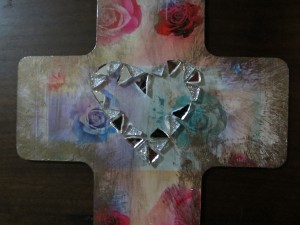
Use the tile cutter to cut the mosaic tiles into small triangular shapes.
-
Use the heart-shaped cookie cutter to lightly trace a heart onto the front of the cross.
-
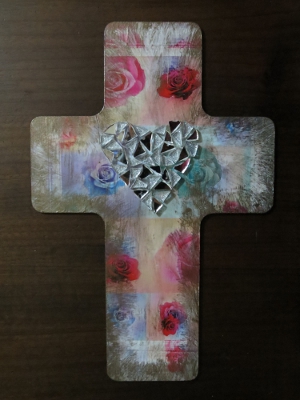
Glue the cut tiles onto the cross ~ first do the outline of the heart, and then fill in the rest of the heart.
-
Let it dry thoroughly before continuing with the next step.
-
Use the thin paint brush and paint the Plaster of Paris heart with the flesh colored acrylic paint. Let it dry thoroughly.
-
Add some detail to the Plaster of Paris heart with the antique bronze paint and let it dry.
-
Add a thin layer of varnish to the heart and let it dry.
-
Glue the Plaster of Paris heart to the front of the cross.
- Glue the wood frame hanger to the back of the cross.
Tips:
- When doing decoupage, never use the highest heat setting on the hairdryer.
- See http://craftshapes.co.uk/index.htm or http://www.craftparts.com/ for possible suppliers of wooden crosses.
Read NextBunny Peeps Bunting

