Vibrant Painted Furniture DIY

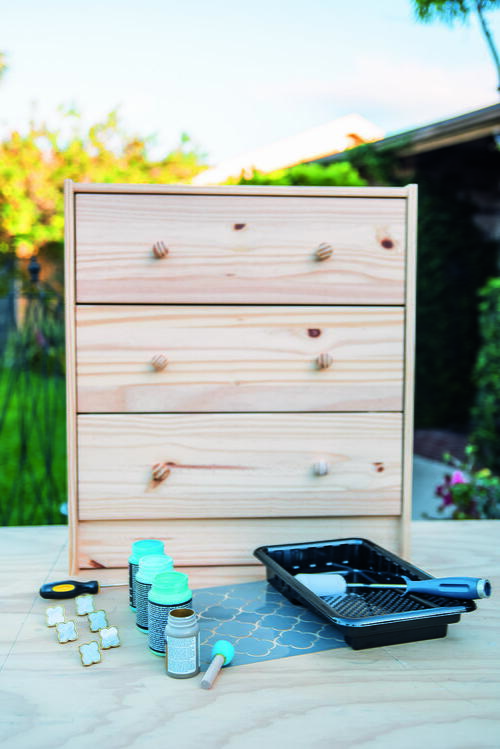
This chest of drawers was a great price at only $35. It had clean lines that can work in any bedroom style and can be used in multiple ways. If you have a piece of furniture that belonged to your child and maybe it’s too sentimental to part with, we can give it a modern facelift with this paint project.
Painted furniture is a great way to personalize any space. You can take an old piece and give it a new look; or buy a new piece and give it a custom finish. It’s a good project to involve the kids because they are tapping into their creative side and using the furniture as a blank canvas to express themselves.
This project can be done on existing furniture that is stained, but it will require extra steps to prep the piece, like sanding to get all of the glossy finish off and applying primer so the new paint will adhere to the surface. It’s much easier to paint when you buy the furniture unfinished in real wood. They are reasonably priced and available in many styles. The cost is even less when assembly is required. It can make a fun statement on its own in a bedroom or dorm, or you can paint many pieces to create a collection. The possibilities are limitless!
Materials List
- Chest of drawers—choice of furniture
- Chalk paint—light blue, teal and turquoise or colors of your choice
- Paint trays and foam rollers
- Stencil—choice of pattern
- Painter’s tape
- Stencil brushes
- Brushed metallic paint—gold
- Decorative knobs
Instructions
-
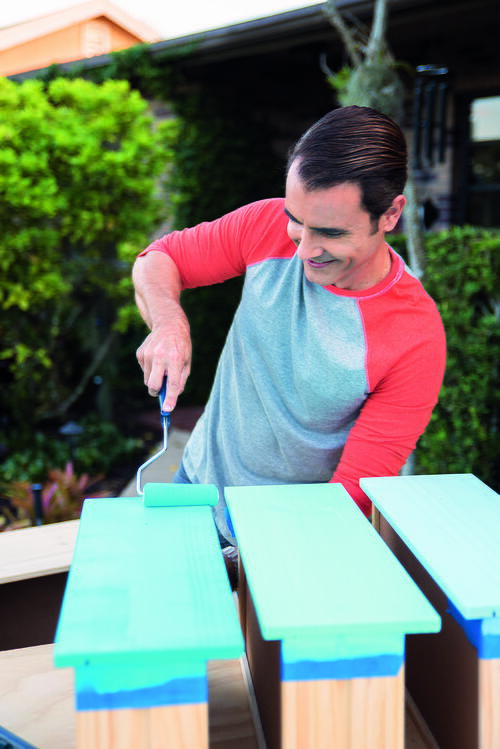
The piece doesn’t have to be primed or sanded since it’s unfinished, but before you apply paint, wipe off any dust or particles with a damp cloth.
-
Take the drawers out and paint each front a different shade of blue to create a monochromatic color scheme. This also reflects an ombré effect by layering the colors from light to dark. You can use any color combination you like best that complements your space. Apply the paint with foam rollers for a smoother finish; they are also disposable when you’re done.
-
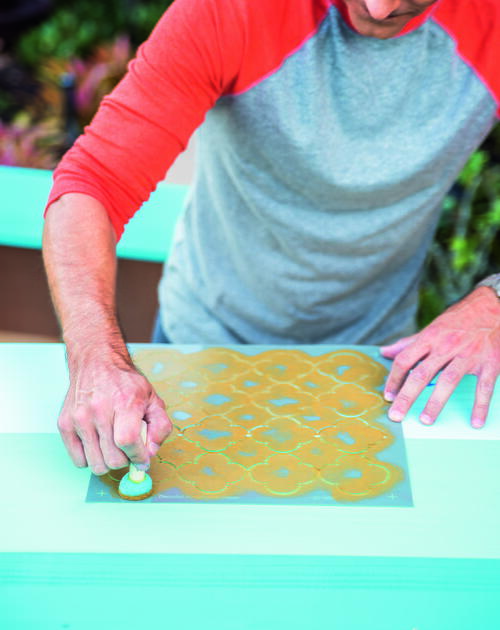
Once the paint is dry, align all the drawers and start with the stencil design in the center and work your way down the entire surface. This will ensure the pattern is repeated evenly for a contiguous look. Hold the stencil in place with painter’s tape to prevent it from moving. Dip the tip of the stencil brush in the gold paint and then dab off excess on a scrap piece of paper or cardboard. Apply the paint using the stippling method, which involves dapping the brush against stencil openings. Stencils work best when you build the color to avoid having the paint bleed underneath.
-
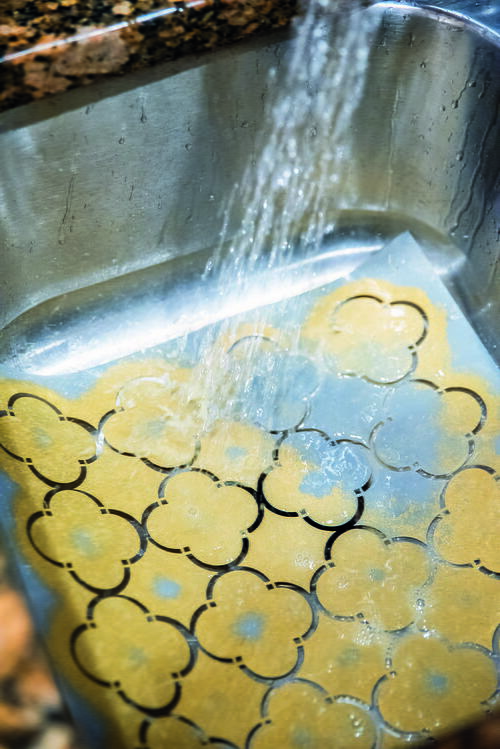
As you move from one area to another, it’s also suggested that you wash the stencil with soap and water to maintain the crisp lines of the pattern since paint can accumulate from continuous use. Continue overlapping the stencil to complete the design on the sides.
-
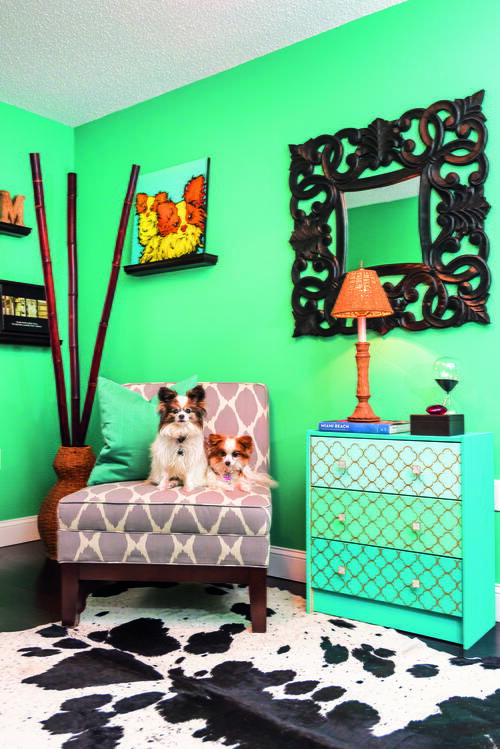
I painted the top and sides in a solid color to complete the look. Instead of using the wood knobs the piece originally came with, I added brass knobs with a marble inlay for a touch of modern glam.
After
For less than $100 in materials, you have a custom piece of furniture that can be used as a nightstand next to a bed, media cabinet for a small television, chest for clothes and so much more. It’s stylish, budget friendly and a project your kid/teen would enjoy making to decorate their bedroom.