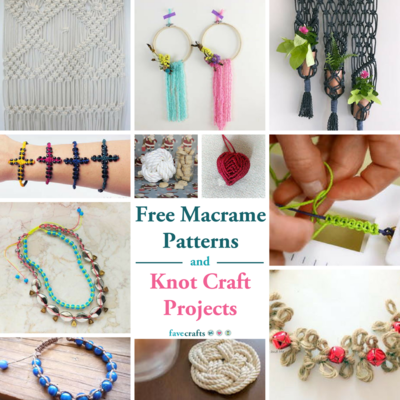
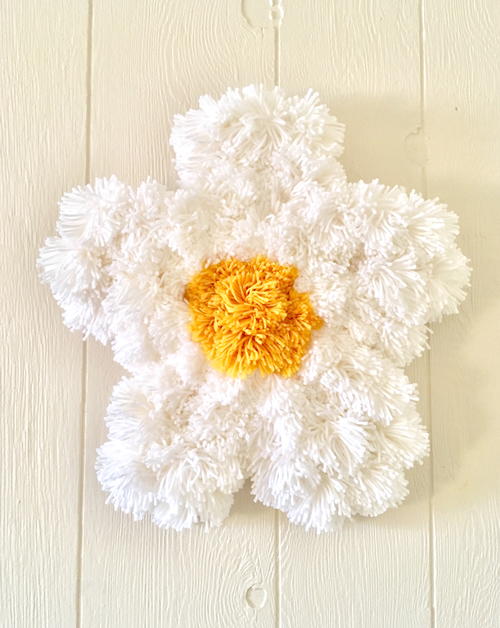
Daisy Pom Pom Rug DIY
If you're looking for pom pom rug designs, this tutorial is sure to stir up some nostalgia!

Follow this pom pom rug DIY to make your own floor decor! This awesome daisy is a pom pom rug design that can also be turned into a bright and fun wall hanging. Pom pom rugs are so easy to make, and they feel great on your feet! They can be such a statement piece of decor in any room, and the results are just fantastic. The daisy motif is both vintage and modern. This is one of those designs you could totally envision in a 1980s living room, but it's trendy today, too! If flower power's your thing, be sure to check out this tutorial.
Time to CompleteWeekend project
Primary TechniqueGeneral Crafts

Project TypeMake a Project
Materials List
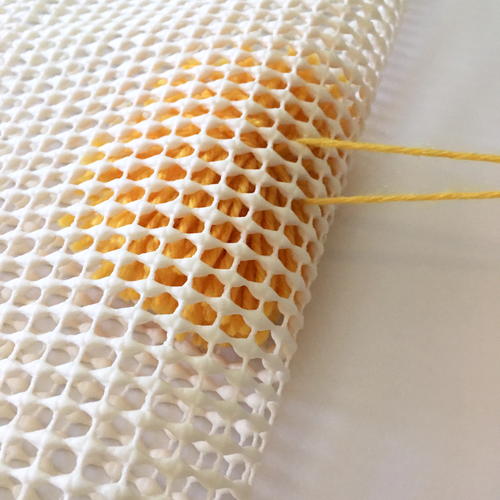
- 2 square pieces of white or cream non-slip rug mat (the kind with the little holes)- at least 27” (inches) square in size (it can be larger and cut down to this size)
- 1 extra-large (1 lb) skein white acrylic yarn (medium thickness)
- 1 small skein of yellow acrylic yarn (medium thickness)
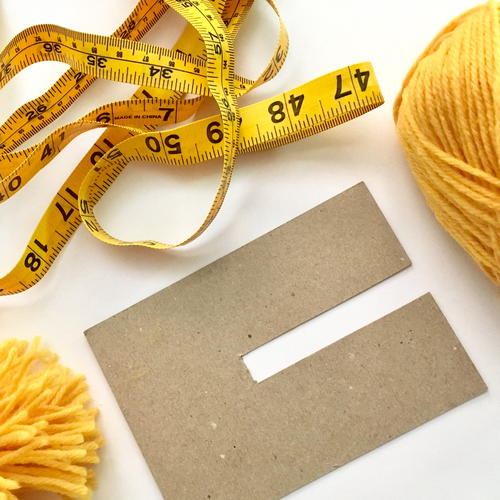
- Rectangular piece of thin cardboard to create a pom pom maker, approx. 3.5” by 5” (or you can use a large plastic pom pom maker)
- Fabric scissors
- Tape measure
- Pencil
- Removable sticky tabs for walls or double-sided tape (for the wall decor option)
Daisy Flower Shaped Yarn Pom Pom Rug (or Wall Decor!) (Rainy Weekend Project)
If you grew up in the 80s and 90s you know that daisies were THE flower motif to wear! I still love them, and those decades are back in style in a big way. Brighten up your decor with this fun (and simple) DIY project that can be used as a decorative rug or even go on a wall! Make this rug over a rainy weekend inside, and admire it for years to come. It requires no sewing or glue, and you can even make it in any other colors you prefer.
Instructions
-
Working on a large table or work surface, lay out your non-slip rug mat. If it has fold marks or isn’t flat enough, put a few books on it for a while.
-
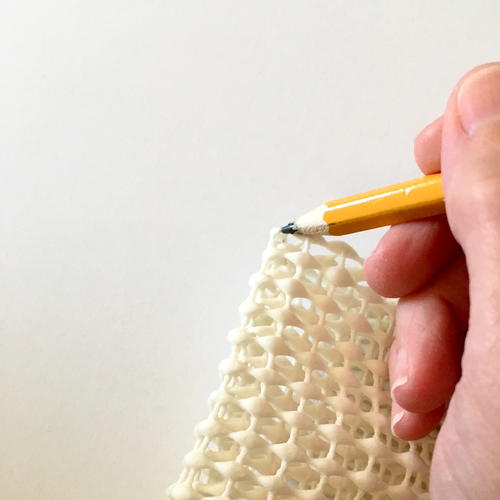
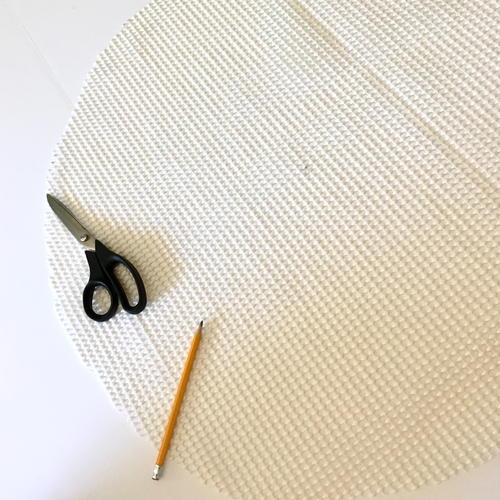
You’ll next need to cut the mat material into a large circle shape. For this tutorial I made the circle about 26-27” across, and will trim the excess after the poms are attached. You can make the daisy on a square piece of mat material, I just find it much easier to imagine the flower shape on a circle.
To make the circle, find the center point of your square piece by folding it twice, creating a point. Take your pencil and make a mark in the middle, then lay the mat flat on your workspace. Measure from the center and make a pencil mark at 13.5” intervals (or you can measure 27” across the whole circle). It doesn’t have to be an exact circle, so close enough is fine. The size of your finished rug may vary based on your yarn thickness and other factors. -
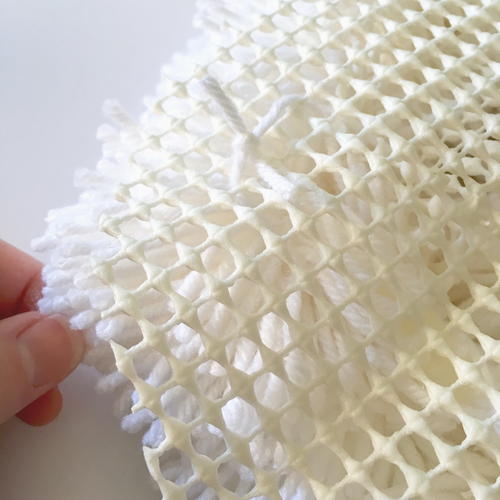
Cut out a second identical mat material circle by using the first as a template. Set this second mat piece aside as we will need it at the end. This will form the backing for your rug or wall decor, providing a bit more stability and a cleaner look.
-
Next, cut 7 yellow and 45 white pieces of yarn to use to use to tie the centers of your poms. They should be approximately 17-18” long. These strings will also serve as the ties to attach the poms to the rug backing, so be sure not to clip them off when making your poms! Keep the strings in your work area as you’ll need them soon.
-
Also cut out 5 white yarn pieces that are about 7-8” long. You will use these in the last few steps to attach the second mat backing that we already cut out.
-
Now you’ll need to create a pom pom maker tool (see photo). The cardboard piece I used is about 3.5” by 5” with a long rectangle cut out of the middle. It’s best to use a sturdy cardboard so it will keep its shape, especially since you’ll be making so many poms for this project. My finished pom poms were also about 3.5” across using this cardboard maker.
-
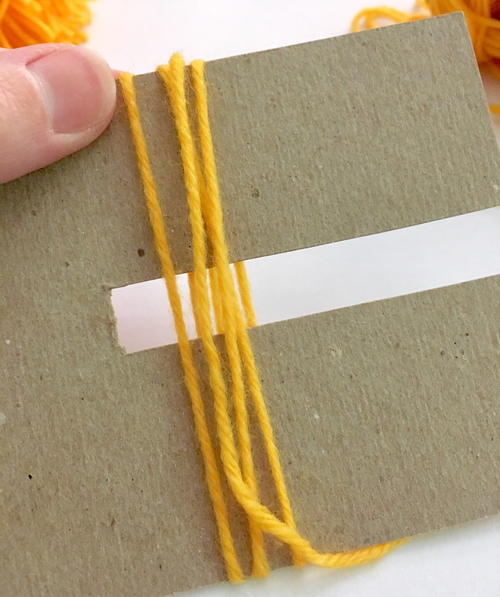
Begin each pom by placing the end of the yarn at the top of your cardboard pom pom maker. Wrap the yarn (not pulling too tightly!) around approximately 65 times, then cut off the end when you are done. Try not to bend or buckle the cardboard pom maker because you need to use it a lot for this project, plus you want your poms to be uniform in size!
-
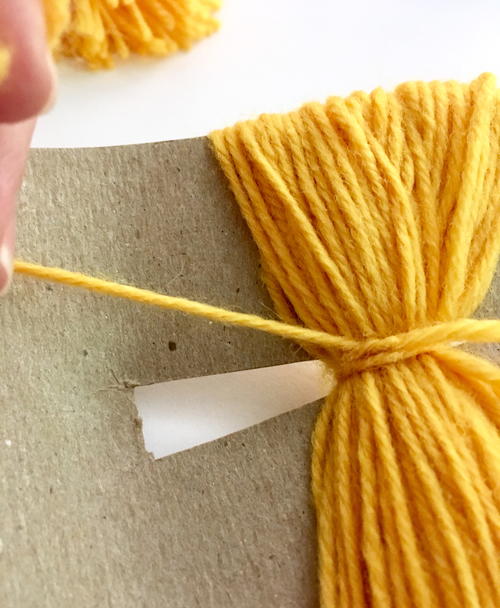
Take one of your 17-18” long pieces in the corresponding color and slide it through the small open space within the cardboard maker. Then take the other end and tie it tightly in the center in a double knot. Do this without breaking the yarn (this means you are pulling too tightly). Flip the cardboard and yarn over and make another double knot, being sure that it’s very secure.
-
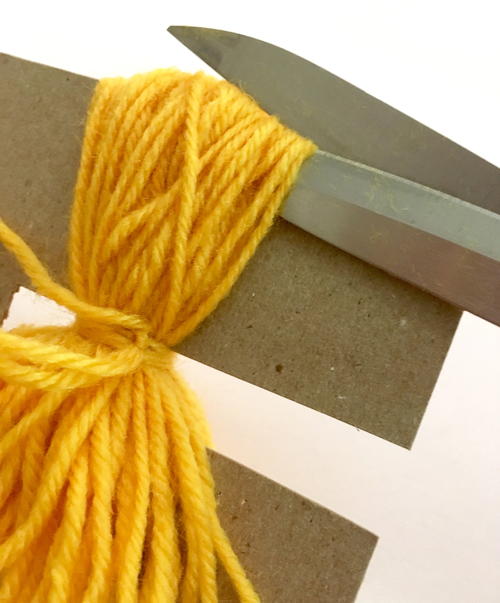
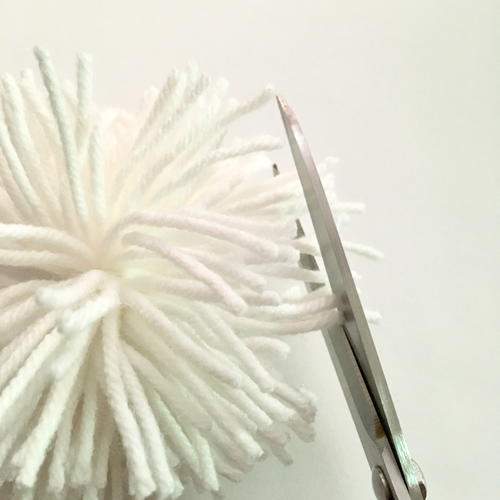
It’s finally time to cut the pom pom off of the maker! Slowly clip the ends along the edge of the cardboard, making sure you’ve clipped all of the loops. Working one side at a time, cut the end and then round off the outer strands so the pom is more even. The wrapping process leaves the outer pieces of string a little longer, so taking a little bit off will improve the shape (see photos). Then repeat this on the other end of the cardboard pom maker.
-
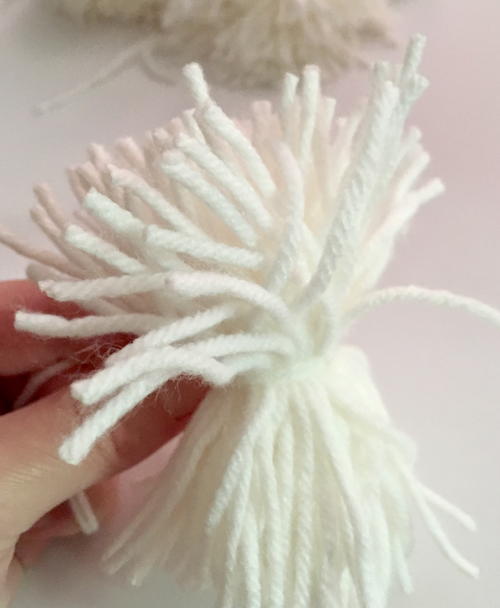
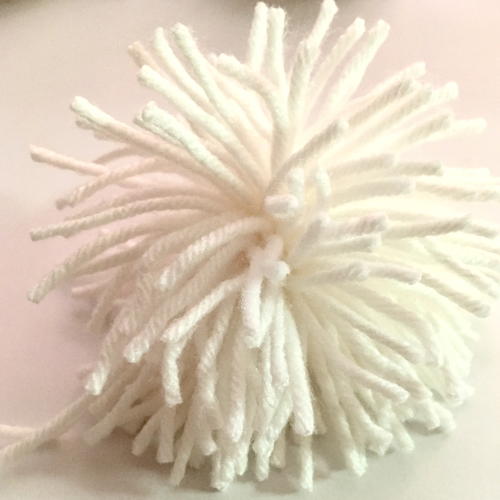
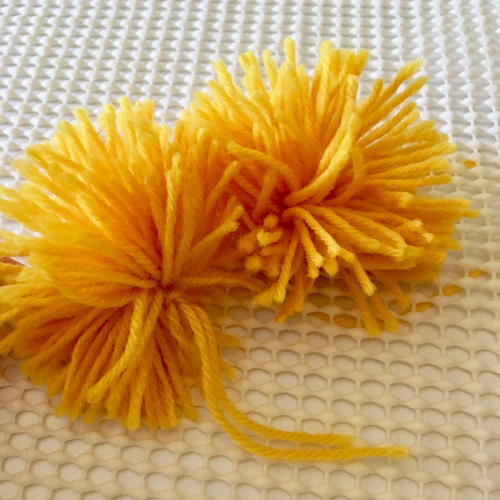
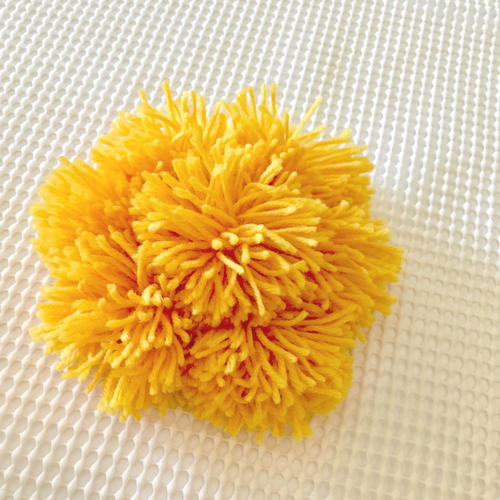
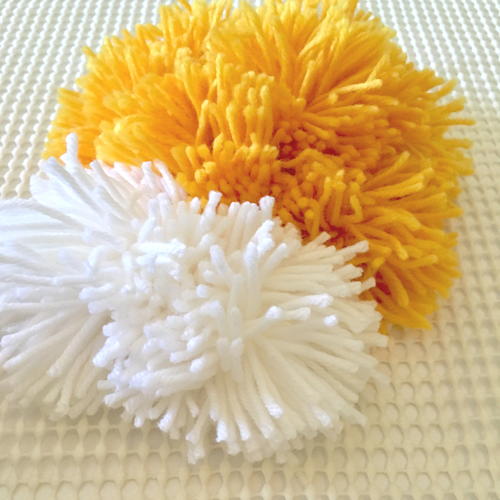
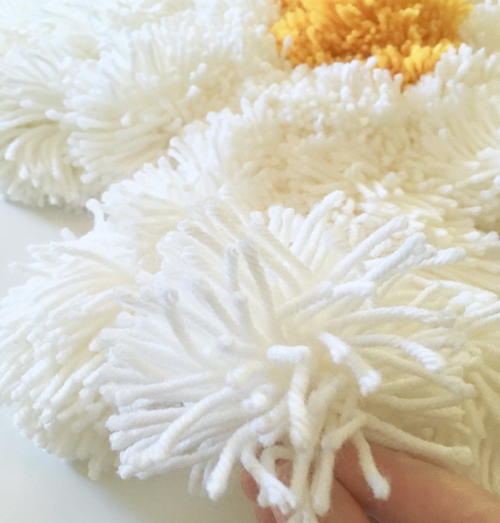
Now you can slide the pom pom off of the cardboard maker! Do this slowly, and then give it a good shake to fluff the yarn again. Trim off a bit from any very long pieces so the pom is more even and round.
-
Repeat this process to make a total of 7 yellow and 45 white pom poms. Put them aside in a clean place as you go- I used a large kitchen mixing bowl!
-
Now that you have all your poms created, lay them out on your rug mat circle to make sure the sizing is correct. This will give you an idea of how your final rug will look!
-
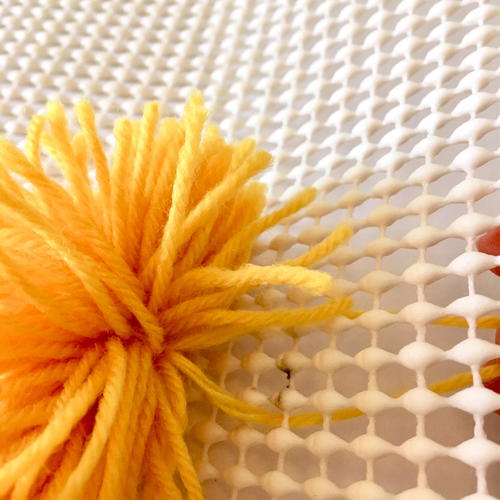
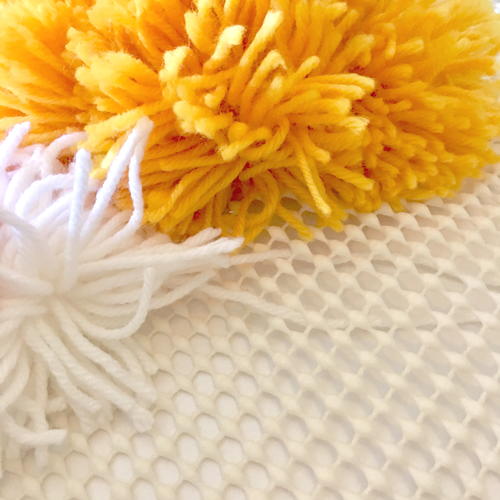
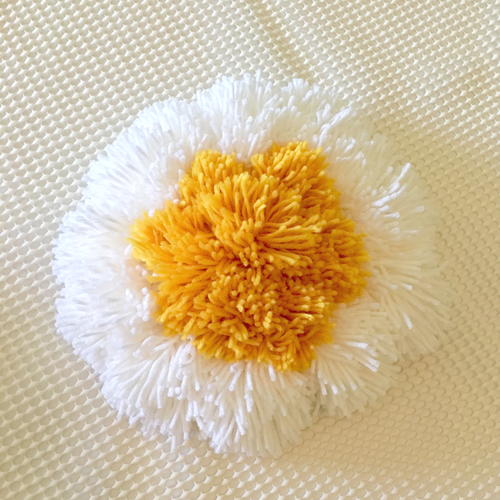
Starting with the yellow poms, make the center of your flower. Attach 1 pom in the very center at the pencil mark: hold the top portion, then guide the pom’s long strings through the holes on the mat and pull it through the back. The strings should skip at least 2 or 3 squares in between poms and the strings. Flip one side of the mat over and tie the poms (gently but securely) together in a double knot.
-
Continue adding the yellow poms around the center, attaching the remaining 6 of them until it’s a round shape. I use the same spacing for the whole project (about 2-3 holes in between each pom and also when tying them on). Use your instinct when arranging them, and if you are unsure, tie them in a loose bow that you can remove before finally securing them with a knot.
-
Now you can create the daisy’s petals with the white yarn. I made 5 petals total, and each one has 9 pom poms (so 45 poms in total for the petals). Each petal is made with two rows of white poms, so attach 10 white poms around the yellow center. You may want to lay them out before attaching them securely to check the spacing.
-
Add the next layers of the white poms until you have 10 total long rows of 4 poms each, radiating from the center.
-
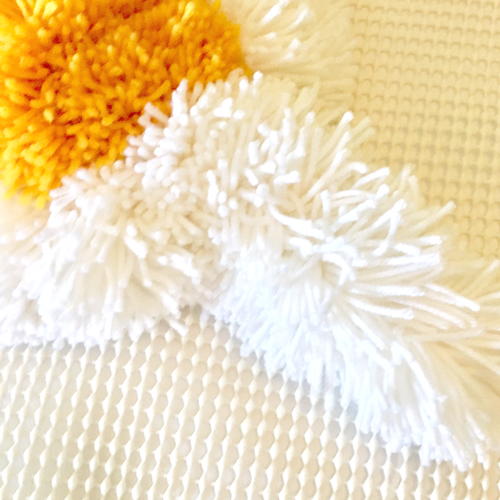
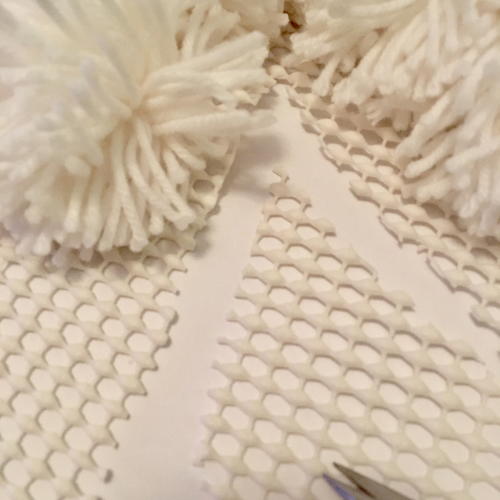
Next, cut out a triangle of excess mat material in between every long row. Cut just past the fourth pom that is on the outside of the daisy (see photos), as you can always take more off later.
-
Now we need to turn the 10 long rows into 5 fluffy petals by attaching the neighboring rows. Basically you want to fill the space of that cutout triangle while making the petal more round and full.
Take an unattached pom (the last for each section), place it in between and near the ends of two neighboring rows of radiating poms, and then tie the loose pom around them to create a round petal. You want to bring the long strings around the back and tie them underneath, leaving this last pom in the middle of the petal. Repeat this 5 times. It’s okay to use a little extra yarn to secure it if needed. Make sure there are no holes or spaces that aren’t secured in your rug before the last few steps. -
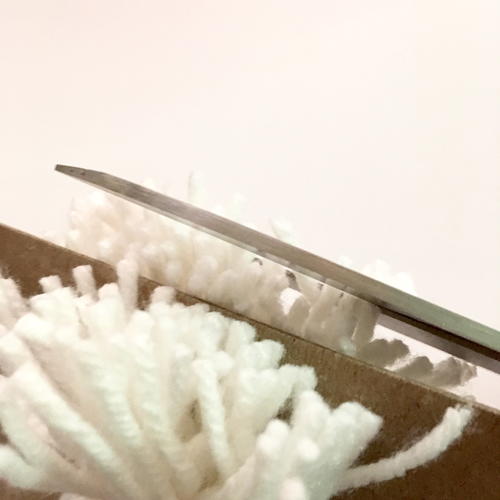
Trim off any excess mat material that is still visible from the front side, as well as shortening the tied strings on back. This is your last chance to make big changes or secure your poms before we add the backing piece.
-
Lay your second mat piece on your work surface and place your daisy rug on top, yarn side facing up. Trim the second mat piece around the shape of the daisy, being sure that it won’t be seen on the front while also not cutting the yarn strands.
-
Flip the whole rug over, yarn side down. Use your 5 pieces of 7-8” long white yarn to tie the extra mat piece to the one with the daisy. One piece can be used for each petal, weaving in and out a few times between both mats. Secure each string with a double knot and clip a little shorter.
-
Trim off the excess mat material, being very careful not to cut the yarn strands. After you can’t see any of the mat from the front, trim any of the yarn strands down that are too long. Do this slowly and remember… you can always take more off, but it’s harder to add more material on!
-
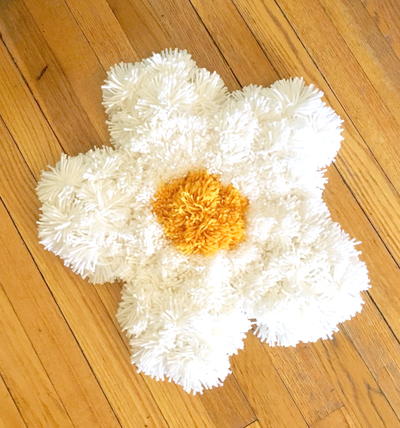
Make sure all of your pom poms are secured, and then give your rug a gentle shake to fluff the pom poms up if they have flattened. You can display the rug on a wood floor or on top of carpet- just always test the rug backing on your wood floors in an inconspicuous place in case it sticks and leaves residue.


Optional: How to Turn Your Daisy into Wall Decor
If you prefer to put your daisy on the wall, I recommend using either removable sticky tabs made for wall decor or a strong double-sided tape. Other options include using small thumbtacks or nails through the holes in the mat material. Always check to make sure that your adhesive or nails won’t damage your walls before putting the daisy up.
Care Instructions
Care for your rug by spot cleaning with a damp cloth, then absorb the excess moisture with a paper towel. You can also trim an occasional piece of yarn if it gets something on it, or even replace the pom pom if needed. Since it’s a white rug it can get noticeably dirty, so try to put it in an area where it won’t get a lot of people walking on it. Not for outdoor use.
-
Enjoy your pom pom rug!

What's your favorite flower?
Read NextRuffled Throw Blanket
Your Recently Viewed Projects
Thanks for your comment. Don't forget to share!
Delphine Bryant
Jul 13, 2018
What a cute little daisy pom pom rug. This would be adorable in a little girls room. Are you bold enough to place a white rug in any room of the house?!
Cheryl Y
Jul 03, 2018
I have always loved pom pom crafts and now this, wow. I appreciate the very detailed directions on just how to make this Daisy Pom Pom Rug with clear pictures to show how to do it. Best of all it's right here and can be printed out if needed. With this being made with white yarn, I think it would work best in a babies room or for a wall hanger. I'm looking forward to trying this one. Thank you so much for sharing this free how to craft.
Morehouse17
Jun 30, 2018
I love this squishy looking rug. It looks like one of those projects that will require a lot of time and materials. I think I will start off small and make just a wall hanging just to get a goof feel of how it is make.
mulberrygalprinces s
Jun 24, 2018
Now this is creative. I love things that are different. This is truly unique. I know no friend of mine has one. I am going to make it in pink and white and give it to my grand daughter to put on her bedroom wall. She will love it and that makes me happy.
Report Inappropriate Comment
Are you sure you would like to report this comment? It will be flagged for our moderators to take action.
Thank you for taking the time to improve the content on our site.