This project was submitted by one of our readers, just like you.
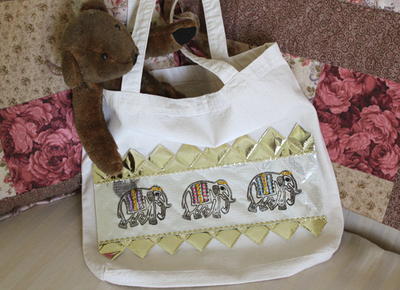
Stamped Canvas Bag
Instantly up your style game by learning how to stamp stunning decorations onto a plain canvas tote.

Stamped Canvas Bag
In the Designer's Words: "When I received a canvas bag filled with Fabric Creations product from Plaid at a recent craft & hobby trade show, I didn't have to think twice about what to decorate - the bag seemed like the obvious choice! Block printing stamps and multi surface paint were perfect for creating a fun stamped border on silver metallic Oly*Fun backed with faux quilted aluminor from Fairfield."
Canvas totes are popular for a reason. These sturdy and strong bags can carry groceries, books, and plenty of other heavy objects. While tote bag patterns to sew can be cute, they are not often thick enough to do the work they need to. This is why we love the Stamped Canvas Bag. This easy bag project allows you to have the strength of canvas with the decorative and darling touches of your DIY self. This example is stamped with elegant little elephants, but you could easily customize it to fit your styling needs.
Estimated Cost$11-$20
Time to CompleteIn an evening
Primary TechniquePainting

Project TypeMake a Project
Materials List
- Plaid Fabric Creations™ Block Printing Stamp
- Plaid Folk Art Multi Surface Paint
- Plaid Mixed Media Applicator
- Oly*Fun Metallic craft material - Silver
- aluminor™ faux quilted craft material - Gold
- Therm O Web Fabric Fuse™
- Canvas bag
- Plaid Mixed Media foam Applicator
Instructions
-
Stamp the elephant image onto silver Oly*Fun as follows. Squeeze black paint onto a disposable plate then dip the foam applicator into the paint. Pounce lightly on a clean area of the plate to spread the paint evenly on the applicator.
-
Dab the paint evenly onto the stamp. Place the fabric on top of the foam mat then press the stamp onto the fabric. I received 12"x12" pieces of Oly*Fun, so I stamped the first image at the center, about 4" from the bottom edge then an image on either side.
-
I created a border by cutting 1" above the images and 1" below using a craft knife and ruler and the grid on my work table mat as a guide.
-
Glue the gold trim along the top and bottom edges of the border, then glue to a 12"x12" piece of gold aluminor. Embellish the elephant images with strips of adhesive backed jewels.
-
Trim the aluminor along the faux quilted design as shown in the photograph, then adhere to the front of the bag.

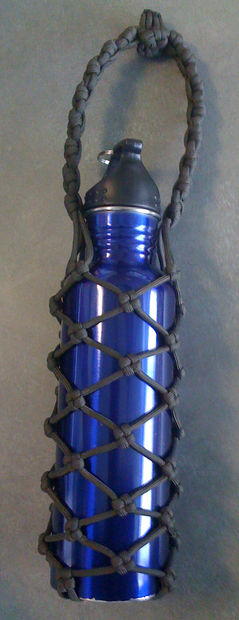
Read NextParacord Bottle Wrap