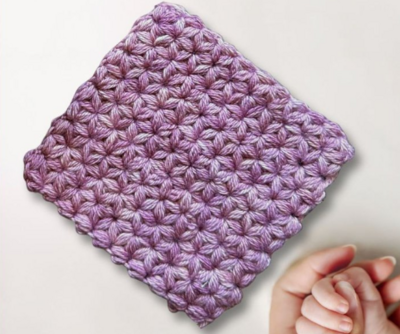
A Bavarian Stitch How-To
Learn a new crochet stitch with this easy tutorial!

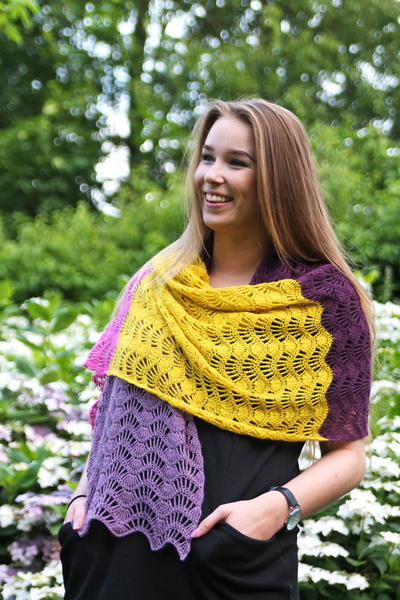
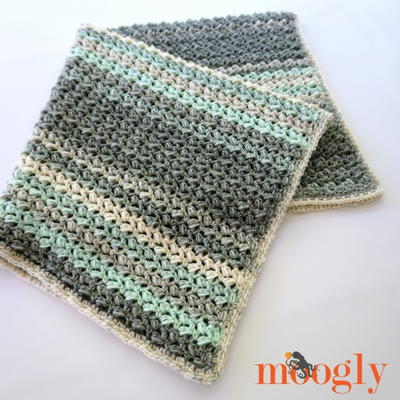
Learning how to crochet a new stitch can be intimidating, but with simple tutorials like this one it doesn't have to be! This step-by-step guide from our friends at I Like Crochet will help you work up a pattern in the Bavarian stitch with confidence. In fact, once you learn how to do the stitch you should definitely use your new skills to crochet the Bubble Gum Scarf (pictured here!).
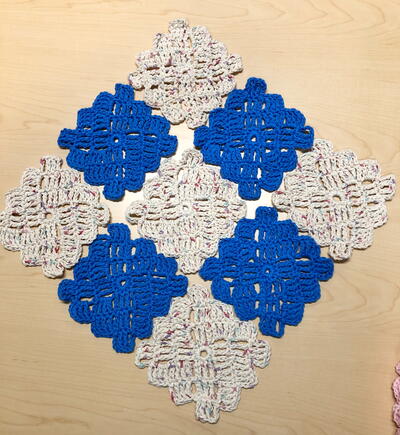
From the Designer: "This simple how-to is the tutorial you need if you’ve ever been wondering how to create a Bavarian Rectangle. Follow along with the photos to stitch your own!"
Notes --
The 8-bptr dec is always worked using the last 4-tr group of 1 shell and the first 4-tr group of the next shell.
When working into beginning ch, insert hook under top two loops of ch to avoid stretching the chain and leaving a large hole.
Instructions
-
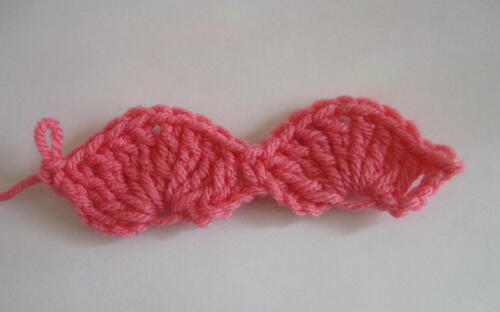
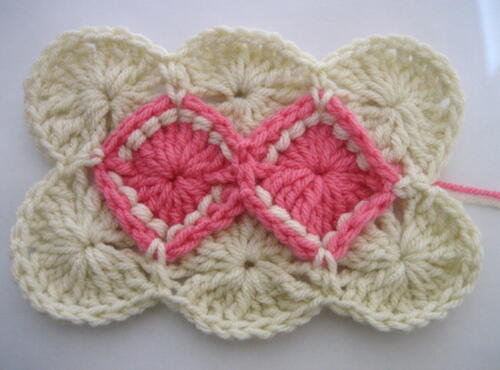
Rnd 1: With first color ch 22, sc in 2nd ch from hook, [skip 4 chs, sm shell in next ch, skip next 4 chs, sc in next ch] twice. Working in opposite side of starting ch, skip 5 chs, sm shell in next ch, which will be the same ch as sm shell on the opposite side of the ch, skip next 4 chs, sc in next ch, skip next 4 chs, sm shell in next ch which will be the same ch as sm shell on the opposite side, skip last 5 chs, join to beginning sc and fasten off. (4 sc, 4 small shells)
-
Rnd 2: Join next color with a sc in first sc, *ch 5, 4-bptr dec, ch 5, sc in next ch 1 space, ch 5, 8-bptr dec, ch 5, sc in next ch 1 space, ch 5, 4-bptr dec, ch 5*, sc in next sc, repeat between * once, join to beginning sc. (2 8-bptr, 4 4-bptr, 6 sc)
-
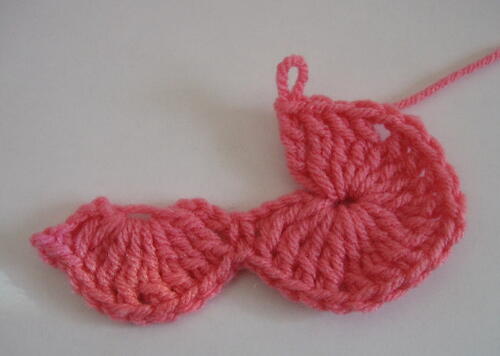
Rnd 3: Ch 1, sc in first sc. lg shell in top of first 4-bptr dec (corner), sc in next sc, sm shell in top of next 8-bptr dec, sc in next sc, lg shell in top of next 4-bptr dec (corner), sc in next sc, lg shell in top of next 4-bptr dec (corner), sc in next sc, sm shell in top of next 8-bptr dec, sc in next sc, lg shell in top of last 4-bptr dec (corner), join to beginning sc and fasten off. (2 sm shells, 4 lg shells, 6 sc)
-
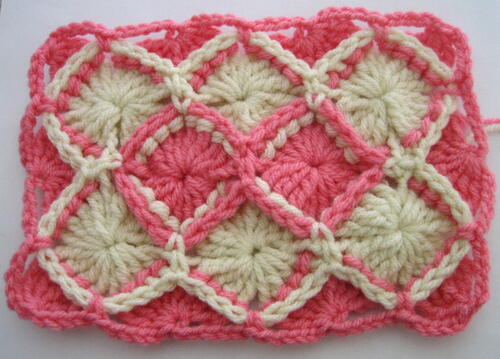
Rnd 4: Join next color with a sc in first ch 1 space of first corner shell, *ch 5, 4-bptr dec, ch 5, sc in next ch 1 space, [ch 5, 8-bptr dec, ch 5, sc in next ch 1 space] twice, ch 5, 4-bptr dec, ch 5, sc in next ch 1 space, ch 5, 8-bptr dec*, ch 5, sc in next ch 1 space, repeat between * once, join to beginning sc. (10 sc, 4 4-bptr dec, 6 8-bptr dec)
-
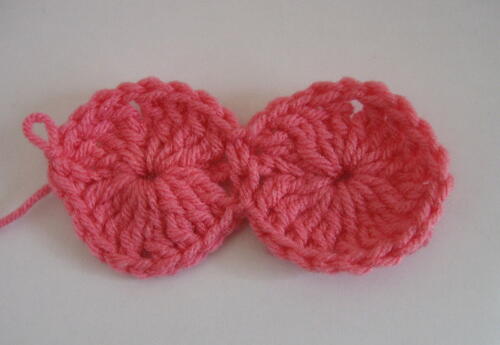
Rnd 5: Ch 1, sc in first sc, *lg shell in top of next 4-bptr dc, sc in next sc, [sm shell in top of next 8-bptr dec, sc in next sc] twice, lg shell in top of next 4-bptr dec, sc in next sc, sm shell in top of next 8-bptr dec*, sc in next sc, repeat between * once, join to beginning sc and fasten off. (6 sm shells, 4 lg shells)
-
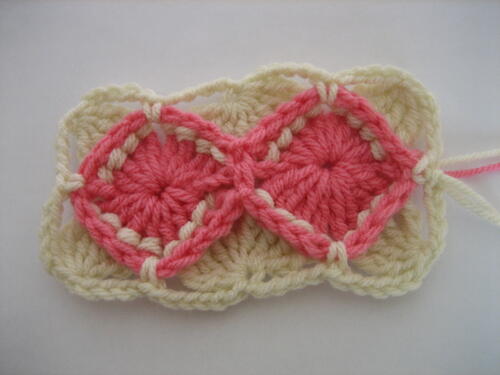
Rnd 6: Join next color with a sc in first ch 1 space of shell in first corner, *ch 5, 4-bptr dec, ch 5, sc in next ch 1 space, [ch 5, 8-bptr dec, ch 5, sc in next ch 1 space] 3 times, ch 5, 4-bptr dec, ch 5, [sc in next ch 1 space, ch 5, 8-bptr dec, ch 5] twice*, sc in next ch 1 space, repeat between * once, join to beginning sc. (14 sc, 4-4bptr dec, 10 8-bptr dec)
-
Rnd 7: Ch 1, sc in first sc, *lg shell in top of next 4-bptr dec, sc in next sc, [sm shell in top of next 8-bptr dec, sc in next sc] 3 times, lg shell in top of next 4-bptr dec, [sc in next sc, sm shell in top of next 8-bptr dec] twice*, sc in next sc, repeat between * once, join to beginning sc and fasten off. (14 sc, 10 sm shells, 4 lg shells)
Next Rounds:
To make the rectangle larger, continue repeating Rounds 6 and 7 alternatively, working 2 rounds of each color until desired square size. You will be adding 1 sm shell to each side of rectangle with every 2 rounds worked.
To make a longer rectangle, work beginning ch in multiples of 10 plus 2 more. Each small shell repeat uses 10 chs.
Read NextSnowman Hat
Your Recently Viewed Projects
Thanks for your comment. Don't forget to share!
kimbella5505 67299 17
Feb 02, 2021
This is just what I have been looking for for a gift for my sister ..I wanted to make her an Afghan though since she lives in Montana...The moment I saw the instruction photos,I thought how perfectly this would make up as sort of a "mile-a--minute " pattern! So I'm getting started! I had such a hard time finding a design that had just the right elements of looking complicated ,but actually works up fairly fast, and not something I've made or seen a hundred times or to overly plain and "humdrum"..Like I said,I know it's a scarf pattern but I'm going to use for a blanket design! Thanks for helping me find the perfect one!
Report Inappropriate Comment
Are you sure you would like to report this comment? It will be flagged for our moderators to take action.
Thank you for taking the time to improve the content on our site.