Amigurumi Animal Ring Dishes
These adorable crochet ring dishes make amazing gifts!

From the Designer: "These adorable amigurumi ring dishes work up fast, they’re useful, and they’re guaranteed to make Mom smile. Pattern includes four animal character options: bunny, cat, mouse, and hamster/chipmunk!"
Yarn Weight(4) Medium Weight/Worsted Weight and Aran (16-20 stitches to 4 inches)
Finished SizeFinished dimensions: dish measures about 4.25” across
Materials List
- Worsted weight yarn in white
- Size G+ (4.5mm) Odyssey hook
- Stuffing
- Yarn needle
- Stitch marker
- Black + white fabric paint
- Scrap yarn
Instructions
Special stitches:
MINI BOBBLE:
YO and pull up a loop in the next st, YO and pull through two loops; *YO and pull up a loop in the same st, YO and pull through two loops* rep *-* until there are 4 loops on the hook, YO and pull through all 4 loops, ch 1 to complete.
BOBBLE:
YO and pull up a loop in the next st, YO and pull through two loops; *YO and pull up a loop in the same st, YO and pull through two loops* rep *-* until there are 6 loops on the hook, YO and pull through all 6 loops, ch 1 to complete.
Notes
You’ll want really dense stitches so the dish maintains shape and isn’t floppy. If you’re not a tight stitcher, try going down a few hook sizes.
DISH
Ch 2 or magic ring
-
Rnd 1: 7 sc in 2nd ch from hook / ring (7)
-
Rnd 2: 2 sc in each sc around (14)
-
Rnd 3: *2 sc in 1st sc, sc in next sc* rep *-* around (21)
-
Rnd 4: *2 sc in 1st sc, sc in next 2 sc* rep *-* around (28)
-
Rnd 5: *2 sc in 1st sc, sc in next 3 sc* rep *-* around (35)
-
Rnd 6: sc in 1st 3 sc, *2 sc in next sc, sc in next 4 sc* rep *-* 6x, 2 sc in next sc, sc in last sc (42)
-
Rnd 7: in FLO, *2 sc in 1st sc, sc in next 9 sc, 2 sc in next sc, sc in next 10 sc* rep *-* 2x (46)
-
Rnd 8: now in both loops, sc in 1st 5 sc, *2 sc in next sc, sc in next 11 sc, 2 sc in next sc, sc in next 10 sc*, rep *-*, 2 sc in next sc, sc in last 5 sc (50)
-
Rnds 9-10: sc in each sc around (50)
-
Rnd 11: *ch 1, slp st in next sc* rep *-* around
FO and weave in ends. -
Reattach yarn to the back loops from Rnd 7, slp st around, FO and weave in ends. This creates a nice “foot” around the base of the dish to mimic ceramic, and it also helps to firm and lift the sides of the dish for a better bowl shape.
-
Next, let’s choose our character! All characters except the mouse have all features (aside from detail embroidery and eyes) built into their patterns for minimal assembly!
MOUSE
-
Ears - make 2
Ch 3 -
Rnd 1: 6 dc + 1 sc in 2nd ch from hook, slp st to join to ch 2 and close round. The bottom of the ear is the last dc, the sc, and the slp st.
-
Body
Ch 2 or magic ring -
Rnd 1: 6 sc in 2nd ch from hook / ring (6)
-
Rnd 2: 2 sc in each sc around (12)
-
Rnd 3: *2 sc in 1st sc, sc in next sc* rep *-* around (18)
-
Rnd 4: *2 sc in 1st sc, sc in next 2 sc* rep *-* 2x, sc in next sc, MINI BOBBLE in next sc, sc in next sc, rep *-* 3x (23)
-
Rnd 5: sc in each sc around (23)
-
Rnd 6: sc in 1st 8 sc, *ch 2, 2 sc in 2nd ch from hook* paw made, sc in next 4 sc, rep *-*, sc in last 11 sc (23)
-
Rnd 7: sc in 1st 22 sc, ch 6, slp st in 2nd ch from hook and in next ch, sc in last 3 ch, sc in last sc
-
FO leaving a medium length tail for assembly.
-
Sew the bottoms of the ears to the body (pin them in place first so you can see if you like where they’re placed). Weave in the ends from the ears.
-
Using scrap pink yarn, embroider a small nose over the middle dc of the mini bobble. Tie off inside the mouse and trim.
-
Center the mouse character in the middle of the dish bottom (over round 4): sew into place. Before closing up entirely, STUFF the mouse.
-
Weave in ends.
-
With black fabric paint, dab on two eyes and allow to dry.
BUNNY
Ch 2 or magic ring
-
Rnd 1: 6 sc in 2nd ch from hook / ring (6)
-
Rnd 2: 2 sc in 1st sc, *ch 5, 3 dc in 2nd ch from hook, hdc in next ch, sc in last 2 ch* (ear made), 2 sc in each of the next 4 sc, rep *-*, 2 sc in last sc (12)
Note - when you come back around to the ears, hold them to the front of the work and crochet behind them, do not work into any of the stitches of the ears themselves. -
Rnd 3: *2 sc in 1st sc, sc in next sc* rep *-* 2x, 2 sc in next sc, MINI BOBBLE in each of the next 2 sc, sc in next sc, rep *-* 2x (18)
-
Rnd 4: *2 sc in 1st sc, sc in next 2 sc* rep *-* 3x, sc right between the mini bobbles, then in the next bobble, then in next sc, rep *-* 2x (23)
-
Rnd 5: sc in each sc around (23)
-
Rnd 6: sc in 1st 11 sc, *ch 2, 2 sc in 2nd ch from hook* (paw made), sc in next 5 sc, rep *-*, sc in last 7 sc (23)
-
Rnd 7: sc in each sc around (23)
-
FO leaving a medium length tail for assembly.
-
Using scrap pink, embroider a little nose between the two bobbles, tie off inside the bunny.
-
Center the bunny character in the middle of the dish bottom (over round 4), sew into place.
-
Before closing up entirely, STUFF the bunny. Weave in ends.
-
With black fabric paint, dab on two eyes and allow to dry.
CAT
Ch 2 or magic ring
-
Rnd 1: 6 sc in 2nd ch from hook / ring (6)
-
Rnd 2: 2 sc in 1st sc, *ch 3, slp st in 2nd ch from hook, dc in last ch, ch 1, slp st in same ch as dc* ear made, 2 sc in each of the next 3 sc, sc in next sc, rep *-*, sc in same sc (to complete increase), 2 sc in last sc (12)
Note - when you come back around to the ears, hold them to the front of the work and crochet behind them, do not work into any of the stitches of the ears themselves. -
Rnd 3: *2 sc in 1st sc, sc in next sc* 2x, BOBBLE in next sc, sc in next sc, BOBBLE in next sc, sc in same sc as BOBBLE, sc in next sc, rep *-* 2x (17)
-
Rnd 4: *2 sc in 1st sc, sc in next 2 sc*, [insert hook through the ch 1 of the first ear and into the next sc, yo and pull through sc and ch 1, yo and pull through 2 loops to complete sc] ear anchored, sc in same sc to complete increase, sc in next 2 sc, 2 sc in next sc, sc in next sc, rep *-* 1x, 2 sc in next sc, rep [ - ] ear anchored, sc in next sc, rep *-* 1x (23)
-
Rnd 5: sc in 1st 9 sc, *ch 2, 2 sc in 2nd ch from hook* paw made, sc in next 4 sc, rep *-*, sc in last 10 sc (23)
Note - when you come back around to the paws, hold them to the front of the work and crochet behind them, do not work into any of the stitches of the paws themselves. -
Rnds 6-7: sc in each sc around (23)
-
Ch 6, 3 dc in 2nd ch from hook, hdc in next ch, sc in last 3 ch, sc in next sc, FO leaving a medium length tail for assembly.
-
Using scrap pink yarn, embroider a little triangle nose between the two bobbles and a little cat smile around the bobbles. Tie off inside the cat body and trim the ends.
-
Center the cat character in the middle of the dish bottom (over round 4): sew into place. Before closing up entirely, STUFF the cat. Weave in ends.
-
With black fabric paint, dab on two eyes and allow to dry.
HAMSTER/CHIPMUNK
Ch 2 or magic ring
-
Rnd 1: 6 sc in 2nd ch from hook / ring (6)
-
Rnd 2: 2 sc in 1st sc, *ch 2, 2 sc in 2nd ch from hook* ear made, 2 sc in each of the next 4 sc, rep *-*, 2 sc in last sc (12)
Note - when you come back around to the ears, hold them to the front of the work and crochet behind them, do not work into any of the stitches of the ears themselves. -
Rnd 3: *2 sc in 1st sc, sc in next sc* rep *-* around (18)
-
Rnd 4: *2 sc in 1st sc, sc in next 2 sc* rep *-* 2x, BOBBLE in next sc, sc in same sc, sc in next 2 sc, 2 sc in next sc, sc in next sc, BOBBLE in next sc, rep *-* 2x (24)
-
Rnd 5: sc in 1st 11 sc, *ch 2, 2 sc in 2nd ch from hook* paw made, sc in next 3 sc, rep *-*, sc in last 10 sc (24)
Note - when you come back around to the paws, hold them to the front of the work and crochet behind them, do not work into any of the stitches of the paws themselves. -
Rnds 6-7: sc in each sc around (24)
-
FO leaving a medium length tail for assembly.
-
Using scrap pink yarn, embroider a little dash for a nose centered between the two cheek bobbles. Tie off inside the hamster/chipmunk body and trim the ends.
-
Center the character in the middle of the dish bottom (over round 4): sew into place. Before closing up entirely, STUFF the body. Weave in ends.
-
With black fabric paint, dab on two eyes and allow to dry.


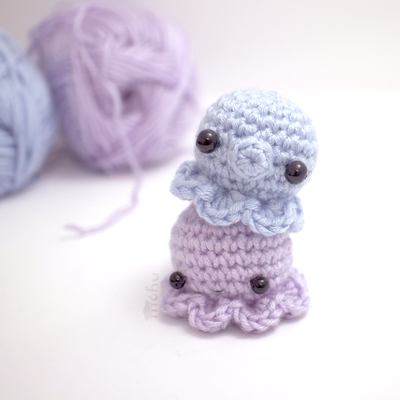
Read NextMini Octopus Crochet Pattern