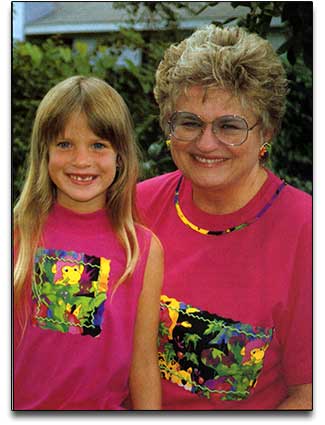
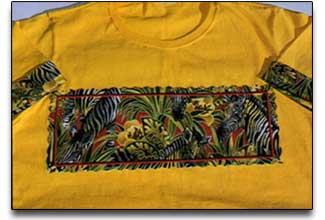
Wild Jungle Shirts
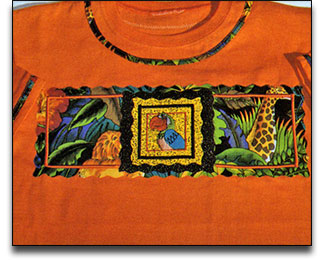
Tropical fabrics, decorative stitching and embroidery create a fun jungle theme on a plain shirt with this craft from Sulky of America. You can even create matching socks! Machine embroidered motifs are optional if you do not have an embroidery machine.
Materials:
- Hanes Her Way"™ Ready-to-Wear bright colored T-shirts, shorts and Matching Socks in Adult and Child's size
-
Husqvarna Viking #1+ or Rose and Embroidery Unit
Braiding Foot
Bias Binder Foot
Edge Joining Foot
Bobbins - Machine Needles: Top Stitching or Embroidery Size 14/90
-
Notions
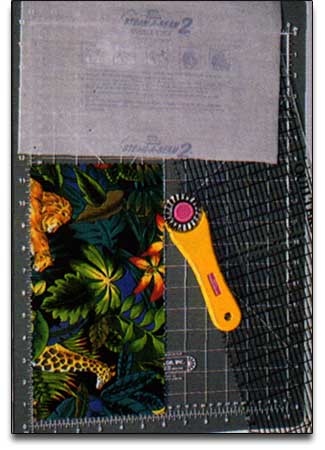
Steam-A-Seam 2 Double-Sided Fusible Web
Iron & Pressing Pad
Scissors and Pins
Rotary Cutter w/Wavy Blade, Ruler and Mat - 2 mm Sulky Puffy Foam™ in a color to match the Sulky 30 wt. Rayon Thread
-
Sulky threads
Sulky 30 wt. Rayon to coordinate with your fabric selection and Sulky Puffy Foam colors
Sulky 40 wt. Rayon as listed on the embroidery card of your choice
Sulky Clear Polyester Invisible Thread or Sulky White Bobbin Thread for the bobbin - Sulky Stabilizers: Totally Stable or Sulky Sticky
-
Tropical or primary colored fabrics
Joyce used Alexander Henry and Hoffman Prints, and Robert Kaufman's Pointillist Fabrics
Choose fabric for Blocks
Determine the color and size fabric blocks and placement on the T-shirt front (and back, if desired) for the size shirt you have chosen. rough cut only the square you wish to embroider at this time. Joyce used the following finished sizes for the Adult and Child.
Adult - Size XL - 3-1/4" down from neck:
Base Rectangle - 4-1/2" wide
Frame Square - 3-1/2"
Embroidered Square - 3"
Child - Size 7 - 1-1/4" down from neck:
Base Rectangle - 4-1/2" wide
Frame Square - 3-1/2"
Embroidered Square - 3"
These measurements will depend on the size of the shirt.
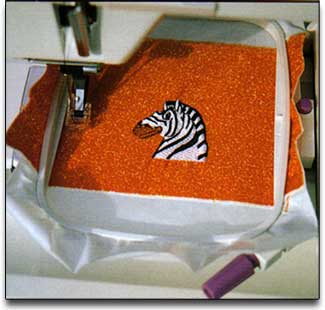
Prepare to Embroider Motifs
-
After selecting your embroidery design and the solid or Pointillist dotted fabric on which to embroider the matching motifs, set up your machine for embroidery. For the Husqvarna Viking #1+ or Rose Sewing Machines:
- Insert card and cassette.
- Turn unit on.
- Put on Embroidery Foot (Q for #1+, quilting position for Rose).
- Set presser foot pressure for embroidery.
- Drop feed teeth.
- Thread machine with appropriate Sulky 40wt Rayon thread for your chosen design.
-
Use Sulky Polyester Bobbin thread in the bobbin, threaded through the hole in the bobbin case.
-
Hoop fabric, layering stabilizer under fabric to be embroidered. If the piece of fabric is a scrap which is smaller than the hoop, iron a piece of Totally Stable onto the back of the fabric and catch the edges of the stabilizer in the hoop, making sure the fabric is centered. Or, adhere Sulky Sticky to the underside of the hoop and press the fabric into it.
- Clip hoop onto embroidery unit, touch stitch, check perimeters, adjust size (if you want a smaller motif for a smaller T-shirt, simply shorten stitch width and length before stitching), touch Run. When the design is finished, snip threads and remove stabilizer.
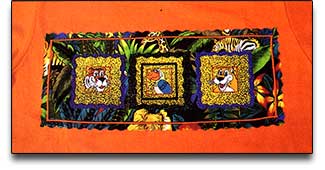
Fuse Embroidered Square and Frame Over Rectangle
-
After embroidered squares are completed, begin the embellishment of the T-shirt front. Look at your novelty print and find elements in the design that would look good as a horizontal panel across the front of your T-shirt. Cut a rectangle of fabric about 6" high and 10" across, or wider, depending on how large your shirt is. Using Steam-A-Seam 2, double-sided paper-backed fusible web, remove the printed paper release sheet to reveal the tacky side; finger press it to the wrong side of your rectangle. (For a softer finished look, adhere fabrics by spraying the backs with Sulky KK 2000 temporary spray glue.) For a decorative effect, cut around the edges of the rectangle, through the web, with the aid of your ruler and wavy blade rotary cutter.
-
Place the rectangle on the T-shirt front, positioning it to your liking. Fuse it in place with a pressing motion (do not move the iron back and forth). This particular web will adhere to the fabric and keep cut edges from fraying.
-
Back Pointillist Fabric with Steam-A-Seam2, Cut these "frame" fabrics to 1/4-1/2" in from each other or whatever looks good and fits correctly when stacked on one another. trim around the edges with the wavy rotary cutter. Fuse over the rectangular fabric panel.
- Back the embroidered Pointillist Fabric piece(s) with web and trim with the wavy rotary cutter. Center in the previously-fused squares(s) and fuse down with a steam iron. Turn the T-shirt inside out and fuse from the back as well.
Stabilize Areas With Decorative Stitching
Iron 2 layers of Sulky Totally Stable or place 2 layers of Sulky Tear-Easy, cut in 2" strips on the back of the T-shirt over the areas where more decorative stitching will be done over the Puffy Foam.
Hooped Embroidery With Sulky Puffy Foam on Top of fabric

-
If you don't have a preprogrammed satin stitch on your machine, reduce the length way down to as short as it will go and still stitch. On the Husqvarna Viking computer sewing machines, select the medium satin stitch (A15). Place the Puffy Foam piece under the foot and satin stitch around the embroidered design and novelty print panel approximately 1/2" in from the scalloped, cut edge.
- Tear away the excess foam. this foam was designed specifically for the sewing industry, so the perforation of the stitching will cause the excess to literally fall away from your work.
More Decorative Stitching With Puffy Foam
-
Place Puffy Foam between the presser foot and what you are embroideering to create a raised, 3-dimensional effect to your stitching. Adjust your machine according to the thickness of the foam. When using the Husqvarna Viking #1+ or Rose Machines and 2 mm Puffy Foam, reduce presser foot pressure, use an embroidery foot, and tension between 2 and 3. For 3 mm Puffy Foam, use a Quilting Embroidery Foot and set top tension between 1 and 2.
-
Another trick is to use a rotary cutter to cut a thin strip of 2 mm Puffy Foam 2 mm wide (for 3 mm foam, cut 3 mm wide). Insert the strip through the hole in the Braiding Foot, and satin stitch over the foam tube to couch it onto the fabric. This makes turning corners cleaner and easier.
These techniques are particulary nice for kid's clothes because the Puffy effect is permanent through the washing. It won't come off like puffy paints. Do not, however, overheat in your dryer, or put direct pressure from a hot iron on puffed up stitching.
Optional Cuff Embellishment
-
Rotary cut or tear a 5" wide crossgrain strip of wild print fabric.
-
To make cuffs, fold in half lengthwise, wrong sides together. Press.
-
To add the cuffs, open underarm seams (or inseams on shorts) about 2" from bottom edge of hem.
-
Expose the free arm on your machine.
-
Leaving shirt right-side out, lay the folded cuff on the throat plate first and slip the sleeve over so the cuff is inside.
-
Line up the raw edges of the cuff to the folded edge of the existing sleeve hem. Sew together.
- Repeat to add other cuff.
To make matching embroidery socks, see Fun Embroidery Socks.
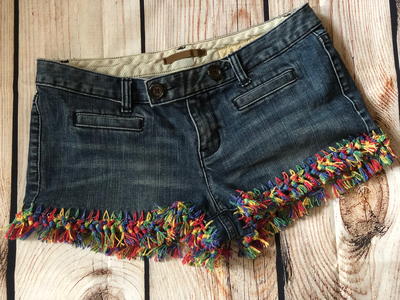
Read NextDIY Refashion Jeans