This project was submitted by one of our readers, just like you.
Geometric Jewels DIY Organizer
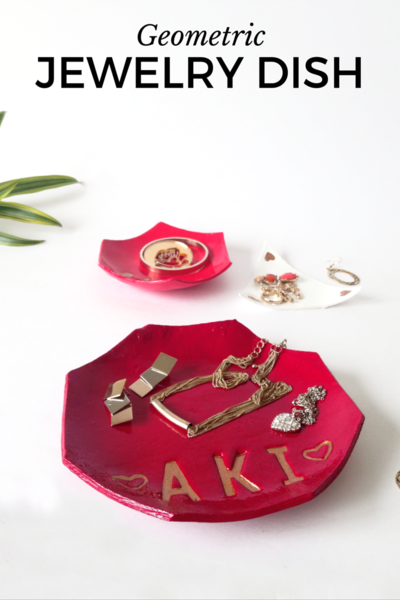
"Looking for a bold yet pretty gift for your bestie? Or a custom lifestyle product that will make your brand stand out? These custom geometric jewelry trinket dishes are your answer. Easy to customize and make. Let me know how you organize your jewelry and your thoughts on this bold yet pretty custom jewelry dish."
Estimated CostUnder $10
Time to CompleteIn an evening
MaterialsClay
Primary TechniqueCeramics

Project TypeMake a Project
Materials List
-
Air Dry Clay
- Acrylic Paint (similar)
-
Metallic Paint (I used pearl metallic bronze shade)
-
Enamel (Glossy Clear)
- Plastic alphabets
- Sandpaper
- Paintbrush
-
Metal scale
-
Knife
- Rolling Pin
Instructions
-
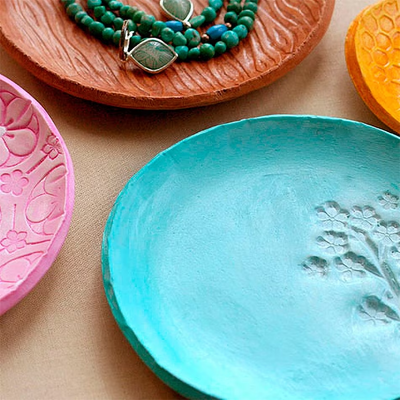
Using a clear plastic as base roll out the air dry clay. You could make the clay layer anywhere between 3 mm to 4 mm. If the layer is too thin it will tend to break easily and if it is thicker it will be harder to mold into shape. The magenta dish is 5 mm and that’s why you can see a bit of uneven molding, whereas the pink dish is 3.5 mm and has molded beautifully. The white dish is less than 3 mm and even though it has survived over a month of use, it does seem fragile. Also turn between the two sides while rolling out the clay to give both sides a even surface. Please read the instructions on the air dry clay packet very carefully. The air clay I used needed to be sealed properly between uses to retain it’s moisture (the same was also written on the packing of the clay).
-
Using the paper template and a steel scale cut out the geometric shape with a knife. While cutting try and maintain as much smoothness and evenness as possible. Minor unevenness can be sanded away after the custom jewelry dish is completely dry.
-
Next, place the plastic alphabets in the order you want. At this stage just lightly place it on the clay layer so that there are no impressions left. Once you are satisfied the placement- press them in.
-
There are 3 ways you can use the plastic alphabet to make an impression on the clay. First is debossing like I did, using the raised surface of the plastic alphabet make an impression into the clay. Next is embossing by pressing the hollow side of the plastic alphabet into the clay, this leaves you with not a complete emboss but an embossed impression by hollowing the outlines of the alphabet. The third style is to lightly press the hollow side into the clay and then using the back of the paintbrush to trace around the outline. You can try all three on a small piece of clay and choose what you like the best. I personally loved the debossing with the metallic paint. You can even completely use the back of a paintbrush or other stamping tools to create various textures and patterns in the clay. Using the back of the paintbrush I debossed the heart free-hand into the clay. If you do go wrong somewhere you can easily manipulate by using a super thin layer of clay onto the mistake and blending it into the original clay layer. The ease of making changes, while clay is wet, is the biggest pros of using clay for the custom jewelry dish.
-
Now you will have to mold the flat layer of clay into the desired vessel shape (3D shape). I used a glass plate for the magenta dish, a serving bowl for the pink trinket dish and a tea-cup saucer for the white dish. It is best to use either plastic or glass utensils because the clay comes of easily from them. Then let the custom jewelry dish dry completely. The instructions regarding drying time is given on the clay packaging. Once the upper surface was 80% dry I inverted the clay jewelry dish to dry out the other side. I had to leave each bowl overnight to dry.
-
When completely dry rub of the edges of the geometric jewelry dish with the sandpaper to smooth out the edges. Even at this stage I found the 3.5 mm pink jewelry dish to be easiest to handle as compared to the thinner white and thicker magenta jewelry dish.


