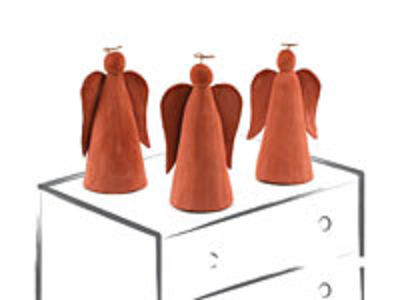
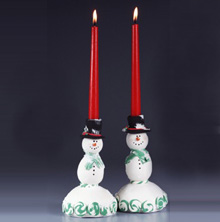
Winter Snowman Candleholders
Use these great Christmas snowman candleholders to help host your next holiday party. They'll light up the room and make everyone feel nice and cozy.
Materials:
- STYROFOAM™Brand Foam:
- Balls: 4", one; 1", two
- Eggs, 2-1/2", two
- Wooden items: candle cups, two; toothpicks, four
- White felt, 9" x 12" sheet
- Black acrylic paint
- Textured snow paint
- Air-dry modeling compound: white; red; green; black; orange
- Cosmetic blush
- Serrated knife
- Candle stub or paraffin
- Pencil
- Ruler
- Compass or 2" circle template
- Medium flat paintbrush
- Self-closing plastic bags
- Disposable palette
- Water basin
- Paper towels
- Rolling pin
- Waxed paper or pastry sheet
- Scissors
- Low-temp glue gun and glue sticks
- Thick, white craft glue
- Taper candles of choice
Steps:
- Wax serrated knife with candle stub or paraffin. Cut 4" foam ball in half to create candleholder bases. Note: From this point, candleholders are created in same way. Trace candleholder base onto white felt; cut out and set aside.
- Expose white modeling compound to air for five minutes prior to rolling to prevent cracking. Roll modeling compound to 1/8" thickness on waxed paper, turning over several times to prevent sticking.
- Drape modeling compound over rounded side of foam base, smoothing out air bubbles as needed. Mold compound around flat side of base; use scissors to trim excess. Gently roll base on hard surface to smooth compound.
- Repeat Steps 2 and 3 to cover foam ball head and foam egg body. Store any leftover modeling compound in plastic bag for future use.
- Insert one end of a toothpick into center top of candleholder base; press body onto opposite end. Remove foam shapes, dip toothpick ends in glue and replace. Repeat to attach head to body.
- Roll equal amounts of white and green modeling compound into two long thin ropes. Place ropes side by side on work surface and twist together. Refer to photo to wrap rope around bottom of snowman's body; trim excess and save for Step 7.
- To create candies, roll 6" lengths of leftover twisted rope into coin shapes. Press candies side by side along bottom edge of base. Reserve excess rope for Step 8.
- Roll length of twisted rope flat for scarf. Drape scarf around snowman's neck and use scissors to cut fringe into ends.
- In same way as white modeling compound, roll black modeling compound to 1/8" thickness on waxed paper. Drape modeling compound around outside of candle cup wrapping compound up over top edge. Cut a 2" circle from compound for hat brim and press candle cup on top. Gently press hat to top of head.
- Use fingertips to roll small, carrot-shaped nose from orange modeling compound; press to face. Roll narrow hat band from red modeling compound; press around hat. Roll tiny red berries and form small green holly leaves; press to hat band.
- Refer to photo and use paintbrush handle to add black dots for eyes, mouth and buttons. Paint inside of candle cup black. Use fingertip to apply blush to cheeks. Let dry overnight.
- Apply textured snow paint to hat, shoulders and along candy base. If any cracks appeared in modeling compound, cover with additional snow paint.
- Glue felt base to bottom of candleholder.
®™ Trademark of The Dow Chemical Company ("Dow") or an affiliated company of Dow. For more project ideas, please see styrofoamstyle.com.
Your Recently Viewed Projects


Thanks for your comment. Don't forget to share!
Sonflower
Jan 10, 2010
I really like this project. Even though the Holidays are over I have a number of friends that collect Snowmen. My granddaughter who is just 7 enjoyed doing these for friends and family members. Get project to work on when it snows!!!!
Report Inappropriate Comment
Are you sure you would like to report this comment? It will be flagged for our moderators to take action.
Thank you for taking the time to improve the content on our site.