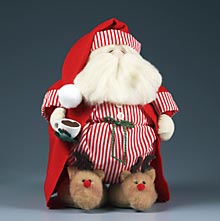
Sleepy Santa Decoration
Santa is so busy with all his deliveries he just can't get enough sleep. Help him out by giving him some cozy slippers and a cup of coffee. Using a lot of felt you can create this adorable sleepy Santa decoration.
Materials:
-
STYROFOAM* Brand Foam:
- Balls: 6", one; 3", two; 1-1/2", one
- Eggs, 3", two
- Red/white cotton fabric or flannel, 45" wide, 1/2 yd.
- Felt: 9" x 12" sheets: two off-white, four red, one dk. brown; 45" plush: 1/6 yd. tan, dk.
- green scrap
- Green cord or yarn, 1/2 yd.
- Pompoms: 1" white, one; (two) 1/2" red
- Natural wool doll hair, 1 yd.
- Black embroidery floss
- Black beads, 6mm, four
- White buttons, 1/2", two
- Miniature china teacup, 1" diameter
- Serrated knife
- Candle stub or paraffin
- Fine-line black permanent marker
- Pencil
- Ruler
- Compass
- Scissors
- Needles: sewing; embroidery, 3"-4" long
- Strong white thread
- Extra-long straight pins
- Low-temp glue gun and glue sticks
- Thick, white craft glue
- Powdered cosmetic blush (optional)
- Pattern
Instructions:
-
Wax serrated knife with candle stub or paraffin. Cut foam eggs in half lengthwise. Cut 1-1/2" and one 3" foam ball in half. Slice one-third from top of 6" foam ball; save both pieces. Press one side of remaining 3" foam ball against table to flatten slightly.
-
Place egg halves flat side down on felt as follows, then trace shapes 2" beyond foam edge: two red (arms); two tan plush (reindeer heads). Tracing shapes at foam edge, trace second pair of eggs on tan plush (backs of heads). Cut out all felt ovals.
-
Cut patterns from fabrics as indicated. Cut following, using compass to draw circles required: cotton fabric, one each 9" and 15" circles, 3" x 10" strip; off-white felt, two 4" and one 8" circle; tan plush, two each 3" and 6" circles.
-
To cover foam shapes, center shapes rounded side down on corresponding fabric pieces: bottom of 6" ball on 15" red/white circle (pants); top of 6" ball on 9" red/white circle (shirt); eggs on larger ovals cut in Step 2 (reindeer heads, Santa's arms); 3" ball on 8" off-white circle (Santa's head); 1-1/2" ball halves on 4" off-white circles (hands); 3" ball halves on 6" tan plush circles (slippers).
-
For each foam shape, bring felt or fabric edges up to flat side of shape. Pin at four opposite points. Adjust excess fabric between pins; glue to secure. Let dry. Note: Alternate method is to sew gathering stitch around each felt or fabric shape; pull stitches tight around foam shape, then knot and clip thread.
-
Remove pins. Glue backs to reindeer heads and 3" tan circles to bottoms of slippers; let dry.
-
Sew gathering stitch around Santa's nose. Pull stitches tight; knot and clip thread. Position flat edge of head to back. Glue nose to center of face. If desired, use finger or brush to blush cheeks.
-
Thread embroidery needle with three strands floss and secure at back of head. Bring needle through ball to front of face just above nose. Sew 1/2" slanted stitch for eye; repeat. Cut one 8" and two 7" lengths from doll hair. Bundle 7" lengths and tie center with thread; glue under nose. Glue 8" doll hair length around face.
-
With right sides of hat together, glue or sew long open edges together. Turn hat right side out. Fold 3" x 10" hatband in thirds lengthwise, right side out; glue around bottom edge of hat. Place hat on head with seam at back; glue to secure. Glue white pompom to tip.
-
Using photo as guide, glue pants and shirt together. Glue slippers to pants and head to body. Tie green cord into bow; glue bow and buttons to shirt and pants as shown.
-
If desired, blush reindeer cheeks. Use scissors to poke eyeholes. Glue beads into holes. Glue red pompom noses to faces. Glue two pieces together for each ear and antler; glue ears and antlers to heads. Glue heads to slippers.
-
Sew or glue two red felt sheets together along one 12" edge. Use scissors to gently round outside corners. Sew gathering stitch 2" from top long edge. Pull stitches tight to fit robe around neck; glue to secure. Spot glue tip of hat to robe.
-
Fold each cuff in thirds lengthwise, right side out; glue around wide end of each arm. Glue arms and hands to body as shown.
- Cut small circles from green plush and dk. brown felt. Glue green "saucer" to bottom and brown "coffee" to inside of teacup. Cut tiny holly leaves and berries from felt, if desired, and glue to teacup. Glue cup to one hand.
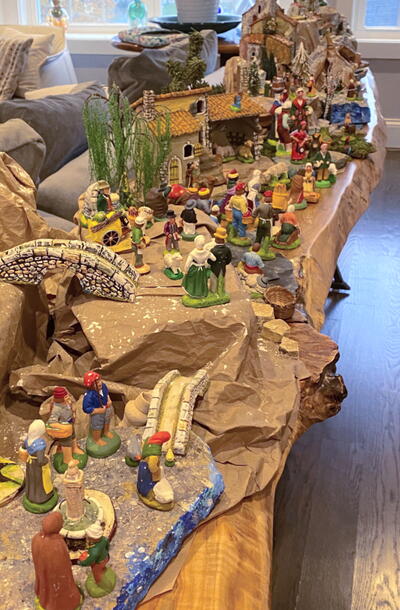
Read NextHow To Build A French Creche
Your Recently Viewed Projects
Thanks for your comment. Don't forget to share!
nevadatransplant 2 444856
Oct 03, 2011
Been a sewer for 40+ yrs & found this to be difficult .... their Instructions were hard to follow. I wound up making my "own" pattern using cloth doll & improvised along the way.
Report Inappropriate Comment
Are you sure you would like to report this comment? It will be flagged for our moderators to take action.
Thank you for taking the time to improve the content on our site.