Mini Quilt Christmas Decor
Create a nostalgic Christmas mini quilt with this pattern that uses applique techniques. It will brighten your home this holiday season.

Materials:
- Muslin and Various Scrap Prints. Cut as listed in instructions
- 9” X 11” Quilt Batting
- 9” X 16” Fabric for Backing and Hang Tabs
- Theresa’s Hand Dyed Buttons – Country Christmas or Traditional Christmas Mix B & 1 pack of Mixed Star Buttons
- Linen Thread - Hillcreek Design 40/2 weight
- Pigma Pen for drawing eyes on Santa
- White Crayola or Colored Pencil to draw Santa’s Eyebrows and Pink to blush his cheeks
- Fusible Webbing.
- Pattern
Instructions:
-
Using fabric scraps cut out the following blocks for the front of the small wall quilt.
-
(A) 3 1/2” x 3 1/2”
-
(B) 3 1/2” x 3 1/2”
-
(C) 2 3/4” x 6 1/2”
-
(D) 3 1/4” x 2 1/2”
-
(E) 3 1/4” x 4 1/2”
-
-
Cut out Fabric strips for border and Hang Tabs.
-
(4) 1 1/2” x 8 1/2” Border Strips. (use 4 different prints).
-
(2) 4 1/2” x 4” Hang Tabs.
-
-
Cut Backing and Batting 9” x 11”.
-
Check diagram for placement and assemble the left side of the quilt attaching block A to B. Then the right side, blocks D to E. Attach the left side A/B to block C and then the right side D/E to block C. The top should measure 6 1/2” x 8 1/2”. Press and trim edges if needed.
-
Attach top and bottom borders. Then sew border side strips to each side of quilt. Press and trim edges. The top should now measure 9” x 11”.
-
Trace appliques designs onto paper side of fusible webbing. Hint: tape the pattern onto a window or light box then trace. Be sure to trace from back side of pattern as the fused pieces will face the opposite direction they are drawn. - - - The smaller dashed lines indicate the part of the fabric which is under another design piece. Follow manufactures directions and fuse to fabrics then cut out.
-
Block A - Fuse Holly Leaves onto block as shown.
-
Block B - Fuse Santa into place as shown. Draw eyes with Pigma pen. Blush cheeks with Crayola or colored pencil and draw nose line. Use white to draw in eyebrows. Crayola may be heat set by placing scrap fabric over area drawn and press with dry iron for several seconds. The crayon or pencil should melt into the fabric. You may want to practice this on a separate fabric swatch before actually using it on your quilt.
-
Block C - Fuse Christmas Tree into place.
-
Block D – Fuse Cardinal as shown. To make the sculptured wing, simply fuse the wing fabric onto a piece of quilt batting. Cut the shape out, stitch a pleat near the center shoulder of the wing. Attach this to the quilt when adding details to the blocks. (See A).
-
Block E - Fuse Candle.
-
Place batting behind quilt, pin in place. Stitch around quilt blocks with running stitch and 40/2 Linen Thread. Then stitch details as indicated on pattern.
-
Make sculptured mustache for Santa. Fuse the fabric mustache onto a scrap of quilt batting, then cut out the shape. At the center of the mustache, take a stitch then wrap the linen thread around the center of the mustache. You should have a crease on each side of the mustache. (See B). Stitch onto Santa’s face. Watch placement as you will want to see the nose and blushed cheeks on your Santa.
-
Sculptured Hat, add quilt batting over the already fused hat pieces. They will be cut out the same as the fabric pieces already fused to the quilt. Stitch into place as shown on the pattern with linen thread.
-
Sew buttons on to inner quilt blocks A,B,C & D. The outer buttons will be attached after the quilt is completely assembled.
-
Trim edges of batting to match the quilt top.
-
Hang Tabs - With right sides together sew 1/4” seams down sides of tabs forming a tube (2” x 4”). Turn right side out and press. Fold in half to form the tab, Place tabs 1/2” from outer edge and sew in place.
-
Then place quilt backing right sides together and stitch 1/4” from edge all the way around the quilt leaving a 3” opening for turning. Turn and press.
-
With linen thread, stitch all the way around the mini quilt using a 1/4” running stitch. Sew buttons onto hang tabs & outer corners. Note: Try tying the buttons onto your quilt while leaving a knot and the 1/2” ends of the tie on the front side of the button.
-
Hang from an 11” wire quilt hanger or cinnamon stick.
Crafter's Note: This pattern would make a great T-shirt or Sweatshirt block. Fuse it onto a shirt and embellish the corners with buttons. Or add button holes to the quilt and button it on and off a jumper or jacket!
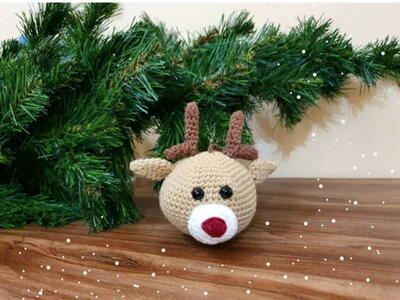
Read NextCrochet Reindeer
Your Recently Viewed Projects


Thanks for your comment. Don't forget to share!
SissieSass
Dec 14, 2016
I love the idea of turning this quilt into a sweatshirt design. It would be a neat gift idea to give away to warm everyone on Christmas Eve or throughout the holiday season. I can think of several people who would love the sweatshirt. Do you happen to have a photo of it?
Report Inappropriate Comment
Are you sure you would like to report this comment? It will be flagged for our moderators to take action.
Thank you for taking the time to improve the content on our site.