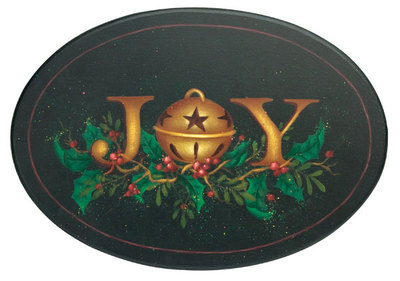
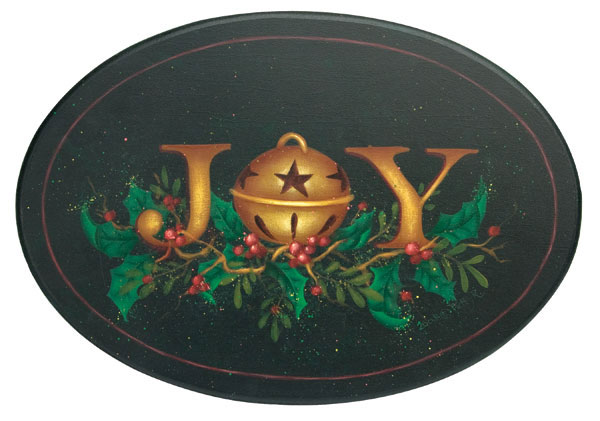
Jingle Joy Plaque
A "Joy" plaque painted with acrylic paints will bring handmade cheer to your home or perhaps a gift recipient's.
DecoArt Products
Americana Acrylics
- DAO6 - Pineapple
- DAO18 - Country Red
- DAO53 - Mistletoe
- DAO67 - Lamp (Ebony) Black
- DAO93 - Raw Sienna
- DA128 - Deep Burgundy
- DA133 - Hauser Dark Green
- DA147 - Antique Green
- DA157 - Black Green
- DA160 - Antique Maroon
- DA163 - Honey Brown
- DA174 - Milk Chocolate
- DA194 - Marigold
- DA251 - Melon
- DA254 - Avocado Dip
Multi-Purpose Sealer
- DS17 - Multi-Purpose Sealer
DuraClear Varnishes
- DS60 - DuraClear Matte Varnish
Supplies:
- #8, #12 Royal Fusion Shader #3180
- #1 Royal Aqualon Liner series 2595
- 1/2 Fusion Comb series R3730 (Spatters)
- #8 Royal Majestic 3170 Filbert (Drybrushing)
- Small and medium Crescent Stencil brushes R1114 (Dryrubbing)
- 5" foam roller
- Extra fine grit sandpaper
- Compass
- Water container
- Disposable palette pad
- Paper towels
- Tracing paper
- Transfer paper
- Stylus
- 16" oval available from www.patriciarawlinson.com
- Pattern 1
- Pattern 2
Steps:
- Preparation- Sand oval with extra fine sandpaper. Use paper towel to remove dust. Roll on one coat of Black Green mixed 50/50 with Multi-Purpose Sealer; let dry. When dry, repeat with Black Green only. Moisten paper towel and crumple; pat towel into Hauser Dark Green and pat onto palette pad. Stipple this color onto wet background. (Wet on wet technique will allow colors to soften each other.) Let dry completely. Trace design onto tracing paper. Transfer outlines of branches and letters, omitting bell details at this point. Trace on further details as they are called for.
- Branches- Basecoat branches Milk Chocolate; shade on each side of top branches where they cross with 1:1 mix of Antique Maroon and Milk Chocolate. Drybrush highlights with Raw Sienna; repeat with less coverage of Honey Brown, and finally with highlights of Marigold.
- Basecoat letters Milk Chocolate; drybrush with Raw Sienna. Repeat, covering less area with Honey Brown and then again, covering less area with Marigold. Shade letter tops and bottoms with Antique Maroon. Paint line on left side of letters with Antique Maroon.
- Basecoat bell with Milk Chocolate. Shade with Antique Maroon under band on bell, on each side of bell, and under bell hanger. Dryrub Raw Sienna highlights; strengthen with Honey Brown. Drybrush on final highlights of Marigold and then finally Pineapple. (This color is final pop to make bell center of attention.) Basecoat star cutouts with Antique Maroon; drybrush Lamp Black to deepen this area. Base/stroke with 1:1 mix of Antique Green and Hauser Dark Green; drybrush highlights with Avocado Dip.
- Holly- Base with Mistletoe; shade with Hauser Dark Green at back of each leaf, veins, and flips. Dryrub highlights with Mistletoe and touch of Pineapple.
- Berries- Base with Deep Burgundy; dryrub highlights with Country Red. Repeat with Melon. If needed, add sparkle with Pineapple.
- Oval Band- Set compass to width of band and run sharp point along edge of piece, allowing pencil tip mark band. Line band with thinned Deep Burgundy; highlight band with Country Red and finally, Melon.
- Spattering- Spattering is done with thinned paint (80 percent water). (The more water, the bigger the spatter.) I use filbert comb/rake and fully load it in thinned paint. (Always tap off excess onto palette.) To keep spatters from snowing all over painting, anchor large, handled brush near area to be spattered and tap smartly. Spatters will fall right where you want them. Spatter on greens and leaf edges with thinned Mistletoe; repeat with Avocado Dip. Spatter berries with thinned Melon.
- Finishing-Let dry completely. Apply multiple coats of DuraClear Matte Varnish and let dry.
Techniques:
- Dryrubbing- I use a Royal Crescent Stencil Brush for this technique. These must be dry for this technique to work. Load some paint on tip of brush and rub off paint firmly onto paper towel. (It will look like there is no paint left on brush.) Start rubbing in center of area that is to be drybrushed. (This area will be darkest oar most strongly colored.) Hold brush at 90 angle and rub with fairly firm pressure with shape following rubbing. (This will look like it is not doing anything at first, but continue rubbing and a very soft color will appear.) There will be some dust that appears; just brush this off. Do not change colors or use water floating on an area that you just brushed as t needs some bonding time. Or use hair dryer to set it.
- Drybrushing- This technique uses textured background, usually applied with foam roller, and dark background as deepest shadow color. Each subsequent color used will be lighter. With each layer of lighter color, you will cover less and less area to achieve gradual increase in value, ending at the brightest point in the subject. (In essence, this is like applying a series of highlights.) Use photo as placement guide for highlight areas. You will move from color to color with dirty brush, thus eliminating any big jumps in color. If your brush dries out, wash it and re-dirty it in proceeding sequence color. You can convert traditional patterns into dry brush pattern by using dark background or basing sections of pattern in their darkest color and applying colors in order by their value, from darkest to lightest.
Drybrushing is done with stiff filbert brush. To load brush:
- Rinse brush and blot it dry. (Damp brush is okay.)
- Set brush in edge of paint and pull out from pile, flattening brush in paint.
- Dust tip of brush onto paper towel (only tip).
- Begin stroking color starting at place where color is brightest or strongest. With shape following strokes, use light pressure and continue to skim colors over surface. (This is where texture comes in handy, as paint will catch on raised areas.)
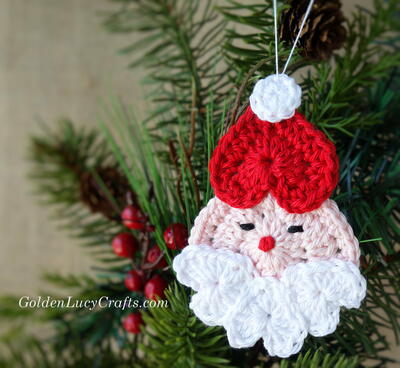
Read NextCrochet Heart Santa Ornament