Christmas in July DIY Card
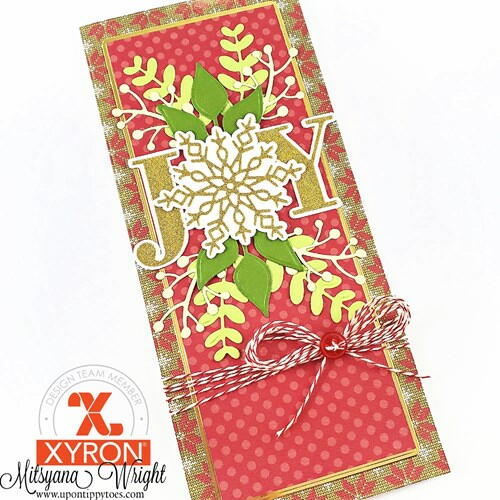
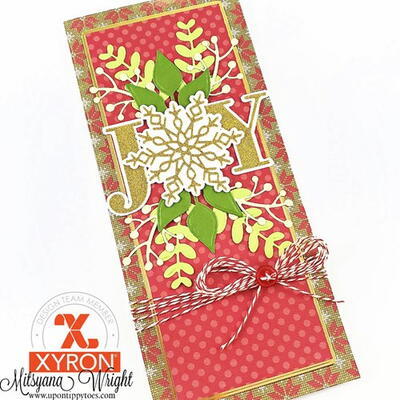
Personalize your holiday cards by making your own this year. Using Xyron Holiday Gift Wrap, Foliage Die Sets and other paper crafting materials, you can make the prettiest card out there.
PLUS Enter to win the Xyron Holiday Gift Wrap Bundle Giveaway as part of our 12 Days of Christmas in July giveaways as well as our 12 Days Grand Prize!
Materials List
- Xyron® Holiday Gift Wrap Bundle
- Maker's Movement® - Winter Foliage Die Set
- Maker's Movement® - Foliage Die Set
- Sizzix® Big Shot
- Authentique™ - Christmas Greetings Collection
- Recollections™- Forest Cardstock
- Accent® 120 lb White Cardstock
- Crafter's Companion- Luxury Cardstock Gold
- Red & White Baker's Twine
- Red Button
- Paper Trimmer
- Pencil
- Scissor
Directions:
-
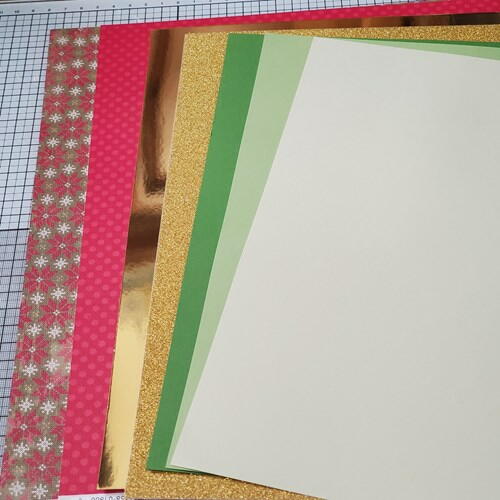
Gather your supplies.
-
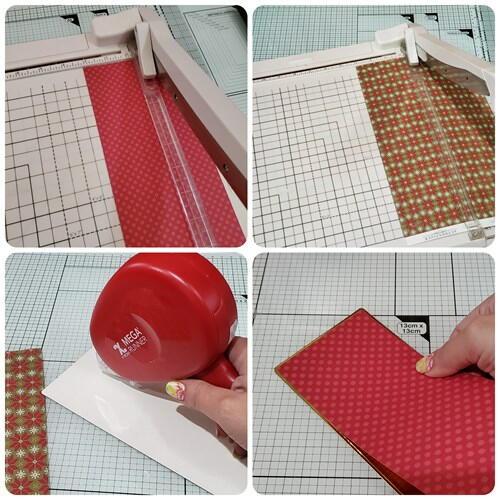
Trim white cardstock to measure 8" × 9". Fold the paper in half to create a 4" × 9" slimline card base.
-
Trim Poinsettia paper to measure 4" × 9", gold foil paper to 3-1/2" × 8-1/2", and polka dot paper to 3-1/8" × 8-1/16".
-
Layer and adhere the poinsettia papers onto the slimline card base using a Xyron® Mega Runner. Then adhere the polka dot paper onto the gold foiled cardstock. Keep these two separate for now.
-
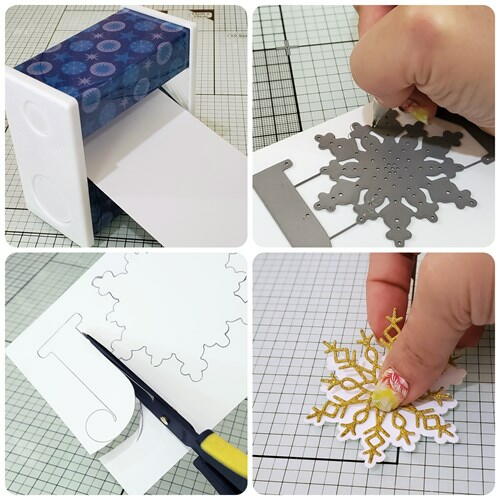
Trim the Gold Glitter cardstock down to 3" × 5" and run it through the Xyron 3" Sticker Maker.
-
Die cut the JOY die set out of the adhesive-backed gold glitter cardstock using a Big Shot machine.
-
Run a 3" × 5" piece of white cardstock through the Xyron 3" Sticker Maker.
-
Use the JOY word dies and a pencil to trace around the die onto the white cardstock to create a shadow.
-
Cut out the shadow layer using scissors.
-
Adhere gold glitter die-cuts onto their white cardstock shadow layer.
-
Trim down multiple Greens and white cardstock into 3 inch wide strips and run them through the Sticker Maker.
-
Die-cut foliage from the green and white cardstock papers.
-
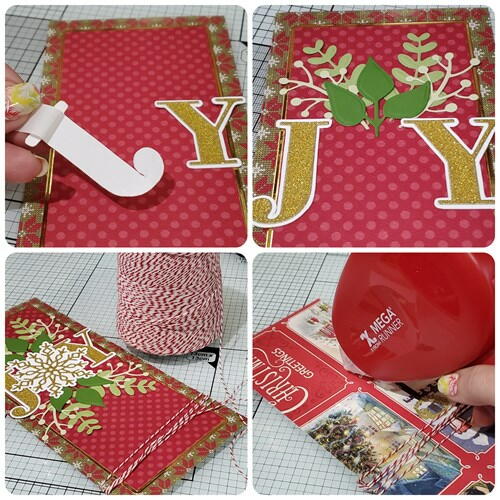
Adhere the J & Y of the JOY die cuts onto the card front.
-
Arrange half your foliage die-cuts above the J & Y. Repeat below the letters as well.
-
Adhere the snowflake in the center to cover the stems of the foliage pieces.
-
Wrap Twine around the bottom portion of the card front and add a button topped bow.
-
Finally, adhere card front onto card base using the Xyron Mega Runner.
Read NextOld Fashioned Merry Christmas Card

