Candle Pedestals Faux Carved
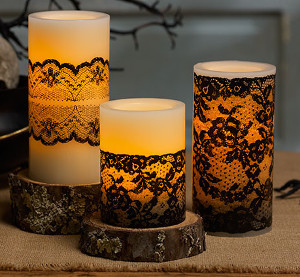
Koren Russell shows us how to make these beautiful candle pedestals in only 14 steps. Not only will it make your house feel warm and comfy but it can also be used for a wedding gift.

Materials:
- STYROFOAM Brand Foam:
- Ball, 4"
- Block, 12" x 12" x 1/2"
- Egg, 6"
- Acrylic paints: black; dk. brown; brick red; green; dk. golden brown
- Air-dry modeling compound, 8 oz. package
- Fishing weights, BBs, or other weighting material
- Serrated knife
- Candle stub or paraffin
- Fine-line black permanent marker
- Pencil
- Ruler
- Compass
- Large rubber bands, four
- Metal tablespoon
- Medium flat paintbrush
- Disposable palette
- Water basin
- Paper towels
- Waxed paper
- Scissors
- Fine-grit sandpaper
- Low-temp glue gun and glue sticks
- Thick, white craft glue
- Pillar candles, 3" x 4", two
- Optional: Clay tools
Steps:
- Cover work surface with waxed paper.
- Use compass and marker to draw four 3-5/8" and four 4" circles onto foam block. Wax serrated knife with candle stub or paraffin; cut out circles. Sand edges with scrap foam.
- Center and glue one 3-5/8" foam circle to each 4" circle. Set aside to dry.
- Cut 5/8" slices from top and bottom of foam ball, being sure cuts are parallel. Sand edges with scrap foam. Repeat for foam egg, removing 1-1/4" from narrow end and 1/2" from wide end of egg.
- Place all four rubber bands around foam ball, dividing surface into vertical eighths. Use pencil to score line at left side of each rubber band. Remove rubber bands.
- Use clay tool or spoon handle to enlarge scored lines into v-shaped grooves, 1/2" wide and 3/16" deep at center. Groove edges should be smooth and rounded; remove loose particles with finger.
- Push pencil through center of ball from one flat side to the other. Use knife to enlarge hole to 1" width; remove foam core from ball.
- Repeat Steps 5 and 6 for foam egg. Instead of making center hole in egg, carve 1-1/2" deep hole into each end.
- Glue one side of ball to one set of foam circles assembled in Step 3; smaller circle should be next to ball. Let dry. Tightly pack hole with weighting material of choice. Glue second foam circle to top of ball, again with smaller circle next to ball. Let dry.
- Tightly pack hole in top of egg with weighting material. Glue foam circle to top in same way as ball. Carefully flip egg over and repeat for base of egg. Let dry.
- Press small amount of modeling compound against ball pedestal. Use thumb to press it into and across foam surface, forming thin layer. Continue to cover entire pedestal. Dip fingers in water, or use clay tools, to smooth compound. Let dry completely.
- Repeat Step 11 for egg pedestal.
- Sand rough or raised areas. Wipe dust with damp paper towel. Surface need not be perfect.
- Paint both pedestals black; let dry. Dry brush pedestals, applying color layers as follows: dk. brown; brick red; green; dk. golden brown. To dry brush, dip damp brush into small amount of paint, then wipe against paper towel to remove excess paint. Using just tip of brush, lightly and randomly brush color across surface. Repeat colors as desired.
®™ Trademark of The Dow Chemical Company ("Dow") or an affiliated company of Dow. For more project ideas, please see styrofoamstyle.com.

