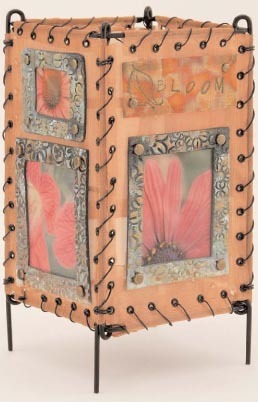
Fresh Flower Candle Screen
Create a decorative floral candle screen using wire mesh, metal stamp art and rub n' buff, from AMACO.

Materials:
- AMACO® AMACO® WireFrame™ - Square
- AMACO® WireMesh® - Copper
- AMACO® Fun Wire™ - 18 Gauge, Black
- AMACO® FIMO® Liquid Decorating Gel
- AMACO® FIMO® Soft - Black
- AMACO® Rub ‘n Buff® Antique White, Turquoise, Patina, Spanish Copper, Antique Gold
- AMACO® Metal Stamp Art Ink Pad - Teal
- 5 photos of flowers
- Matte photo paper
- Inkjet printer
- Bowl of warm water
- 140 black eyelets
- 22 gold brads
- Black permanent marker
- Rubberstamps (leaf & letters to spell "BLOOM")
- Gold embossing powder
- Heat gun
- Eyelet setter
- Scissors
- Ruler
- AMACO® PolyBlade
- AMACO® PolyRoller or Pasta Machine
- Floral texture sheet or rubber stamp
- Spray bottle with water
- Super glue
- Oven
- Tea light
Instructions:
- Cut the WireMesh® pieces to enclose your frame. You need 1 piece for the bottom, 3 for the front and sides, and 1 for the back. The back piece will need a 2" gap at the bottom of the mesh to insert the tea light. Measure each area between the frame’s black rods to get the correct size. For example: The opening for front and sides will be approx. 33/4" wide by 73/4" tall, but measure it yourself to be sure. Make sure you cut each piece of mesh 1/2" bigger on all sides so you can fold the raw edge under before you attached the eyelets.
- Attach the eyelets to the WireMesh®. On the 3 pieces of mesh for the front and sides, I used 5 eyelets along the top and bottom, and 10 on the sides. Use a permanent marker to put dots where each eyelets will go. The bottom piece has 5 eyelets on all four sides. The backside mesh needs 5 eyelets at the top and 7 down each side. I didn’t use any along the bottom. Use your eyelet setter to secure the eyelets to the mesh.
- Attach the WireMesh® to the WireFrame™. Using the black FunWire™, wire wrap the taller (vertical) edges of the front, back and 2 side pieces of the mesh to the frame. To secure the wire ends, start and finish with a double loop of wire around the frame. Be sure to pull the wire snug and trim off any excess. Next, going around the top of the frame, wrap the wire through the eyelets on all four sides. Now you can attach the bottom mesh. You will be feeding the wire through the eyelets in the bottom mesh piece and the eyelets along the lower edge of the side pieces, wrapping it around the metal frame as you go.
- Create the Flower Transfers. Print 5 different pictures of flowers onto matte photo paper using an inkjet printer. (I used pictures I took in my garden.) Spread a very thin layer of FIMO® Liquid Decorating Gel over the pictures and bake for 5 minutes in oven at 275ºF and let cool. Brush on second layer of FIMO® Liquid and bake again. Cut the pictures apart and soak them in bowl of warm water for 10 minutes. Gently rub all the paper off the back of the clay transfers. I find keeping it damp and rubbing in small circles works best. Set the transfers aside for now.
- Make the Clay Picture Frames. Condition the Black clay. Roll it out to a thickness of approximately 1/16". Spray the surface of the clay with water and press the floral texture sheet (or rubberstamp) into the clay. Press firmly with your fingers or a clay roller to capture all of the design. The size of the frames can be cut to whatever size works for your pictures, though you do want them to be at least 1/2" wide. Before you bake the frames, use one of your brads to make holes through the clay. Center those holes at the four corners of all the frames. These holes will be important later when you secure the frames to the mesh. Bake the clay frames for 15 minutes at 275ºF. Once the clay is cool, embellish it with Rub ‘n Buff®. Put a bit on the tip of your finger, then randomly dab and rub it onto the surface of the clay. Try not to get the color down into the indentations of the stamped floral design. Keep layering the colors until you have something that is pleasing to the eye.
- Attach the Transfers to the Picture Frames. Using the super glue, attach the flower transfers to the clay frames. Keep them pulled tight as they dry for the best results.
- Embellish the Banner. Cut a piece of WireMesh® approx. 33/4" by 21/2". Fold raw edges under 1/4" on all sides. If you wish, use the heat gun to heat up the mesh. It will affect the color of the copper and create some very interesting designs. If you do this, let it cool before going onto the next step. Working quickly, ink up your leaf stamp and your letters to spell “BLOOM” with the Metal Stamp Art Ink Pad and press them onto the banner. Sprinkle the embossing powder over the top and shake off the excess. Use the heat gun to melt the powder.
- Attach the Embellishments to the Mesh Screen. Push the tabs of the brads through the holes you made in the clay frames and also the banner (I only used 2 brads for the banner). Decide where you want the clay frames and banner to attach. Push the brads through the mesh. Open the tabs on the brads and press them flat to secure the embellishments in place.
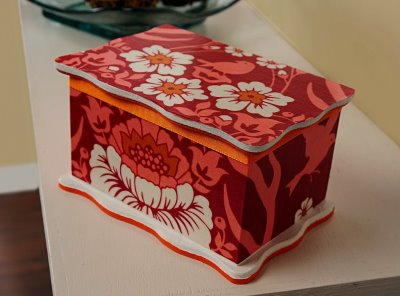
Read NextFabric Floral Trinket Box