Autumn Hue Collage
The colors and icons of fall come to live in this beautiful Autumn Hue Collage. Decorated with a variety of colorful papers, shapes, and embellishments, this DIY collage is a great way to get your home ready for the fall season. You could even use these instructions to make a similar collage for spring and winter as well. Turn it into a calendar, a unique family tree, or fill it with a combination of quotes and photos to remember a wedding, graduation, or vacation with the family.

Materials:
- 10 inch x 10 inch canvas
- Large frame with an opening that is at least 10.5 inches wide and tall
- Fabrics to cover the canvas and frame backing
- Variety of patterned papers in fall colors
- Odds and ends such as buttons, snaps, and pins
- My Funny Valentine Squeeze Punch (Extra-Large)
- My Funny Valentine Squeeze Punch (Large)
- Seal of Approval Squeeze Punch (Large)
- Square-A-Licious Squeeze Punch (Extra-Large)
- Cutting Mat (18" x 24")
- Ergo Control Rotary Cutter (45 mm)
Instructions:
-
The base of my collage is an 10 inch x 10 inch canvas. I decided that, rather than painting it, I would cover it with fabric. This was a quick, easy process using the Fiskars 12.5 Inch Square Acrylic Ruler. It allowed me to cut a perfectly sized square of fabric to wrap around the 10 inch canvas without the need for measuring.

-
I first used the ruler and the 45 mm Comfort Grip Rotary Cutter to cut a piece of iron-on fusible web.

-
Following the very simple directions that come with the fusible web, I adhered it to some muslin fabric. I then placed the 12.5 Inch Square Ruler over the fused web and used the rotary cutter to cut out square from the fabric.

-
Next, the paper backing was peeled from the fusible web.

-
Then it was ironed to the front side of the canvas.

-
I finished by wrapping the edges of the fabric around the canvas to the back side and stapling them down to the wood frame.

-
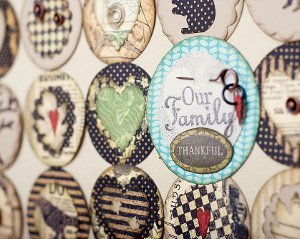
To create the collage, I punched 24 circles from the Graphic 45 patterned papers and some neutral cardstock. After inking the edges of all the circles to give them an aged look, the circles were glued to the fabric covering of the canvas.
-
I continued punching patterned paper shapes using a variety of other Fiskars Squeeze Punches, inked the edges of them all, and began layering them on the circles. In the opening where the 25th circle would go, I adhered a slightly larger circle cut from Bella Blvd's Tail Waggers and Cat Naps line of papers. And creating a tiny collage on it to remind us all to be thankful for family. I added some buttons, small punched shapes, and small metal snaps throughout the collage to finish the design.
-
Finally, I covered a thin board slightly smaller than my frame opening in some burlap and a coordinating plaid fabric before mounting my canvas to it. The canvas can be adhered with a strong liquid adhesive or you can attach it using velcro.
-
And you can see that a simple design comprised of 25 circles can be transformed into a rich, textured piece of fall decor by layering bits and pieces top of them. One large collage made from 25 tiny collages!

- Thank you to Graphic 45 and Bella Blvd who provided all of the patterned papers used to create this collage.
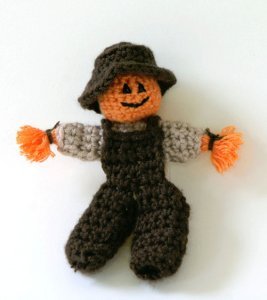
Read NextCrochet Scarecrow Finger Puppet