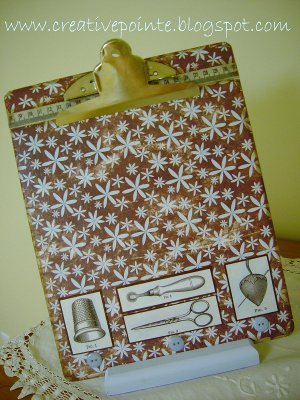
Decorative Clipboard
Make this Decorative Clipboard for your favorite teacher or coach! This clipboard project can be customized so you can decorate it however you'd like! This is an easy and fun project for kids to do with their parents.
Materials:
- Wooden Clipboard--9.25" x 11.75"
- Base (optional)--4" x 6" x 3/4"
- 12 x 12 sheet of scrapbook paper
- Acrylic paint
- Multi-Medium and/or glue
- Brush and/or foam brush
- Craft knife
- Vintage images and/or other embellishments
- Ruler
- Sanding block
- Spray fixative (if using printed images and/or Distress Inks)
- Distress Inks & Waterbrush (optional)
- Ribbon--9.5" length
- ModPodge
- Acrylic varnish (optional)
Instructions:
- Using your choice of brush, paint the sides and back of the clipboard with acrylic paint. If you have a base, paint it in the same or coordinating color.
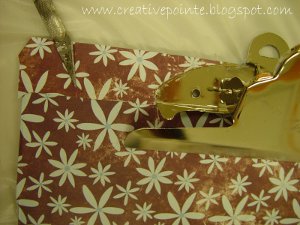
- Trim your paper to just a little bit past the clipboard, lining up the paper under the clip as far as it will go. Don't worry about cutting out around the clip base just yet. Make sure the top of the paper is lined up straight and butted against the metal portion under the clip.
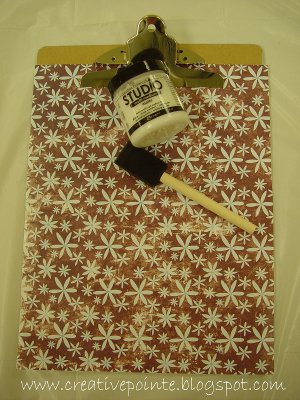
- Using a brush, apply a thin layer of Multi-Medium or glue to the front wood surface of the clip board. Starting at the top and making sure the paper is straight and butted up against the metal piece under the clip, smooth paper down onto the medium or glue. Check to make sure that there are no bubbles. I used a brayer to make sure that the paper was down smoothly. Wipe any excess glue that squeezes out off of the edges.
- Take a piece of the same scrapbook paper you trimmed previously and with the straight edge, butt it up to the top of the piece already adhered. Don't worry about matching up the design. Using a pencil, draw around the metal clip portion for a cutting guide. Cut out marked portion and then adhere to the front of clipboard the same way as the larger piece.
- Once all the medium or glue has dried, turn the clipboard over and using a craft knife, trim away the paper that extends past the edges.
- Using a sanding block, lightly sand the edges of the clipboard so that they are smooth with no extra paper extending.
- Now it's time to decorate the clipboard. Keep in mind that if you want to use the clipboard to actually write on, don't add any raised embellishments.
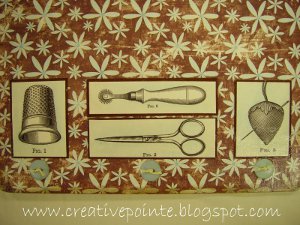
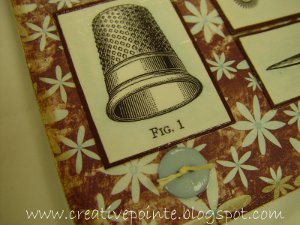
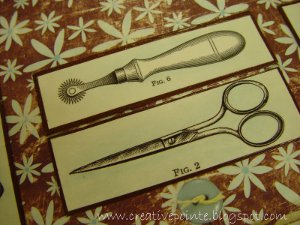
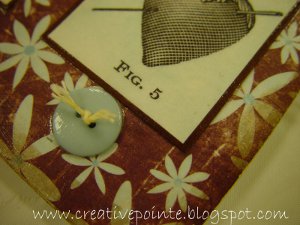
- I found vintage sewing art and printed them in black and white on white cardstock. I then sprayed the images with fixative and used Distress Ink and a waterpen to add the blue coloring. I mounted these onto brown cardstock and glued them to the clipboard. Buttons were added with glue below the artwork.
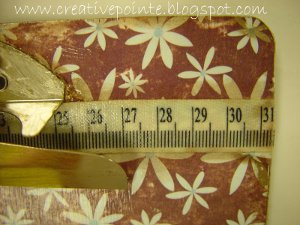
- To hide the paper seam at the top of the clipboard, I took measuring tape ribbon and glued it over the seams right under the clip.
- I also used Distress Ink to color the ribbon and shade the clipboard sides. I resprayed the entire piece with fixative to set the DI.
- Finally, I applied six coats of ModPodge to the front of the clipboard. I used acrylic varnish to finish the clipboard back and sides andthe base. You could also use ModPodge if you like.
Read NextAltered Book Tips and Inspiration
Your Recently Viewed Projects

Thanks for your comment. Don't forget to share!
princess6860504
Jan 14, 2018
Boy, she sure gives us quite a detailed step by step for this crafting project. She wants to make sure that she's fully explained it and has left no stone unturned. If I wrote it, it would not look like that! I am loving the vintage sewing motif she chose. Wouldn't this be great to just hang as wall art in your sewing room?
Weberme
Aug 10, 2016
This decorative clipboard is such a great idea to make it look special and it is so easy that even a kid can do it. These would be great for a collage student or teacher or even for yourself. With just some cardstock and some embellishments and mod podge you can create something so beautiful. What a super great teacher gift or even a gift for that special someone to make their day. Anyone make any?
Report Inappropriate Comment
Are you sure you would like to report this comment? It will be flagged for our moderators to take action.
Thank you for taking the time to improve the content on our site.