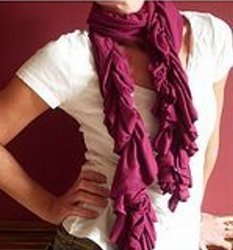
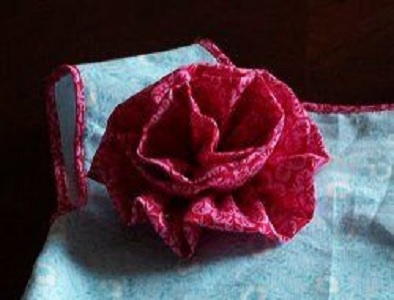
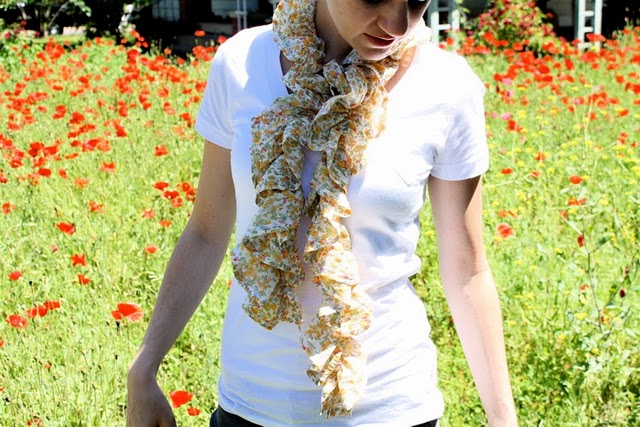
Summer Scarf: Version 1
Make a light-weight summer scarf in cotton, sear sucker or linen fabric for the warm, summer months. Make a scarf bursting with ruffles with this scarf sewing tutorial from Dana Willard.
See this project and more at Fall Fashion Help: 16 DIY Fall Fashion Trends!
Materials:
- 1/2 yard of very light-weight cotton, seersucker, knit or linen; fabrics that seem to "breathe" and will give your scarf a bounce. (If you use knit, you don't need to do anything to the edges. Just leave them raw. Your project time just got cut in half!)
- Sewing Machine
- Elastic Thread
Instructions:
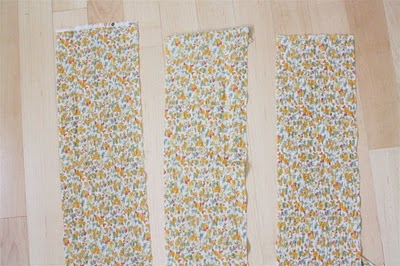
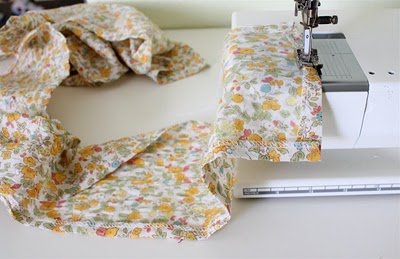
- Cut strips of fabric so that you end up with one long strip that's about 125 x 6 inches (318 x 15 cm). I cut out three long strips and sewed them together on the ends.
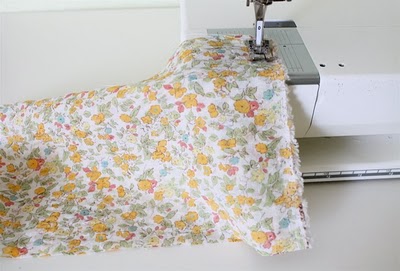
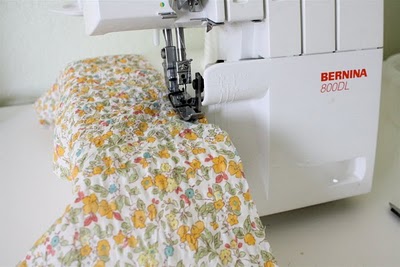
- Serge all the way around the outside of your entire scarf, ends and sides. If you don't have a serger or if you want a more polished look, you don't need to serge. Instead, iron all the sides over about 1/4 or 1/2 an inch and then skip to the next step.
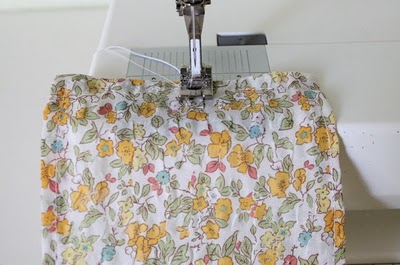
- Iron over all the edges of your scarf about a 1/2 inch.
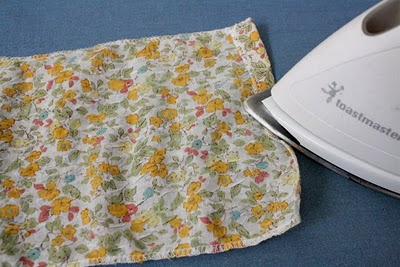
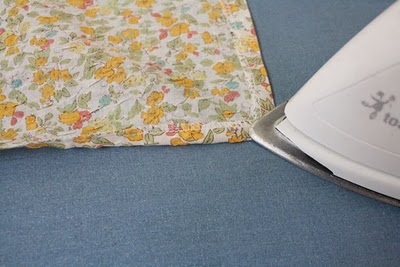
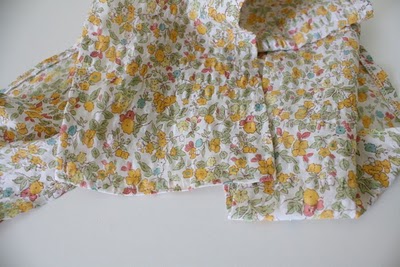
It should look something like this.
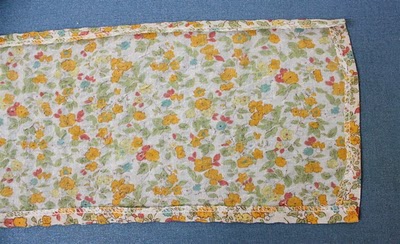
- Sew this "hem" down, all the way around the scarf.
Here's your scarf, ready to be ruffled.
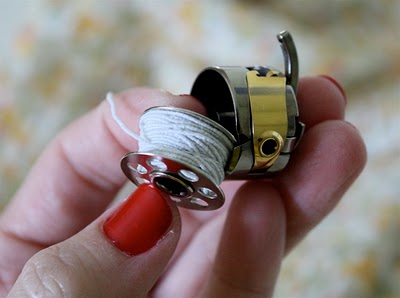
5. To get the ruffle, we're using Elastic Thread. Simple!
NOTE: IF THE ELASTIC THREAD is NOT gathering up on your scarf, a few things you can try:
- Spray your scarf with water and ironing. This usually does the trick.
- You may need to adjust your bobbin tension(esp if you have a BROTHER machine).
- You can make a scarf without using Elastic Thread. See the Summer Scarf, Version 2.
You can Elastic Thread at most sewing stores in the notions area, or online (about $2). For very detailed info on sewing with Elastic Thread, please see our Summer Vacation Dress and Shortie Pattern. But this tutorial should tell you all you need to know for your scarf.
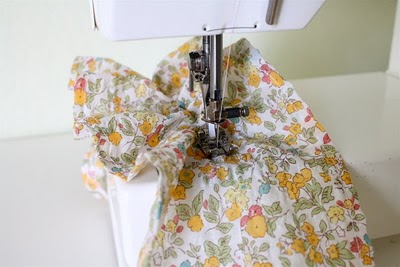
- Okay, so wind the elastic thread around your bobbin. Not too tight, not too loose, just somewhere in the middle. And load it into your machine.
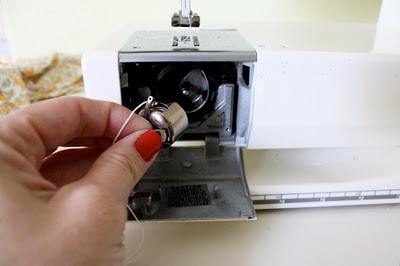
- With normal thread on the top of your machine, you're ready to gather. Start in the middle of your scarf (make sure you are sewing on the TOP of your scarf, the nicer looking part). Do a stay stitch (back and forth stitch at the beginning). And just start sewing down in a straight-ish line. Don't worry about drawing a line on your scarf. Just eyeball it. It's going to be all gathered up and ruffled when you're done, so if you're a little off, no one will know.
- Watch the fabric gather up behind you. I love it every time!
- Continue to the end and do another stay stitch.
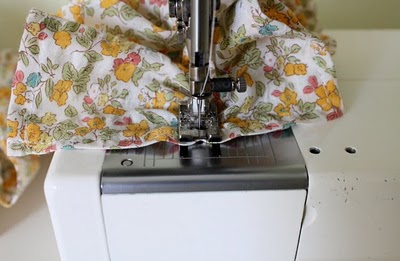
- Then, repeat this one more time, doing another line of elastic thread about 1/4 inch or 1/2 inch from the first line. Don't worry if it's not completely centered on your scarf.

- And voila, you're done! Okay, tie it around your neck! (no special method here, just one simple tie, like you're getting ready to tie shoelaces).

You can add more or less lines if you'd like. Here are my observations after making 2 scarves :
- Why not just sew ONE line of Elastic Thread? I found that doing one line felt too weak, like it was going to snap. Two gave it more strength.
- I also tried it with multiple lines which spread further out on the scarf but it's a totally different look. It won't ruffle and twist as it does in the photos here. It will lay more flat and look like a shirred scarf.
Read NextHomemade Jar Opener From Jeans
Your Recently Viewed Projects

Thanks for your comment. Don't forget to share!
Weberme
Nov 25, 2016
This is such a super cute summer scarf. I love the shirred look but I have always been wary of using the elastic thread because the one time I did it got caught in my machine but that was because I used my bobbin winder to do the bobbin and found out to do it by hand it works best. I am going to make some of these for sure for my grand daughter and maybe some others. This is a great tutorial with pictures that show the steps very well. This is a must read for anyone wanting to make that super easy pretty scarf.
wrencottage1 43971 45
Sep 02, 2014
Have always been a bit wary of using elastic thread. But I took the plunge last evening and made a really pretty scarf with some light cotton printed fabric that I've had for at least 25 years! Your instructions are perfect and the scarf looks great - thank you! Now going to make more for friends and also look for other projects using shirring. Inspired!
ltfulton 4217401
May 05, 2014
Thank you for this. I have wanted to do this for ages, and you have made it easy. xx
MissMaggie
Jul 25, 2011
Hi mysterysinc, Unfortunately we do not have all of Dana Willard's patterns on the site yet. To view all her work, please click on her name in the introduction. There you will find links to her personal blog. Thank you! -Editors of FaveCrafts
mysterysinc
Jul 24, 2011
In the above tutorial, you mention a summer vacation dress, but I cannot locate it. Can you point me in the right direction. This tut is what comes up when I do a search.
The Naptime Crafte r
Mar 21, 2011
I love this! Made two last evening in no time and they are SO cute!
StitchnStudio
Jun 29, 2010
Oh... this is so cute. I cant wait to try the elastic with my machine. Thanks for sharing.
mychompers
Jun 09, 2010
How can I do this free hand, without a machine? mychompers@hotmail.com
SherryMarlene12
Jun 09, 2010
Cool! You can also use that elastic on ruffles on blouses and dress ruffles. Sherry Ascough
Report Inappropriate Comment
Are you sure you would like to report this comment? It will be flagged for our moderators to take action.
Thank you for taking the time to improve the content on our site.