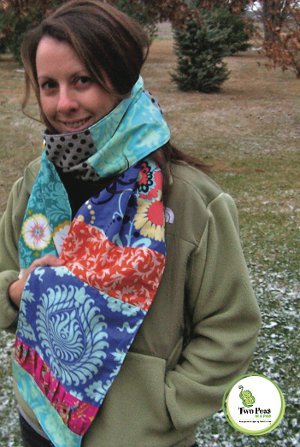
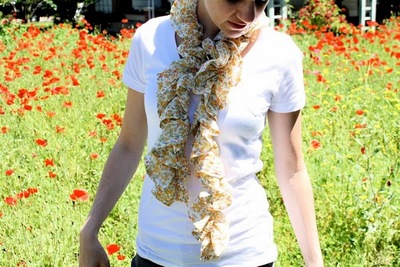
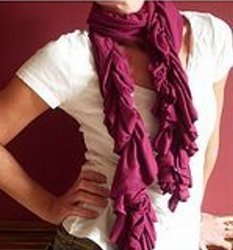
Scrunchy Tee Shirt Scarf Tutorial
This free sewing pattern from Jennifer Juniper for a scrunchy gathered scarf is a must-have accessory for you and your girlfriends. You get a lot of bang for your buck, it is a great accessory for yourself, and also a great gift to give. It's really a win/win project.
See this project and more tee shirt projects in "9 Ways to Transform Old T-Shirts".

Materials:
- At least 2 yds. of thin jersey knit (I used T-shirt weight)--this will make four to six scarves, depending on the width of your fabric
- Thread
- Elastic Thread (found in the elastic aisle)
- Scissors
- Sewing Machine
- And about 10 minutes of time
- Pattern
Instructions:
- Cut a 10 inch by (at least) 72 inch strip of fabric (your fabric will end up being half as long when you finish, so the longer the better). At this point, you can decide to taper your ends or to cut the ends apart, like fringe, at least 12 inches up from the bottom. I might even make longer tails if I did this again.

- Hand wind the elastic thread onto your bobbin (use ordinary thread on top), and sew with a basting stitch from the center of one tail/fringe alllll the way to the end. Then again from the center of the other tail allll the way to the other end. So, you have two long seams about 3 inches apart, down the center. (Make sure you back stitch at the beginning and the end, basting stitches will pull out easily if they aren't anchored like this.) See how it is bunching up as it passes through the machine? It's like magic! If you have machine with self-adjusting tension, you will have to fiddle or turn that option off or your fabric will not bunch up.

- Here is how it looks all sewn - just two straight seams from end to end. All the magic happens when you wind it around your neck!

- Now, prance around all giddy-like with your cute new scarf. Make sure to pose for pictures and make plans to give them to everyone with a neck.
Do you have more shirts you want to craft with? Well, check out all these other fun tee-shirt crafts you can make: Knotted Tee Shirt Scarf, Checkerboard Game Carpet, Tee Shirt Sleeve Scarf, and a fun Tee Shirt Quilt!
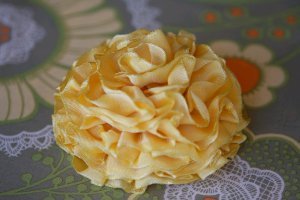
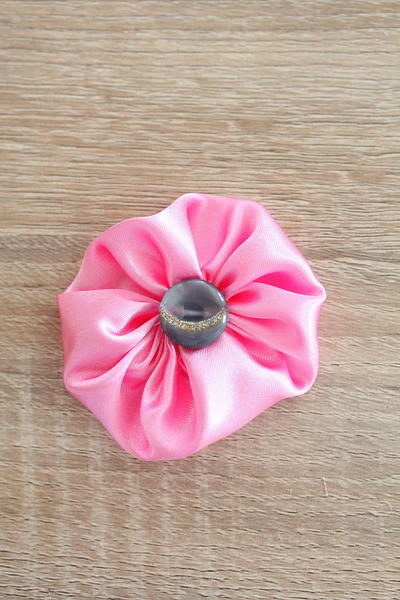
Read Next5-Minute Flower Yo-Yo
Your Recently Viewed Projects
Thanks for your comment. Don't forget to share!
gprobargains
Dec 30, 2012
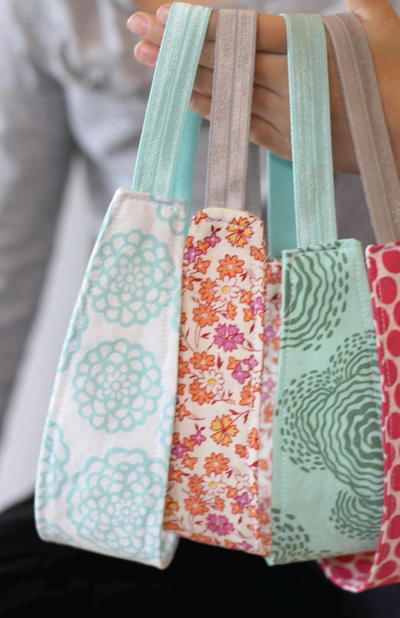
I wonder how this looks with a print pattern. Has anyone tried it? I actually bought a big bright floral pattern and now am questioning if it has to be a plain cloth?
msflair50 0991737
Aug 06, 2013
A print would be amazing! Wear it with a solid top or dress or go bold with a blended (same color family) plaid or stripe top! On another note: Use a small cording foot - it has either one or several 'groves' on the bottom in order for the elastic to glide through. If you have the capability on your sewing machine, use center needle position and center groove on the accessory foot for the elastic. Have questions? Please contact me via Facebook @ Linda Mitchell Antilley...
momforever
Jan 07, 2012
dear designer, how would you make this from a t-shirt? My take is you used fabric off the bolt which is about 60inches wide. I wonder what would happen if you took the fabric you used and cut on the diagonal? Did you finish the edge? How wide was your elastic? I'm not sure what you mean by a BASTING stitch on your machine. Thanks for a fun looking project. Sincerely, Momforever
msflair50 0991737
Aug 06, 2013
A "Basting" stitch is just the stitch length being let at the longest stitch possible. If a regular stitch has, say, 15 stitches per inch in it, a basting stitch might have 5-6 stitches per inch. It is the same stitch you would use if you were going to gather fabric to make a skirt. Have questions? Please contact me via Facebook @ Linda Mitchell Antilley... Read more at http://www.favecrafts.com/Sewn-Accessories/Scrunchy-Scarf-Tutorial/ct/1#6lqY6zH11R38UKAc.99
editorKS
Dec 06, 2011
Thanks to MaryEllen, LRN, and bjm1 for their help and input! If any of you are still having trouble after reading these tips from your fellow crafters, we would suggest contacting the pattern designer directly (specified in the byline). Hope this helps! --Editors of FaveCrafts
bjm1
Dec 05, 2011
Ive been reading thru this and understand the confusion but once I re-read and reviewed the diagram it made sense to me Perhaps try this translation attempt Cut a piece of jersey old t-shirts etc into a single piece of fabric at least x - wide If you need to connect a few assorted pieces together to create this long piece of fabric due so by joining ends- right sides together regular stitch length and trim the seams to reduce the bulk Lay your length of scarf out on a table or floor surface and fold in half lengthways - at the fold cut up from the end of your scarf fabric about - only This will give you two thinner halves of the one piece a - repeat this at the other end of the scarf when the scarf is wrapped around your neck it will look as though you…Read More have skinny scarves even though it is still one whole piece Wrap bobbin with elastic thread as previous directions Pick one side of the scarf right or left and find the middle of one of the thin strips you cut to begin your sewing from a - Sew from this thin end in a straight line across the entire length to the end of its opposite side b - Repeat this sewing step with the remaining thin piece and sew across the length all the way back to the opposite side these rows of stitching pull upon the fabric due to the elastic in the bobbin causing it to ruffle itself all the way along Should you want to really fancy this up you could sew each of the ends individually tight and sew on dingle-balls bells tassels whatever IF YOUR STILL UNSURE AND DON'T WANT TO WASTE FABRIC CUT A SCRAP AND WALK THROUGH FOLLOWING THE DIRECTIONS EACH STEP OF THE WAY ON YOUR SCRAP easy-peasy you'll see
momforever
Jan 07, 2012
I like this explanation of the treatment of the end cuts. Thanks, Momforever
LRN
Jan 22, 2011
If you don't understand the directions, look at the drawing again. You cut ONE piece, 10 or 12" wide and at least 72" long. Cut a 12" slit at each end, forming two "tails" at each end. Do your threads as she says. Then sew a straight line starting at the center of one tail on one end, all the way to the end of the corresponding tail on the other end. Repeat on the other side. And be sure to backstitch at the beginning and end of each line. That's all. I hope this helps someone.
MaryEllen
Jan 09, 2011
I went to her site and she's a little more clear that each strip you cut creates a scarf. If you are making one scarf cut a 10-12" strip from a 72" long piece of T-shirt weight fabric.
poppies
Sep 23, 2010
i wanted to make this scarf for some friends, but the end result in the tutorial doesn't look like the picture posted. . . . . what would be different?? i like the look of the posted pic.
Crafter 1669142
Sep 23, 2010
We have decided to make this a "Home made" Christmas. I was undecided what to make for my 27 yr old daughter until I saw this! Great gift idea.
Crafter 3820411
Sep 23, 2010
Hi, This scarf looks really cute and I would like to make it but I am sure you left out some of the directions for making it. Please proof read your copy and try again. I love this website! DorisB.
Hope Studios
Apr 29, 2010
There are no strips cut, you are just separating the very end of the one strip. You know, cut a slit part way up the ends but not all the way through. So you will have one piece and the very ends are split into two, like a really fat fringe.
marlla22
Jan 10, 2010
I I have tried this and it works, but mine doesn't look as good as your ? I used 8 foot of material. Do you cut more than one strip of material? if you do how do you join them? HELP
dockasue
Jan 09, 2010
Cute and practical but can't grasp the directions. Do you end up wone scarf in one piece??? Are the 10" pieces attatched? Please clarify a little more for this g'ma that would like to make some for g'kids and myself! Thanks.
Sharon Herbert
Jan 01, 2010
The directions are not clear enough for me. I get cutting out strips but what exactly is next and how do they attach to each other?
pmhenry
Jan 01, 2010
This is a great idea. I have been crocheting scarves for Christmas. But I would like to get back to sewing. This really fits my needs for something decorative and warm at the same time. Thank you
creativemom56
Dec 31, 2009
This looks soo cute! But a question...after you cut the strips how do they stay together? By wrapping? I may have missed something in the directions. Thanks!! Happy New Year!!!!!
Hope Studios
Dec 14, 2009
Thanks for posting my tutorial! You can find more ideas like this every week on Tutorial Tuesday at httpwww.hopestudios.blogspot.com
Report Inappropriate Comment
Are you sure you would like to report this comment? It will be flagged for our moderators to take action.
Thank you for taking the time to improve the content on our site.