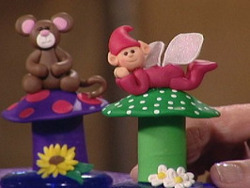
Tooth Fairy Container
Kids have to put their teeth under their pillow for the tooth fairy to take, but now you can get a bit more creative. Make a cute tooth fairy container out of polymer clay. This will ensure the tooth won't get lost. Project by Beck Meverden.

Materials:
- 3 oz. bricks of Kato Polyclay:
- 12301 yellow
- 12304 magenta
- 12318 beige
- 12309 white
- 12308 green (2 bricks)
- Kato clear medium
- Kato Nublade
- Flat round blue glass *
- 24-gauge white Fun Wire
- Wire cutters
- White glitter
- Round toothpick
- Blush
- Cotton swab
- Clay-dedicated pasta machine or acrylic roller
- Two 2mm smoke black micro marbles
- 5/16" Kemper circle cutter, optional
- White paint
- Paintbrush
- E-6000 adhesive
- Parchment paper
- Scissors
* found in the florist department of craft stores
Condition all clay according to manufacturer's instructions. To make chartreuse clay, mix a 1-inch ball of green with a 1-1/4-inch ball of yellow.
Steps:
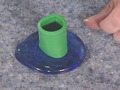
- To make the mushroom stem: Flatten a sheet of chartreuse through the pasta machine on a #1 (1/8 inch) setting. Use the Nublade to cut a 1-1/2" x 2-1/2" rectangle.
- Press ends of the rectangle together to make a cylinder, erasing the seam with your fingers. Place on top of the blue glass.
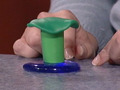
- For the mushroom top: Flatten a 1-1/8-inch ball of green into a 2-1/4-inch circle, tapering the thickness from the center on out. Curl the edges slightly and place on top of the stem.
- For the flowers: Roll 15 small (approximately 5/32-inch) balls of white clay into teardrops. Use the toothpick to indent each petal. Press five petals together at the narrow ends to make the flower.
- Roll three 1/8-inch balls of yellow and press into the center of each flower. Position flowers on the blue glass.
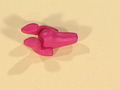
- To make the fairy body: Roll a 5/8-inch ball of magenta into a 1-inch-long tapered log.
- For the legs: Roll two 7/16-inch balls of magenta into 1-inch-long tapered logs. Shape the widest ends into pointed feet. Press onto both sides to the body.
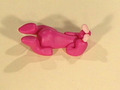
- For the arms: Roll two 3/8-inch balls of magenta into 3/4-inch-long logs. Press arms to both sides of the body and position.
- For the hands: Flatten two 3/16-inch balls of beige into teardrops. Press onto the end of each arm.
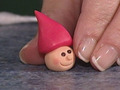
- For the head: Roll a 17/32-inch ball of beige. Press two black micro marbles into head for eyes. Use a toothpick to draw two squint lines by each eye. Roll a 1/16-inch ball of beige and press onto the head for a nose. Press a circle cutter halfway into the head to make the mouth, or use a toothpick to draw the mouth. Blush the cheeks using a cotton swab.
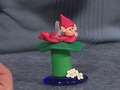
- For the hat, roll a 17/32-inch ball of magenta into a teardrop. Use the blunt end of a paintbrush to hollow out the hat, and press the hat onto the top of the head.
- For the ears: Flatten two 3/16-inch balls of beige into teardrops. Press onto both sides of the head. Use the blunt end of a paintbrush to indent each ear.
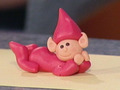
- Press the head onto the top of the body. Place fairy on top of the mushroom.
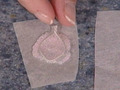
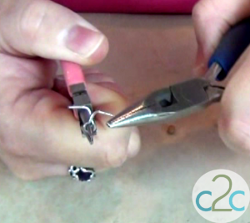
- For the wings, cut two 2-3/4-inch lengths of white wire. Shape into wings and twist ends together. Lay flat on parchment paper. Fill wings with Kato clear medium; then sprinkle glitter all over wings.
- Bake wings at 275 F degrees for 20 minutes and let cool. Use scissors to cut off excess. Press wings into the back of the body.
- Bake entire piece at 270 F degrees for 25 minutes. Allow to cool.
- Use the blunt end of a paintbrush to dot entire mushroom top with white dots of paint.
Read NextIdeas for Polymer Clay Canes
Your Recently Viewed Projects


Thanks for your comment. Don't forget to share!
M Altenberg
Mar 14, 2017
This is absolutely adorable. Your child will love making this project with you to store their tooth in. This is also a great project to make by yourself and surprise your young child with it.
wtp76aolcom
Jan 27, 2011
i miss the innocent days of the "tooth fairy" what fun to watch the kids look under the pillow and find a quarter or a toy, from the "tooth fairy" too bad kids today don't have a fun reminder to look back on
Report Inappropriate Comment
Are you sure you would like to report this comment? It will be flagged for our moderators to take action.
Thank you for taking the time to improve the content on our site.