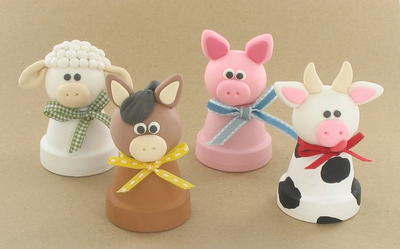
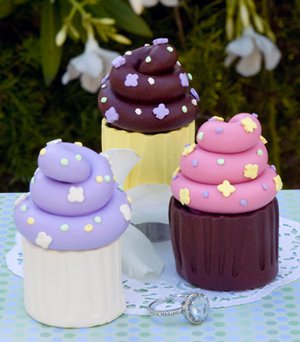
Clay Cupcake Boxes
Store rings, earrings, and other small trinkets in these adorable Clay Cupcake Boxes from The O'Neil Sisters. Made entirely with clay, these clay boxes are perfect for presenting jewelry gifts. Best of all, these scrumptious looking cupcakes are calorie free! Decorate them to your heart's content and give them for birthdays, Mother's Day, Valentine's Day, or just because!

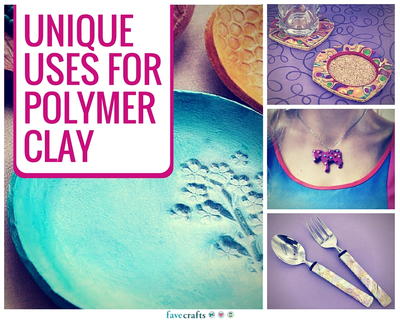
You can find this project, as well as many other Polymer clay tutorials, in our free eBook, 24 Polymer Clay Tutorials: Polymer Clay Jewelry, Decor and More!
Materials:
- Sculpey III Oven-Bake Clay: Chocolate #053
- Dusty Rose #303
- Spring Lilac #1216
- Sunshine #1274
- Pale Pistachio #1221
- Translucent Liquid Sculpey Bakable
- Transfer & Color Medium
- Studio By Sculpey Super Slicer
- Studio By Sculpey Style & Detail Tools
- Sculpey Clay Gun: clover shape & small circle shape
- Circle cookie cutter, 1 1/8” diameter
- Rolling pin
- Wax paper
- Masking tape
- Cookie sheet
- Aluminum foil
- Old deck of playing cards
- Packing tape
- Ruler
- Fork
-
Sponge paintbrush
Instructions:
-
Before you get started, cover your worktable with wax paper and secure it with masking tape.
-
To make the bottom of the ring box, slice off half of the Chocolate clay block, then condition it by working it in your hands until it is soft and pliable. To ensure your clay is rolled out evenly to the right thickness, make two stacks of playing cards with 7 cards in each stack. Tape each stack together with packing tape. Lay one stack on each side of your Sculpey. Roll out the clay with the rolling pin until the ends of the rolling pin are on top of the stacks. Your clay will be the same thickness as the stacks of cards.
-
Cut a rectangle 3¾” long and 1 1/8” wide from the rolled out Chocolate clay. Press a fork gently into one side of the rectangle to create the illusion of cupcake paper, repeating along one side to cover the piece. Use the cookie cutter to cut a circle out of the remaining rolled out clay. Stand the rectangle on its side and butt the bottom edge up against the outside edge of the circle. Curve the rectangle around the circle, pressing the bottom edges together to make a cylinder. When the sides of the rectangle meet, press them together. Burnish all the seams with the large metal ball end of the detail tool until the seams are smooth and nearly invisible.
-
To make the frosted lid, condition and roll out the Dusty Rose clay using the rolling pin and the same 7-card stacks. Cut out a circle with the cookie cutter. Make the circle slightly smaller than the bottom of the ring box by pressing the cookie cutter around the circle’s outside edge, shaving off about 1/16” of the circle’s diameter. Roll a snake ½” thick and 7½” long. Taper the ends with your fingers. To build a platform for the frosting swirl, roll a ball ½” in diameter, then mold it into a Hershey’s Kiss shape. To make the frosting, press the end of the snake onto the outside edge of the kiss and coil the snake up and around the kiss, finishing with a swirl.
-
To make delightful sprinkles, use the extruder with the clover shape tip. Condition the Sunshine clay and press out a thin clover. Slice off with the slicer. Repeat until you have 10 Sunshine clovers. Next, use the small circle tip and the clay gun to make sprinkles in Spring Lilac and Pistachio. Press the clovers and sprinkles onto the frosted lid.
-
Bake all your pieces in a 275º F oven for 15 minutes on a cookie sheet covered with aluminum foil.
- After the pieces have cooled, coat them with a layer of Translucent Liquid Sculpey to remove fingerprints and create a professional finish. Crumple a sheet of aluminum foil and press it out again to cover the cookie sheet. Place the coated pieces on the cookie sheet and bake again at 275º F for 15 minutes.
Read NextHow to Make Mokume Gane Polymer Clay
Your Recently Viewed Projects

Thanks for your comment. Don't forget to share!
Report Inappropriate Comment
Are you sure you would like to report this comment? It will be flagged for our moderators to take action.
Thank you for taking the time to improve the content on our site.