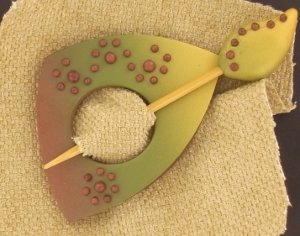
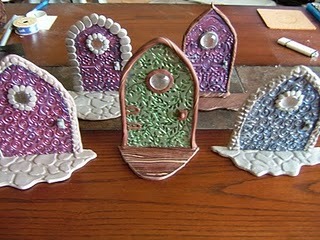
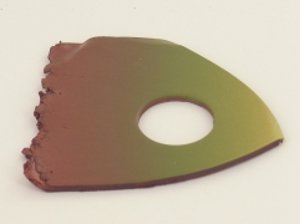
African Pin and Stick

This colorful African Pin and Stick from Polyform Products is great for jazzing up your wardrobe! Polymer clay projects like this are easy to make, and they make great gifts for the fashionista in your life! Mix and match your favorite colors to create something fun and unique! Polymer clay projects do now always have to be super cute animals or little figurines. You can easy branch out and makes something stunning and stylish like this dotted pin. Attach this stunning pin to your coat or sweater this fall and enjoy the toasty accent of fall colors. You could make this pin in three different shades or easily create an ombre craft idea by using three clay colors in three shades of the same hue.

You can find this project, as well as many other Polymer clay tutorials, in our free eBook, 24 Polymer Clay Tutorials: Polymer Clay Jewelry, Decor and More! Find clay project ideas to decorate the home, give to friends, and more in this adorable collection of clay craft ideas.
How to Make a Polymer Clay Pin
Materials:
- 1 block Premo! Accents: 18K Gold - 2 oz
- 1 block Premo! Accents: Bronze - 2 oz
- 1 block Premo! Sculpey®: Spanish Olive * - 2 oz
- Clay Conditioning Machine
- Sculpey Acrylic Roller
- Sculpey® Clay Tool Starter Set
- Sculpey® Etch ‘N Pearl
- Sculpey® Super Slicer
- Sculpey® Bake & Bond
- Cornstarch
- Sanding screen
- Circle clay cutter, 1-1/4"
- Deli paper or parchment paper
- Wood or bamboo #3 double-pointed knitting needle, or bamboo skewer
- Sandpaper
Instructions:
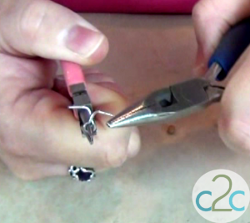
- Make Bronze raised dots with small and medium Etch 'N Pearl tools (see Tips). Bake 15 minutes. Remove from baking surface; remove extra clay around dot edges if needed.
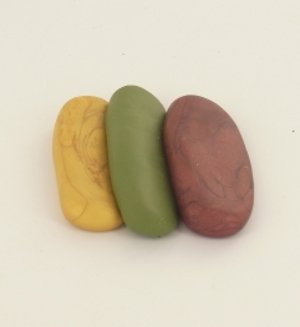
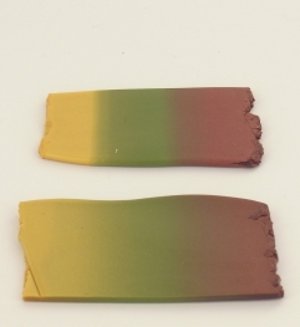
- Using 1/4 bar of each color, make three logs about 2" long. Press one long edge of each log to make them into triangle logs. Press logs together, overlapping wide edges with points. Press to flatten. Roll through pasta machine with multi-color edge perpendicular to rollers. Fold sheet in half, matching sides to sides, and roll through pasta machine again. Repeat until the colors in the sheet are blended. To keep the sheet from widening with each pass through the pasta machine, put the sheet next to the edge of the rollers and press your finger against the other side of the sheet as you crank with your other hand.
- Using Clay Conditioning Machine at setting #1, make Bronze sheet slightly larger than the finished size of your shawl pin. Powder sheet back and lay on sanding screen. Using Clay Conditioning Machine at setting #4, make blended sheet thinner. Lay blended sheet on Bronze sheet and roll together with Acrylic Roller, taking care not to trap air between the layers. Remove from sanding screen and place on deli paper. Cut center hole with round clay cutter. Using flexible Super Slicer held in a curve, cut three curved edges. Press in prebaked Bronze dots.
- Cut center hole with round clay cutter. Using flexible Super Slicer held in a curve, cut three curved edges. Press in prebaked Bronze dots.
- Cut 3" length from wood knitting needle or skewer. Put dot of Bake& Bend on cut end. Using scraps from previous steps, form decorative ornament and press on cut end of stick. Bake 30 minutes. Allow to cool completely before handling.
Notes:
- Preheat oven to 275 °F. Test temperature with oven thermometer for perfectly cured clay. Condition all clay by kneading until it’s soft and smooth or running it through the Clay Conditioning Machine for several passes on the widest setting. Fold the clay in half after each pass and insert the fold side into the rollers first.
Project Tips:
- Make baked raised dots with the Etch 'N Pearl tools on a ceramic tile or clay-dedicated baking surface. Lay clay sheet on baking surface. Dip concave end of tool in water. Press concave end through clay sheet onto baking surface. Lift up clay sheet and the dot will stick to baking surface. Repeat for as many dots as you need.
- Using the sanding screen to texture the back of the shawl pin will help it stay in place on the sweater or shawl. You can also use coarse sandpaper or a large texture sheet.
- If you use a bamboo skewer instead of a knitting needle. sand it with sandpaper to smooth it and make the point a little rounder.
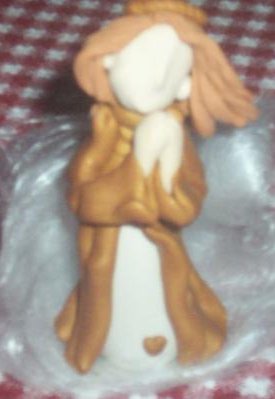
Read NextPolymer Clay Angel Doll