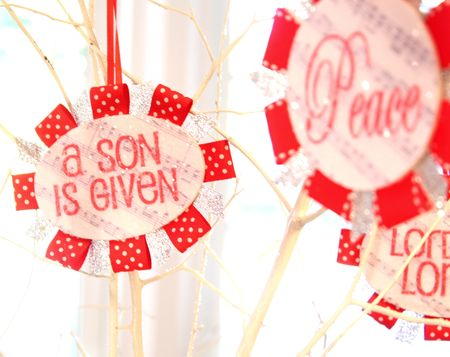
Decorative Wooden Ornament
Spice up your Christmas tree with this homemade Christmas ornament from Shelley Detton. You can easily make this Decorative Wooden Ornament to display during the holiday season and save as a family keepsake.

Materials:
- Little wooden discs in circle and/or oval shapes, approx. 3"
- Download Small circles and 2 ovals (loopy, formal style)
- Download Small circles and ovals contemporary (contemporary style)
- Download Small ovals contemporary and traditional (the remaining ovals in both fonts)
- Modpodge (mat finish) and an inexpensive chip brush and small bowl to hold the Modpodge
- Clear glitter and small tray/box lid to catch the glitter
- Ribbon in various widths (the lengths needed depend on how you choose to design your ornament...see instructions for a general idea)
- Cardstock paper for back of ornaments
- Hot glue gun (craft glue not recommended = takes too long to dry)
-
Individual rectangular phrase boards: A Child is Born, A Son is Given, Forever and Ever, Glory to God , King of Kings, Lord of Lords, Prince of Peace, The Everlasting Father, The Mighty God, Wonderful, Counselor

Instructions:
-
For each ornament, you will need to trace the circle or oval shape onto the cardstock and cut out the shape slightly smaller than the wood. Pour the Modpodge into the little dish and lay down a paper towel or piece of cardstock as a work surface.

-
Each image is printed with some "wiggle room" in case the sizes of the wooden discs vary. To ensure that the wording will be centered on your disc, place image on top of disc and hold up to a light source. You will be able to center the words using the shadow of the disk shape as a guide. Hold paper in place firmly with one hand, and use the thumb of your other hand to create a crease all the way around the disc.

-
Holding disc in your hand, coat top side of wood with a thick coat of Modpodge. Place paper on top, flipping upside down to more easily see that the wood is lining up with the crease all around the edge of the shape. Place right side up onto the paper towel, give the paper a careful rub to adhere it to the wood, and quickly brush Modpodge over the top of the paper. If your ink is the smear-able kind, brush as little as possible so the red ink doesn't bleed all over the place. If bleeding occurs, you can minimize it by gently blotting with a paper towel. Set aside to dry completely.

-
When paper is completely dry, turn upside down and trim away excess with a sharp Xacto knife. I discovered that it is easier to cut when disc is on top of folded cardstock than on a paper towel, as is pictured here.

-
Coat top and sides of disc with Modpodge, and place face down into tray of glitter. Set aside and allow to dry completely. When dry, brush off excess glitter.

-
Cut ribbon in desired lengths and numbers. You will need a skinny ribbon for the hanger, about 8 inches long. The circles will need 6 or 8 of each variety of ribbon. The ovals should have 8 of each ribbon variety. In this example, the silver ribbon is about an inch long and the red ribbon is about 2.5" long. Each ornament is unique, there is no set formula for making these. That's the fun of it - designing each one to be one of a kind!

-
Glue the first set of ribbons on the backside, doing 1 or 2 at a time because the hot glue hardens so quickly. Try to get the ribbon pieces to align with the one opposite, as if there were 3 ribbons instead of six. I always start at the top (12:00 position) and then do the bottom one (6:00 position). Then I place the 2 on the right hand side and finally the 2 on the left hand side. Using 8 ribbons is easier because you can do the 12:00 + 6:00, then the 9:00 + 3:00 and fill in with the final 4 pieces centered in the 4 gaps.

-
Glue the second set of ribbons in the gaps. This ribbon has dots on one side, it's glued face down.

-
If you want to create loops in the ribbon, fold them over and glue them now. An alternative method is to hot-glue the loops together first before attaching to the disc. Glue the skinny ribbon to the top of the ornament.

- Glue the cardstock shape over the back to hide all the uglies...and that's it!

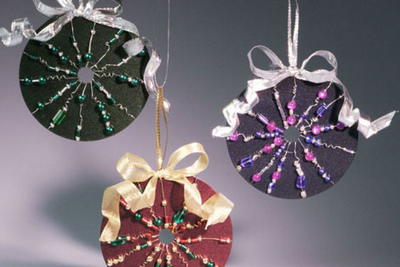
Read NextQuilted CD Ornaments
Your Recently Viewed Projects
Thanks for your comment. Don't forget to share!
angelicone1977 838 9934
Dec 10, 2010
Oh how I loved making these. I just wish that there could be more religious crafts though to honor GOD.
Report Inappropriate Comment
Are you sure you would like to report this comment? It will be flagged for our moderators to take action.
Thank you for taking the time to improve the content on our site.