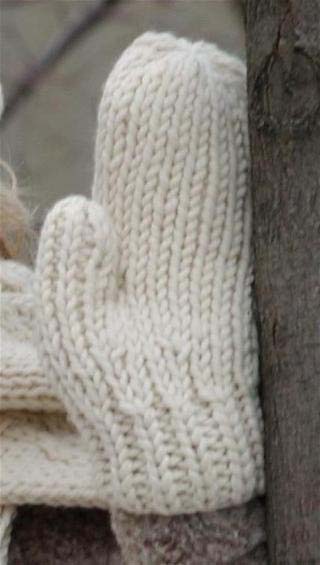
Warm Wool Mittens Free Knitting Pattern
Enjoy free knitting patterns for mittens like these warm knitted wool mittens from Authentic Knitting Board that are sure to keep your hands toasty all winter long.
Stitch: Stockinette and Rib
Size: Adult small and (medium/large).
Materials:
- Yarn: Plymouth Encore Chunky (acrylic blend) or other chunky wool-Requires 1-1/2 skeins.
- Knittingboard with 32 needles
- Knit hook
- Crochet hook for finishing
- Large sewing needle for sewing seams.
Instructions:
- Cast On 22 (26) stitches. Remember to use the anchor yarn. Start at cuff in Rib stitch.
- Knit 10 (14) rows of Ribbing.
- Change to Stockinette. Knit (2) rows.
- Next row, increase one stitch each end.
- Knit row in Stockinette.
- Knit 3 (4) additional rows in Stockinette.
- Increase Row: You will increase (6) times across row. This means you need to shuffle all the loops on your needles to each side to create (6) open needles spaced evenly across the board starting about 1” from side edges. With the open needles, increase from each needle to right of open needles by picking up the previous loop that was hooked over, and place them on open needles. You now have (6) stitches added to your boards.
- Knit the 30 (34) stitches for 2 (4) additional rows.
- Thumb Opening: Slip center 10 stitches onto a stitch holder, one for each board. Drop the holders with loops secured, thru the boards, so that the holders are below ( and outside) the boards. Shift the 10 (11) loops of each side together, so that they are adjacent to each other in center.
- Twist the 2 joining loops, so that loop 10 (11) is placed on needle 11 (12) and loop 11 (12) are placed on needles 10 (11). This will give more strength to thumb.
- Knit additional 12 (16) rows in stockinette.
- Decrease and Bind Off: Decrease (1) stitch each end. Decrease in center to form curved top: (At center, place center loops onto the next needles, one to right and one to left. This creates (2) open needles in center.)
- Knit row staying in stockinette, skipping the open needles. Hook over all needles and lift the 2 bottom loops on decrease needles, so that all needles will have only one loop.
- Repeat the decrease on next row. Hook over so that all needles have just one loop.
- Shift all loops, on one side, over to meet the other set of loops so that they are adjacent, with no open needles.
- Repeat the decrease row (2) additional times.
- Shift all loops on one side over to meet the other set of loops.
- Bind Off with crochet hook by picking up (3) loops, pull one thru two. Pick up next (2) loops, alternating boards. Do this to end and pull yarn tail thru last loop.
- Thumb Finishing: Place the (10) thumb loops back onto the boards from the stitch holders.
- Be sure to place them directly across, each side.
- Tie in yarn to 2nd inside stitch.
- Knit in stockinette for 8 (10) rows.
- Decrease all stitches. This leaves 2 loops on every other needle and an empty needle between. Hook over. Move all loops together so that there are no empty needles.
- Cut yarn with a 10” tail for sewing the thumb.
- Bind Off.
- Bind Off at anchor yarn.
- Sewing: Fold mitten over.
- Sew thumb with tail end of yarn, easing the top edges to a rounded finish.
- Secure well at base of thumb.
- Sew Mitten from cuff to top easing in the top for a nice oval shape.
- Tuck in all tail ends of yarn.
- Repeat all for the 2nd mitten.
Up Next:
Read NextMade to Fit Double Knit Slippers
Your Recently Viewed Projects

Thanks for your comment. Don't forget to share!
Crafter 19872
Oct 24, 2009
Doesn't anybody make just plain gloves anymore? The kind with fingers either knitted in or sewn in?
Report Inappropriate Comment
Are you sure you would like to report this comment? It will be flagged for our moderators to take action.
Thank you for taking the time to improve the content on our site.