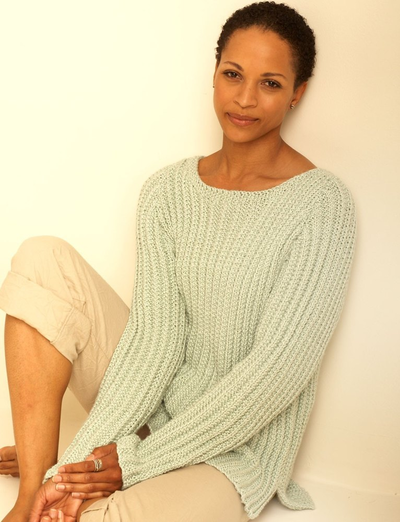
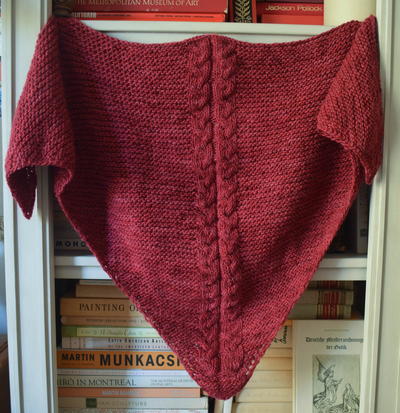
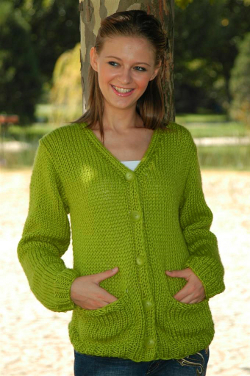
Comfortable Pocket Cardigan
This slouchy cardigan with flattering v-neck and low pockets will quickly become your new favorite sweater. Use this free sweater knitting pattern to knit up the cardigan quickly with bulky yarn. Comfy and cozy, you could work up this Comfortable Pocket Cardigan in all your favorite colors and have one to wear on cooler fall days. Modeled after the popular boyfriend sweater, this pattern is great for girls of all shapes and sizes and is the perfect sweater to take on the go.

Materials:
Sizes: XS (S, M, L, XL, 2X)
- 7 (8, 9, 10, 11, 12) balls Harmony™ yarn in Peridot
- US 10-1/2 (6.5mm) and 11 (8mm) knitting needles
- Stitch holder
- Yarn needle
- 5 buttons
Gauge: 12 sts and 16 rows = 4" with larger needles. Use any size needles necessary to obtain specified gauge.
Finished Bust Measurements: 32 (36, 40, 44, 48, 52)"
Instructions:
Back
- With smaller needles, cast on 48 (56, 60, 68, 72, 80) sts. Work in k2, p2 ribbing for 8 rows.
- Change to larger needles and beg with a knit (RS) row, work in St st until piece measures 14-3/4 (15-1/4, 15-3/4, 16-1/4, 16-3/4, 17-1/4)" from beg.
Underarm Shaping
- Bind off 4 (6, 6, 8, 8, 10) sts at beg of next 2 rows – 40 (44, 48, 52, 56, 60) sts.
- Work even until piece measures 22-3/4 (23-3/4, 24-3/4, 25-3/4, 26-3/4, 27-3/4)" from beg, ending with a RS row.
Shoulder Shaping
- Bind off 10 (12, 12, 14, 14, 16) at beg of next 2 rows for shoulders. Bind off 20 (20, 24, 24, 28, 28) sts for back neck.
Right Front
- With smaller needles, cast on 24 (28, 30, 34, 36, 40) sts. Work in k2, p2 ribbing for 8 rows.
- Change to larger needles.
Establish Button Band
- Row 9 (RS): K2, bind off 2 sts, p2, knit to end of row.
- Row 10: Purl to last 6 sts, k2, cast on 2 sts over gap, k2.
- Rep Rows 9 and 10 for buttonholes 4 more times every 3 (3, 3-1/4, 3-1/4, 3-1/2, 3-1/2, )", working the 2 buttonhole sts in St st in between.
- Work even until piece measures 14-3/4 (15-1/4, 15-3/4, 16-1/4, 16-3/4, 17-1/4)" from beg.
Underarm and Neck Shaping
- Shape underarm as for Back; at the same time, continue working band as established and dec 1 st (after working the band to maintain band throughout) every 2 rows 6 (5, 8, 7, 10, 9) times, then every 4 rows 4 (5, 4, 5, 4, 5) times – 10 (12, 12, 14, 14, 16) sts.
- Work even in St st until piece measures 22-3/4 (23-3/4, 24-3/4, 25-3/4, 26-3/4, 27-3/4)".
Shoulder Shaping
- Work same as Back.
Left Front
- Work same as Right Front, reversing shaping and omitting buttonholes.
Sleeve (Make 2)
- With smaller needles, cast on 24 (28, 28, 32, 32, 36) sts. Work in k2, p2 ribbing for 8 rows.
- Change to larger needles and St st, beg with a knit row (RS).
Begin Sleeve Shaping
- Inc 1 st each end of row every 6 rows 11 (10, 13, 12, 14, 14) times, then every 8 rows 1 (2, 0, 1, 0, 0) times – 48 (52, 54, 58, 60, 64) sts.
- Work even in St st until piece measures 21 (21- 1/2, 22-1/4, 22-3/4, 23-1/4, 23-3/4)" or desired length to underarm. Bind off.
Pocket (make two)
- Using larger needles, pick up 15 (17, 17, 21, 23, 25) sts, 1-1/2 (1-3/4, 2, 2-1/4, 2-1/2, 2-3/4)" in from front edge, immediately above the ribbing.
- Work even in St st until piece measures 5 (5-1/2, 6, 6-1/2, 7, 7-3/4)" from beg. Work in k2, p2 ribbing for 4 rows. Bind off loosely. Sew sides of Pockets to sweater.
Finishing
- Lightly block all pieces, avoiding ribbing. Sew each shoulder seam. Set in sleeves, sew side and sleeve seams. Sew buttons opposite buttonholes.
- Weave in ends.


Up Next:
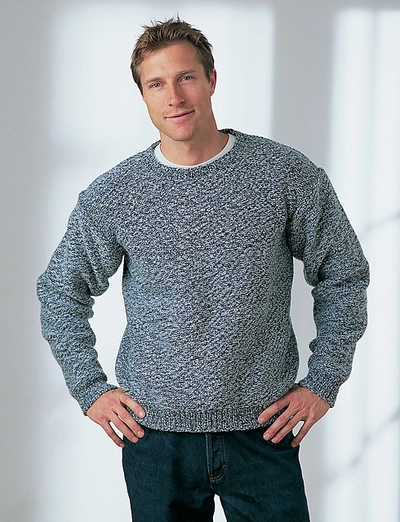
Read NextSimple Men's Knit Sweater Pattern
Your Recently Viewed Projects
Thanks for your comment. Don't forget to share!
benn6974 3256780
Mar 04, 2017
Is this a womans sized pattern?? Cast on stitches seem to indicate a girls size. Love the pattern but I want an adult size. thanks
sunshine3762
Sep 07, 2016
I just started the right front and I am not doing the buttonholes what do I do next? This pattern is not making sense
Kaylee
Sep 08, 2016
@sunshine3762 14949 55 For specific questions about a pattern, we suggest you reach out to the designer. In this case, Premier Yarns. You can find their website here: https://www.premieryarns.com/
kathrynmarang 2709 125
May 06, 2015
I am a beginning knitter and can't figure out which way to put the yarn when I put the button holes in. Do I cast off with a pearl wise or knit wise or does it matter? Help
schatzee 4972653
May 22, 2013
For the ribbing I finish the Cardigan WITHOUT the finishing Band I take LONG CIRCULAR NEEDLES take in Stitches and go from front to back and front On one side I make Button holes by yarn over knit together or for bigger holes knit together yarn over twice and lift one stitch knit one and loop over the lifted Stitch In the back row I knit stitches out of the yarn over Stitch This makes a nice Edge and finishes off the Cardigan For the Pockets I work them in by finish with a ribbing and CAST OFF In the back row I cast on the stitches I cast off and just finish the piece Where you have now a slit I take all the stitches who are cast off and work them down to the ribbing and sew them with invisible stitches with a blunt needle and also connect to…Read More the sides from the back It looks very Professional
CroKnit Boutique
Feb 22, 2012
I just got this pattern in my email and cannot find the "Harmony" yarn called for. I want to use a subsitute yarn but need to see this yarn to compare. Please give me a website for it. Thanks
NJGiGi
Jun 22, 2010
I adapted this to have a finished back neck. When you reach the final inch of back, take center sts and work in k2, p2 ribbing for final inch. When you sew the fronts to the back, it should have a finished look. Since the front bands are obviously ribbing, this is how I thought to finish this. I also eliminated the buttonholes, since I rarely ever button my sweaters. Hope this helps. Thank you.
Crafter 9151996
Apr 17, 2010
The back of the neck looks terrible . the button band should have been added some how. very disappointed.
Crafter 9151996
Apr 17, 2010
I finished the sweater and was very disappointed. The new instructions regarding the back neck say to bind off. It looks terrible. The button band should have been carried out for the back of the neck.
Crafter 9151996
Mar 27, 2010
I'm having difficulty with the button band. Would you explain it more thoroughly?
The Editor of Fave Craftscom and AllF reeCrochetcom
Mar 01, 2010
This pattern has been updated as of 31, the "holder instruction" has been removed. Thanks! -The FaveCrafts Team
Crafter 6536513
Mar 01, 2010
Hello, I have the same questions as the 2 other people. What do we do with the back stiches on a holder? Also the button band does not make sense. Could you explain it again. Thanks, Marie
Crafter 0700998
Feb 28, 2010
I have the same question as the previous reader. Instructions state to place back stitches on a holder but do not explain how to finish the back. Also for the button band - the instructions begin with row 9 (nine). How is the band established. Does the bank include 6 stitches k2 P2 K2? Please send response ASAP. Thanks
Gerri Ann Brenner
Dec 06, 2009
What do I do w the back stiches that were placed on a holder? How do I finish this sweater? Please let me know as soon as possible as this is a gift and I need to send it to the recipient. Thanks!
Report Inappropriate Comment
Are you sure you would like to report this comment? It will be flagged for our moderators to take action.
Thank you for taking the time to improve the content on our site.