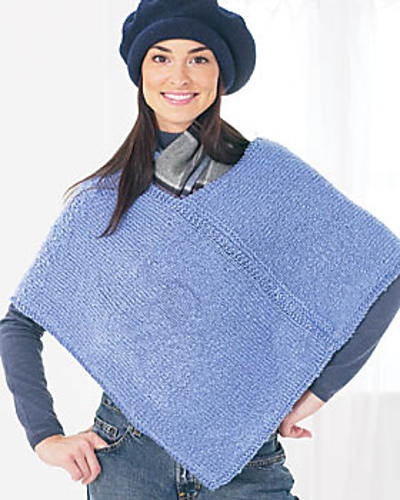
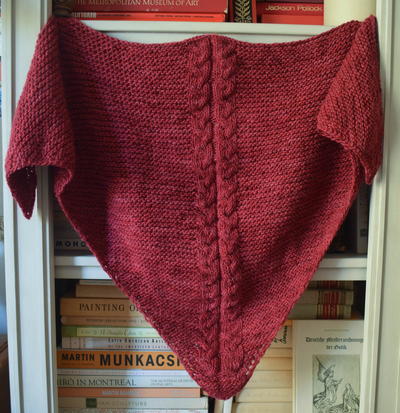
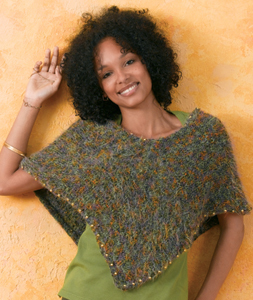
Beaded Poncho
This Beaded Poncho has a chic shape and cool color pallet. It's great for crisp fall days and calls to mind images of tree-lined streets. Best of all, this beginner knitting pattern is free!
Materials:
- Caron International’s Feathers (65% acrylic, 35% nylon; 1.75 oz/50 g, 70 yds/64 m): 9 skeins #0002 Parrot
- Size US 8 (5 mm) knitting needles, or size to obtain gauge
- crochet hook size US F/5 (3.75mm) for edging
- tapestry ndl (tn)
- approximately 105 gold plated 8mm round pearl beads
FINISHED MEASUREMENTS:
Each panel measures 12" by 30", excluding Beaded Edging
GAUGE:
Using size US 8 (5mm) needles, in St st: 16 sts and 20 rows = 4”/10 cm
STITCHES USED:
Stockinette stitch (St st): Knit on RS, purl on WS
Single crochet (sc) for Beaded Edging
Instructions:
SPECIAL TECHNIQUE
Place a Bead (PB): Pre-string beads on yarn. Insert crochet hook in next stitch, slide bead up close to work, yo hook, pull yarn through stitch and loop on hook (slip stitch made).
PANEL (Make 2)
CO 48 sts.
Work even in St st until piece measures 30" from the beginning.
BO all sts.
FINISHING
Block pieces to measurements, if necessary, following instructions on ball band.
Sew one end of each panel to side edge of opposite panel (see Assembly Diagram).
NECK EDGE
Round 1: With RS facing, using crochet hook, join yarn with slip stitch (sl st) to one corner of neck; ch 1, sc in next 2 edge sts, *skip 1 edge st, sc in next 3 edge sts; repeat from * around, join with a sl st in first sc.
Fasten off.
Round 2: Thread approximately 25 beads on to yarn - enough to have a bead for every 6 sts worked around neck edge. With WS facing, join yarn in last st of previous round; * sl st in next 5 sc, PB in next st; repeat from * around, join with sl st in first st.
Fasten off.
LOWER EDGE
Round 1: With RS facing, using crochet hook, join yarn with slip stitch (sl st) to one corner of lower edge; ch 1, work 2 sc in same st as join; cont as for Neck Edge, working 3 sc in each remaining corner st.
Round 2: Thread approximately 80 beads on to yarn - enough to have a bead for every 4 sts worked around lower edge. With WS facing, join yarn in last st of previous round; sl st in next 2 sc, * PB in next st, sl st in next 3 sc; repeat from * around, join with a sl st in first st.
Fasten off.
Weave in ends.
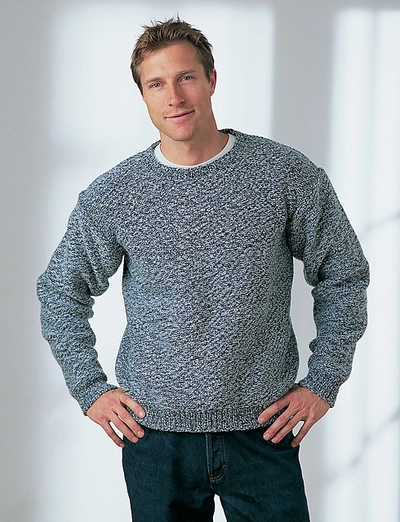
Read NextSimple Men's Knit Sweater Pattern
Your Recently Viewed Projects


Thanks for your comment. Don't forget to share!
rainfairy63 802749 3
Apr 13, 2017
assembly diagram please!!!!!!!!!!!
Editor Dana
Apr 17, 2017
Hi there! Unfortunately there doesn't seem to be an assembly diagram available. Hopefully someone who has made the pattern has some great tips for troubleshooting this! I apologize for the inconvenience. -Dana from FaveCrafts
msdeb21
Feb 10, 2017
This is stunning! Who knew I could use my yarn and my bead collections?! I can just imagine all the beautiful color combinations I will come up with.
sherylv 5366685
Apr 02, 2011
Knitting is my preference. While I can do both, crocheting uses too much wrist action that aggravates the inflammation in my joints. However, personal choice determines what you love to do, BOTH are lovely crafts that produce different styles and results.
alpinerose
Dec 07, 2010
The directions say to see assembly diagram. I don't see one. Where should I look for the diagram.
Report Inappropriate Comment
Are you sure you would like to report this comment? It will be flagged for our moderators to take action.
Thank you for taking the time to improve the content on our site.