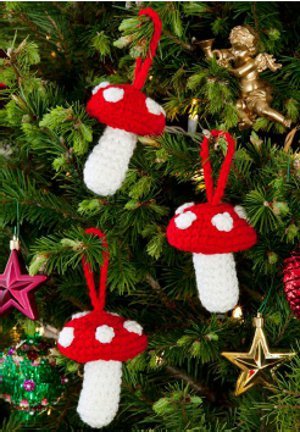
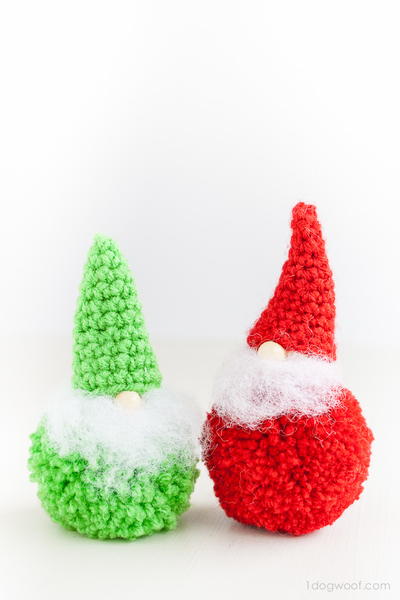
Polka Dot Mushroom Ornaments
Make your own Christmas tree decoration by using leftover red and white yarn to crochet these adorable Polka Dot Mushroom Ornaments. These would look just as cute tied to a package or a stocking. Great for a whimsical or country-themed decor pattern, these adorable crocheted mushrooms can also be out on display all year long, arranged in a garland or just left as cute springtime ornaments. This is a simple and fun crochet pattern for beginners and advanced crochet fans alike.
Find more festive holiday patterns in Red Heart's special eBook, Jolly Holidays: 15 Free Knit and Crochet Gifts and Holiday Projects.

Materials:
- 1 skein Red Heart® Super Saver® yarn in Cherry Red (A)
- 1 skein Red Heart® Super Saver® yarn in Soft White (B)
- 3.5mm [US E-4] and 5mm [US H-8] crochet hook
- Split-ring stitch markers
- Small amount of fiberfill
- Yarn needle
Gauge: 16 sc = 4”; 17 rows = 4”. CHECK YOUR GAUGE. Use any size hook to obtain the gauge.
Special Abbrevations:
- Sc2tog = [draw up a loop in next st] twice, yo and draw through all 3 loops on hook.
Instructions:
Do not join rounds; instead, mark the beginning of each round with a stitch marker, move marker up each round.
Cap
-
With larger hook and A, ch 2.
-
Round 1: 5 sc in 2nd ch from hook – 5 sts.
-
Round 2: 2 sc in each st around – 10 sts.
-
Round 3: * 2 sc in next st, sc in next st; repeat from * around – 15 sts.
-
Round 4: * 2 sc in next st, sc in next 2 sts; repeat from * around – 20 sts.
-
Round 5: * 2 sc in next st, sc in next 3 sts; repeat from * around – 25 sts.
-
Round 6: * 2 sc in next st, sc in next 4 sts; repeat from * around – 30 sts.
-
Round 7: Sc in each st around.
-
Round 8: Working in back loop ONLY, * sc2tog, sc in next 3 sts; repeat from * around – 24 sts.
-
Round 9: * Sc2tog, sc in next 2 sts; repeat from * around – 18 sts.
- Round 10: * Sc2tog, sc in next st; repeat from * around – 12 sts. Fasten off, leaving a 12” tail.
Stem
-
With larger hook and B, ch 2.
-
Round 1: 6 sc in 2nd ch from hook – 6 sts.
-
Round 2: 2 sc in each st around – 12 sts.
-
Round 3: Sc in each st around.
- Rounds 4-9: Repeat Round 3. Fasten off at end of Round 9.
Dots (Make 5)
-
With smaller hook and B, ch 2.
- Round 1: 6 sc in 2nd ch from hook. Fasten off, leaving a 12” tail.
Loop
-
With larger hook and A, leave a 4” tail, ch 24. Fasten off, leaving a 4” tail.
-
Pull tails of Loop through center of Cap and secure ends. Add stuffing to Cap and Stem.
-
With long tail from Cap, sew Cap to stem, matching sts.
- Using tails, sew Dots to top of Cap. Weave in ends.
Read NextHome for the Holidays Afghan