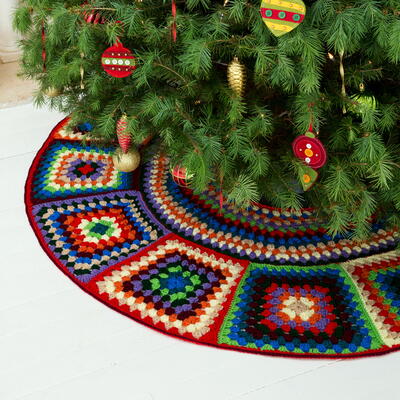
Crocheted Snowflake Table Runner
Cast on this easy home decor crochet pattern before winter comes!

Make this beautiful Crocheted Snowflake Table Runner from Red Heart Yarn to fancy up your kitchen or dining table this winter. This is an easy home decor crochet pattern that you'll love passing on to your kids. Add more of a winter flair to your table runner by making every other snowflake a soft grey or blue. You'll enjoy this beautiful crochet decoration all season long. It also makes a wonderful crochet gift for Christmas or Hanukkah. This Crocheted Snowflake Table Runner is the perfect way to add some winter enchantment to your home.

Crochet HookI/9 or 5.5 mm hook
Yarn Weight(4) Medium Weight/Worsted Weight and Aran (16-20 stitches to 4 inches)
Crochet GaugeSnowflake measures 5½” x 5½” measured point to point. CHECK YOUR GAUGE. Use any size hook to obtain the gauge.
Finished SizeRunner measures 57" long x 14" wide
Materials List
- 2 skeins Red Heart Holiday Yarn in Aran with Gold Metallic
- 5.5 mm [US I-9] crochet hook
- Yarn needle
- Diagram
Instructions for the Crocheted Snowflake Table Runner:
CENTER STRIP
-
First Snowflake
- Ch 4, join with slip st to form a ring.
- Round 1 (right side): Ch 5 (counts as hdc, ch 3), [hdc,ch 3] 5 times in ring; join with slip st in 2nd ch of beginning ch-5—6 ch-3 spaces.
- Round 2: Ch 1, sc in same st as joining, (2 sc, ch 5, 2 sc) in next ch-3 space, *sc in next hdc, (2 sc, ch 5, 2 sc) in next ch-3 space; repeat from * around; join with slip st in first sc—6 ch-5 spaces.
- Round 3: Ch 1, sc in first sc, *ch 3, [sc, ch 5, sc, ch 7 (point), sc, ch 5, sc] in 3rd ch of next ch-5 space, ch 3, skip next 2 sc**, sc in next sc; repeat from * around, ending last repeat at **, join with slip st in first sc—6 ch-7 points. Fasten off.
- Ch 4, join with slip st to form a ring.
-
Second Snowflake (2 points joined)
- Rounds 1-2: Repeat rounds 1-2 of first snowflake.
- Round 3: Ch 1, sc in first sc, *ch 3, (sc, ch 5, sc, ch 3) in 3rd ch of next ch-5 space, with wrong sides together, slip st in corresponding ch-7 point on previous snowflake, ch 3, (sc, ch 5, sc) in same ch of ch-5 space on current snowflake, ch 3, skip next 2 sc, sc in next sc, repeat * once; **ch 3, (sc, ch 5, sc, ch 7, sc, ch 5, sc) in 3rd ch of next ch-5 space, ch 3, skip next 2 sc***, sc in next sc; repeat from ** around, ending last repeat at ***, join with slip st in first sc. Fasten off.
- Rounds 1-2: Repeat rounds 1-2 of first snowflake.
-
Third through Twelfth Snowflake
- Work 10 more snowflakes same as second snowflake, joining in a strip, skipping 1 point on each side of snowflakes.
FIRST SIDE STRIP
-
First Snowflake (3 points joined)
- Rounds 1-2: Repeat rounds 1-2 of first snowflake.
- Round 3: Ch 1, sc in first sc, *ch 3, (sc, ch 5, sc, ch 3) in 3rd ch of next ch-5 space, with wrong sides together, slip st in first ch-7 space on top snowflake on center strip to the right of joining, ch 3, (sc, ch 5, sc) in same ch of ch-5 space on current snowflake, ch 3, skip next 2 sc, sc in next sc, repeat * twice, joining with slip st to junction between 2 snowflakes, then joining to next ch-7 point; **ch 3, (sc, ch 5, sc, ch 7, sc, ch 5, sc) in 3rd ch of next ch-5 space, ch 3, skip next 2 sc***, sc in next sc; repeat from ** around, ending last repeat at ***, join with slip st in first sc. Fasten off.
- Rounds 1-2: Repeat rounds 1-2 of first snowflake.
-
Second Snowflake (4 points joined)
- Rounds 1-2: Repeat rounds 1-2 of first snowflake.
- Round 3: Ch 1, sc in first sc, *ch 3, (sc, ch 5, sc, ch 3) in 3rd ch of next ch-5 space, with wrong sides together, slip st in corresponding ch-7 space on previous snowflake on same strip, ch 3, (sc, ch 5, sc) in same ch of ch-5 space on current snowflake, ch 3, skip next 2 sc, sc in next sc, repeat * 3 times, joining with slip st to next 2 junctions between 2 snowflakes, then joining to next ch-7 point; **ch 3, (sc, ch 5, sc, ch 7, sc, ch 5, sc) in 3rd ch of next ch-5 space, ch 3, skip next 2 sc***, sc in next sc; repeat from ** around, ending last repeat at ***, join with slip st in first sc. Fasten off.
- Rounds 1-2: Repeat rounds 1-2 of first snowflake.
-
Third through Eleventh Snowflake
- Work 9 more snowflakes same as second snowflake, joining in a strip across side of center strip, following assembly diagram for placement.
SECOND SIDE STRIP
Make and join 11 more snowflakes joining to center strip same as first side strip, following Assembly Diagram (see link, above) for placement.
FINISHING
Weave in ends.
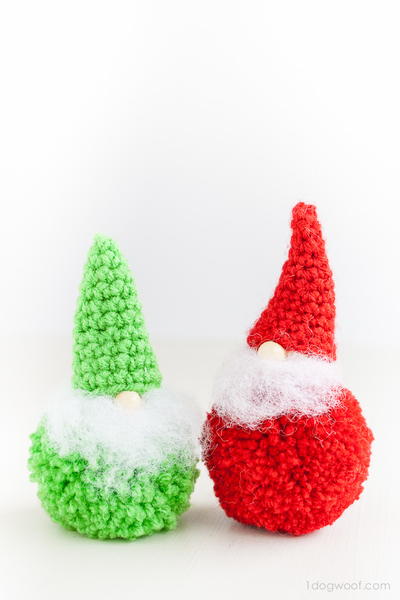
Read NextTiny Crochet Pom Pom Gnomes
Your Recently Viewed Projects
Thanks for your comment. Don't forget to share!
Zeemer
Oct 29, 2018
Snowflakes table runner, perfect for the Christmas season. Great as gift for mom, mother-in-law, sister or aunt for their long table. This is so elegant when used during Christmas dinner Will adorn the area on the table where the food is served. Beautiful!
Marilyn B
Nov 04, 2017
Such an exquisite design and pattern! I could see using a very thin metallic yarn in places or even glue or later weave in some tiny rhinestones or crystal beads for a really glitzy look! What a lovely gift this would make! So pretty as a dining table runner or even as a side or buffet table runner too!
princess6860504
Feb 09, 2017
This is my kind of project. I am a crocheter. I can make as many snowflakes as I need to make! I have not yet used the Red Heart Christmas yarns, but I have always wanted to. It is a nice slim width, which gives it a slightly different look. It would be great on a buffet or a mantle, too. I can't wait to try this one out.
Multicrafter
Dec 05, 2016
I love the look of crocheted snowflakes, but usually avoid making them as they feel so time consuming to me. Not this pattern! The hook size and yarn weight make this a snap to create, and yet the finished product is every bit as delicate and dainty as snowflakes made from thread! Several of my family members will be getting this for Christmas this year!
angelikamberndt 39 15136
Nov 24, 2016
Love this one! Took a while to understand the pattern cause I didn't know the English words D After the 3rd flake I knew it by heart. I made 4 tablerunners so far (working on the 5th). Easy to make but a hell of a lot of weaving ends
achumley0003 31706 34
Oct 11, 2016
The center strip IS the first snowflake. I f you read the pattern the center strip is worked in rounds and the 2nd snowflake is joined to that. I don't know why it's called a strip. It may be because as you join it becomes a strip to form the runner.
marhaz
Jan 20, 2014
The 1st snowflake IS the Center Strip instructions If you go to the Red Heart site, the directions are exactly the same. The only difference is that right under where it says "Center Strip" it says First Snowflake right before the start of the 1st instruction step. If you look at the diagram you can see where it says Center strip and the first one is labeled "First Snowflake" I hope this helps.
brendat 3405641
Nov 07, 2013
The instructions for the first snowflake do not show up for me either. I would love to make this, but cannot until the instructions are complete :-(
janetr186 9662680
Aug 12, 2013
Sounds and looks beautiful. We would like the pattern for the First snowflake. It's not in the pattern directions anywhere.
fjwingo 5813855
Nov 25, 2012
I was able to print by clicking on Print icon and then when my printer pop-up came up I then put it to print Page 1-2 and that is all it printed and it was the complete pattern. The only question I have is that the pattern calles to to Repeat rounds 1-2 of first snowflake and there is no first snowflake. I assume the 1st Second Snowflake is the First Snowflake. Going to give it a try!
Melissa Ryan
Nov 16, 2012
If readers are still having trouble printing this pattern, you can also highlight the text and copy it...then paste it into a Word document and print it that way.
cara 5491618
Sep 16, 2012
You can highlight the photo and the instructions. The first time you do so check to be sure that you have only hightlight the directions end. If you have highlight every thing the left click and start highlighting from the directions end up to the photo. When you have done so, right click and the box that opens has print preview click on it and the print preview will open with the highlighted project. Also by moving the margin markers you can enlarge the project directions, by using the magnifing numbers like to 125%
EvieDun
Aug 20, 2012
Instead of hitting the Print on the page, go to your own File at the top of the page and hit Print Preview and you will see only two pages to print and then hit print. That worked for me.
suehayter3 0937222
Feb 03, 2012
As the previous comment from "aprilfoolmock", cannot get it to print.
aprilfoolmock 0963 408
Jan 27, 2012
like the pattern, but cannot get it to print, only prints advertisement
vasqueztany 630164 2
Aug 28, 2011
Sres Favecrafts; me gust mucho este proyecto. Quisiera saber si es posible que me enviaran el diagrama ya que no hablo ingles y me es ms facil entender el diagrama. Gracias
Report Inappropriate Comment
Are you sure you would like to report this comment? It will be flagged for our moderators to take action.
Thank you for taking the time to improve the content on our site.