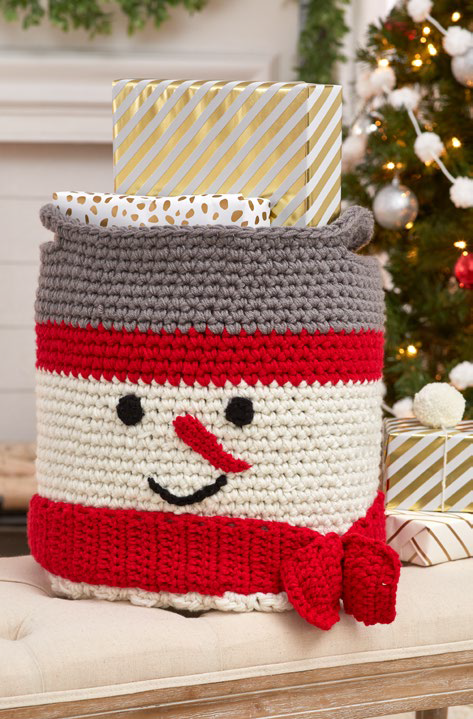
Happy Snowman Crochet Basket Pattern
Christmas crochet patterns like this one are decorative AND functional!

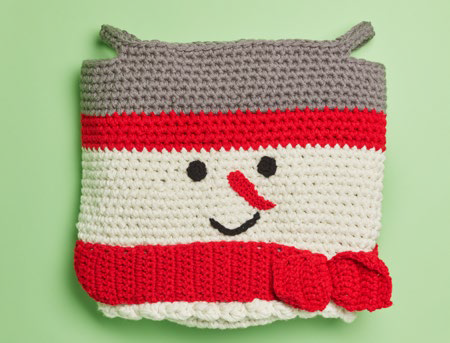
Create the most cheerful crochet basket for the holidays with this snowman pattern! This crochet snowman basket can be used for Christmas gift giving, and the lucky recipient can decorate with it for seasons to come. Learn how to crochet a basket in the round and add the perfect embellishments to take this from a plain basket to a cute character. Stitching on a basic face and adding a scarf to match his hat are easy enough skills to accomplish! He will make the perfect Santa sack for small gifts, and he'll come in handy for storage that is functional as well as adorable.

Crochet HookJ/10 or 6 mm hook, P/16 or 11.5 mm hook
Yarn Weight(4) Medium Weight/Worsted Weight and Aran (16-20 stitches to 4 inches)
Crochet Gauge5 sts = about 3" [7.5 cm]; 5 rounds = about 3" [7.5 cm] in single crochet (sc). CHECK YOUR GAUGE. Use any size needle to obtain the gauge
Finished SizeSnowman Basket measures about 16" [40.5 cm] tall and 42" [106.5 cm] circumference.
Materials List
- RED HEART® With Love®: 4 skeins 1101 Eggshell A, 3 skeins 1401 Pewter B, 2 skeins 1909 Holly Berry C, and 1 skein 1012 Black D Note: Only a small amount of D is needed.
- Susan Bates® Crochet Hooks: 11.5 mm [US P-16] (for basket) and 6 mm [US J-10] (for scarf and facial features)
- Stitch marker
- Yarn needle
Instructions
Pop a fun basket into your holiday décor! This upbeat Snowman basket can add happiness to any room or be used for giving a special holiday gift.
Notes
-
Basket is worked in continuous rounds (spiral), from the base upwards.
-
Scarf, nose, and eyes are worked separately and sewn to basket. Mouth is embroidered onto basket.
-
Basket is worked with 4 strands of yarn held together. Scarf is worked with 2 strands of yarn held together. Nose and eyes are worked with a single strand of yarn.
-
To make it easier to wind yarn into the correct number of balls for scarf and basket, work the scarf first then wind all the remaining C-colored yarn into 4 separate, equal size balls and work the basket.
-
To change yarn color, work last stitch of old color to last yarn over. Yarn over with new color and draw through all loops on hook to complete stitch. Proceed with new color. Fasten off old color.
SCARF
With smaller hook and 2 strands of C held together, ch 11.
-
Row 1: Dc in 3rd ch from hook (2 skipped ch do not count as a st) and in each remaining ch across—9 dc.
-
Row 2: Ch 1, turn, sc in each dc across.
-
Row 3: Ch 3 (counts as first dc), turn, dc in each st across.
-
Rows 4–85: Repeat Rows 2 and 3 for 41 times.
-
Row 86: Repeat Row 2.
-
Fasten off.
BASKET
Before beginning basket, wind B and C into 4 separate, equal sized balls of yarn. With larger hook and 4 strands of A held together, ch 2.
-
Round 1 (right side): Work 6 sc in 2nd ch from hook—6 sc. Do not join, work in continuous rounds (spiral). Place a marker in last stitch made. Move marker up as each round is completed.
-
Round 2: Work 2 sc in each st around—12 sc.
-
Round 3: Repeat Round 2—24 sc.
-
Round 4: [Sc in next 3 sts, 2 sc in next st] 6 times—30 sc.
-
Round 5: [Sc in next 4 sts, 2 sc in next st] 6 times—36 sc.
-
Round 6: [Sc in next 5 sts, 2 sc in next st] 6 times—42 sc.
-
Round 7: [Sc in next 6 sts, 2 sc in next st] 6 times—48 sc.
-
Round 8: [Sc in next 7 sts, 2 sc in next st] 6 times—54 sc.
-
Round 9: [Sc in next 8 sts, 2 sc in next st] 6 times—60 sc.
-
Round 10: [Sc in next 9 sts, 2 sc in next st] 6 times—66 sc.
-
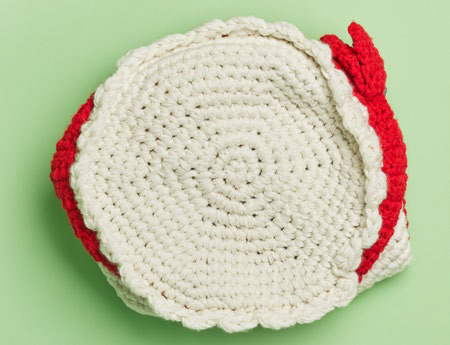
Round 11: [Sc in next 10 sts, 2 sc in next st] 6 times—72 sc. Scalloped Lower Edge: Working in front loops only of Round 11 sts, slip st in first st, *2 hdc in next st, skip next st **, slip st in next st; repeat from * around ending last repeat at **.
-
Round 12: Working in back loops only of Round 11 sts, sc in each st around.
-
Rounds 13–28: Sc in each st around; change to 4 strands of C held together in last st of Round 28.
-
Rounds 29–32: With C, sc in each st around; change to 4 strands of B held together in last st of Round 32.
-
Rounds 33–38: With B, sc in each st around.
-
Round 39 (form handles): Sc in next 12 sts, ch 12, skip next 12 sts, sc in next 24 sts, ch 12, skip next 12 sts, sc in next 12 sts—48 sc and 2 ch-12 spaces.
-
Round 40: Sc in next 12 sts, sc in next 12 ch, sc in next 24 sts, sc in next 12 ch, sc in next 12 sts; slip st in first sc of this round.
-
Fasten off.
CARROT NOSE
With smaller hook and a single strand of C, ch 4.
-
Row 1: Sc in 2nd ch from hook and in each remaining ch across—3 sc.
-
Rows 2–6: Ch 1, turn, sc in each st across.
-
Row 7: Ch 1, turn, sc in first sc, sc2tog—2 sc.
-
Rows 8–12: Ch 1, turn, sc in each sc across.
-
Row 13: Ch 1, turn, sc2tog—1 sc. Fasten off, leaving a long tail for sewing carrot nose to basket.
EYE (make 2)
With smaller hook and a single strand of D, ch 2.
-
Round 1 (right side): Work 6 sc in 2nd ch from hook—6 sc. Do not join, work in continuous rounds (spiral). Place a marker in last stitch made. Move marker up as each round is completed.
-
Round 2: [Sc in next st, 2 sc in next st] twice, slip st in next st; leave last st unworked.
-
Fasten off, leaving a long tail for sewing eye to basket.
FINISHING: Facial Features
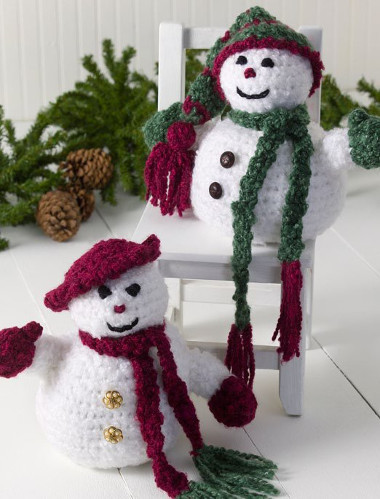
Use photograph as a guide to feature placement.
-
Nose: Sew carrot nose at an angle between Rounds 22 and 26.
-
Eyes: Sew an eye on each side of top of carrot nose, about 2 stitches away from nose.
-
Mouth: With yarn needle and 2 strands of D held together, embroider a chain stitch smile beneath the carrot nose.
-
Scarf: The scarf is longer than needed to reach around the basket, the ends are supposed to overlap. Before beginning, decide where you want the overlapping ends of the scarf to be. Carefully pin scarf in place around basket just above scalloped lower edge. When happy with the scarf placement, sew the top and lower edges to the basket leaving the overlapping ends loose. After edges of scarf are sewn to basket, gather the 9 sts of the first overlapping row on each overlapped end to make it look like the scarf ends have been tied together.
-
Weave in any remaining ends.
Abbreviations
- A, B, C, and D
- Color A, B, C, and D
- ch
- chain
- dc
- double crochet
- hdc
- half double crochet
- sc
- single crochet
- st(s)
- stitch(es)
- []
- work directions in brackets the number of times specified
- * or **
- repeat whatever follows the * or ** as indicated
Do you give the kids their presents in a Santa sack, or do you arrange them under the tree some other way?
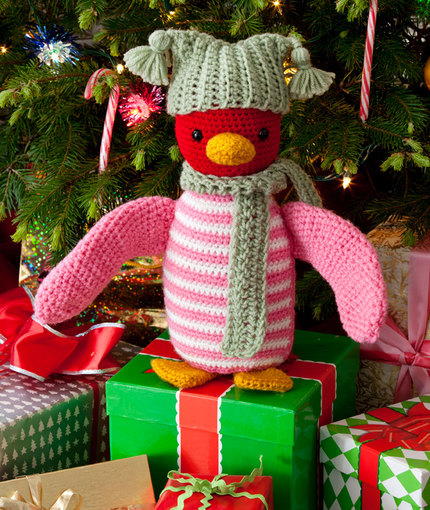
Read NextHuggable Happy Colors Penguin
Your Recently Viewed Projects
Thanks for your comment. Don't forget to share!
Maryn
Dec 19, 2021
kind of hard to rate the pattern when I have to jump thru hoops to print it...
Knittingdancer on Ravelry
Dec 08, 2018
I dont have any kids or grand kids. I just wrapped my great niece and great nephew gifts and put their gifts under my tree.
aketch
Dec 04, 2018
These are very sweet and would be well suited to travel, over the holidays. I gift wrap all my presents and arange them under the tree as best as I can.
Crafty Suz
Dec 01, 2018
This is excellent. I like that it is another way to add to a snowman collection. My sister has many forms of snow people so it is getting hard to find them in a different form. Her hubby loves to crochet so she'd appreciate it all the more if he makes it. I will have to print off this pattern for him.
Report Inappropriate Comment
Are you sure you would like to report this comment? It will be flagged for our moderators to take action.
Thank you for taking the time to improve the content on our site.