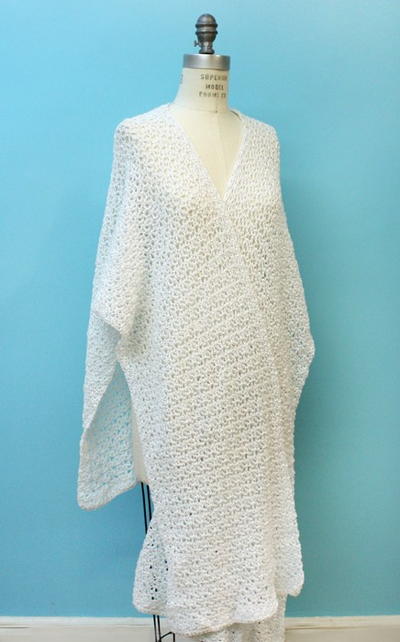
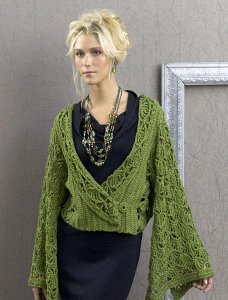
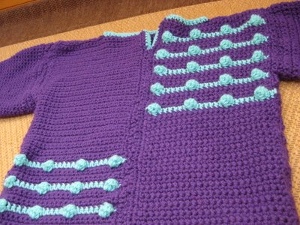
Crochet Bobble Sweater
This crochet bobble sweater is one of many free crochet sweater patterns to make and wear. Learn the bobble stitch and use it to embellish this sweater from Mellisa Langer.


Materials:
- Worsted weight yarn
- I hook
Instructions:
The front is formed by crocheting two rectangular panels that are sewn together in the middle to make the front of the sweater with a slight V in the front:
This pattern creates the sweater you see that fits me which would be the size of a child L or an adult S. Please feel free to make adjustments to whatever size you want.
Sweater front: (make two panels)
- Ch27
- Rows 1-5 sc across (26)
- Row 6 (change color) Join new color and sc in same stitch, sc in next stitch, *bobble, sc in next 6 stitches, bobble* repeat until end of row. End bobble color (4 bobbles formed and 2 sc on either side of the bobbles at the end.)
- Change back to background color.
- Rows 7-11 sc across
- Row 12 Repeat row 6.
- Continue with this pattern until 5 rows of bobbles are complete and then sc with background color to form a long rectangle that is 20" long.
- Now you should have a rectangle that is about 9 x 20. I then weave in all of the ends and sc 2 rows along each long side so that the rectangle is about 9.5 x 20.
- *Repeat the same process for the second panel.*
- With wrong sides up, line up the two panels with the way you want you bobbles to appear. (I inverted mine so that there is a bobble patch at the top and one at the bottom.)
- Start at the bottom and sew the two seams together with your main color yarn & a yarn needle leaving 2.5 inches open at the top for the v opening. Now sew back down the seam again to the bottom to reinforce the seam and weave in your ends.
To form the back, my gauge is to ch 52 and sc a rectangle that is about 19 x 20 that matches the front in size. No worries if it is not wide enough when done because you can add a row or two of sc on the sides to make them match up.
Sleeves:
Sleeves: 16” total (make 2)
I start my sleeves as a flat band to check the gauge and to create a slightly different pattern in the sleeve to form a band at the top that is 5 rows and then sew the seam together and start working in the round. This is my preference, but you can start in the round if you like.
- Ch 48
- Sc 5 rows across flat band. (17” strip)
- Row 6 – join work and work in rounds (sew up seam)
- Row 12 – sc 10 decrease 1 (4x) = 44
- Row 14 – sc18 decrease 1 (2x) = 42
- Row 20 – sc 8 decrease 1 (4x) =38
- Row 47 – sc 3 decrease 1 (8x) =30
- Row 48 – sc 4 decrease 1 (5x) = 25
- Row 49 & 50 – sc AA – end
- Row 51 sc AA in contrasting color.
Piecing together: (I always sew all the seams twice to reinforce and to prevent holes.)
- I line up the front and back panels and sew 5" in on each side at the top to form the shoulders and leave a comfortable neck hole.
- When the top is joined, I line up the bottom and join the sides from the bottom up to about the middle or a little higher to stablized the body to join in the sleeves. (There will be an opening on the sides that have not yet met the sleeve area that I will close once the main part of the sleeves are sewn in.)
- I fold the sleeve so that the little seam from joining the 5 top rows is in the arm pit, line up the top at the shoulder, sew the front of the sleeve to the body, flip, sew the back and then close the side while joining in the last little bit of the bottom of the sleeve in the arm pit.
- To finish, I pick the bobble color or a third contrasting color to sc around the bottom of the sweater, cuffs and neckline.
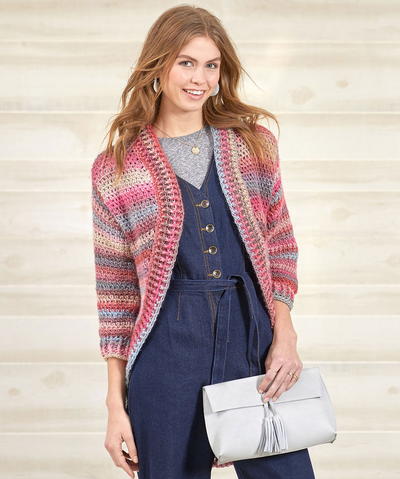
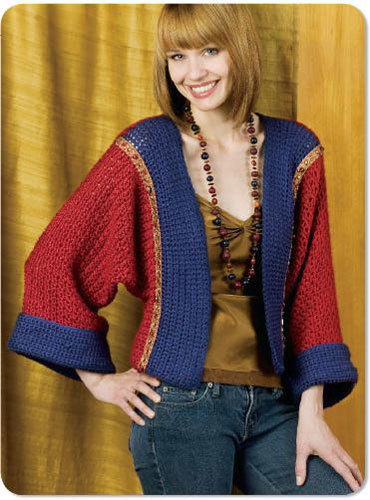
Read NextColdwater Creek Style Cardigan
Your Recently Viewed Projects

Thanks for your comment. Don't forget to share!
pupsmom
Jan 28, 2013
This pattern looks straight forward but I've never had to increase on my own. What is the bust size on the pattern as it's written? How can I increase/adjust? Help!!!!!!
Report Inappropriate Comment
Are you sure you would like to report this comment? It will be flagged for our moderators to take action.
Thank you for taking the time to improve the content on our site.