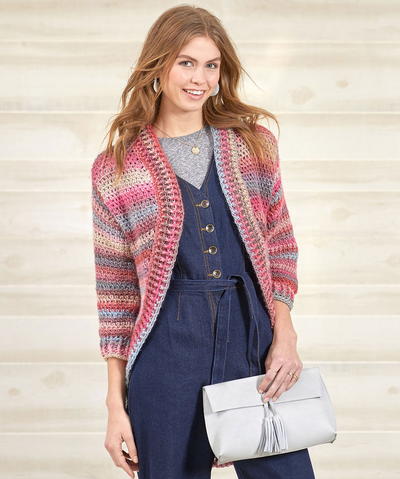
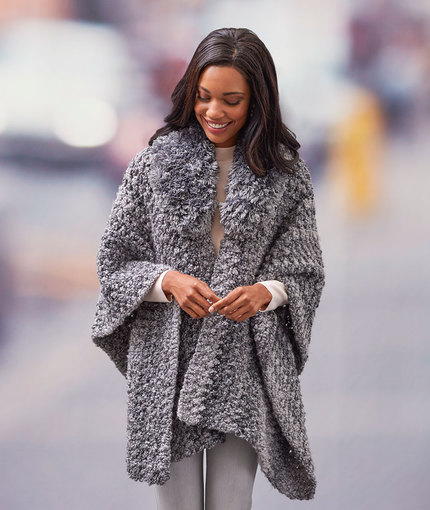
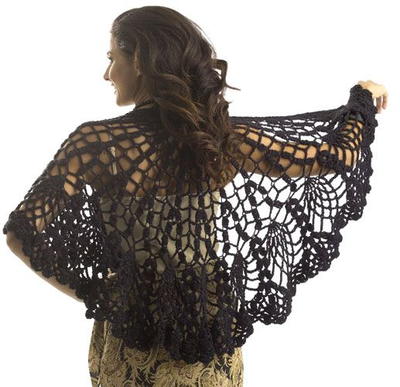
Season-Spanning Crochet Shrug Pattern
A crochet shrug pattern, free for you to print and make for any time of year!

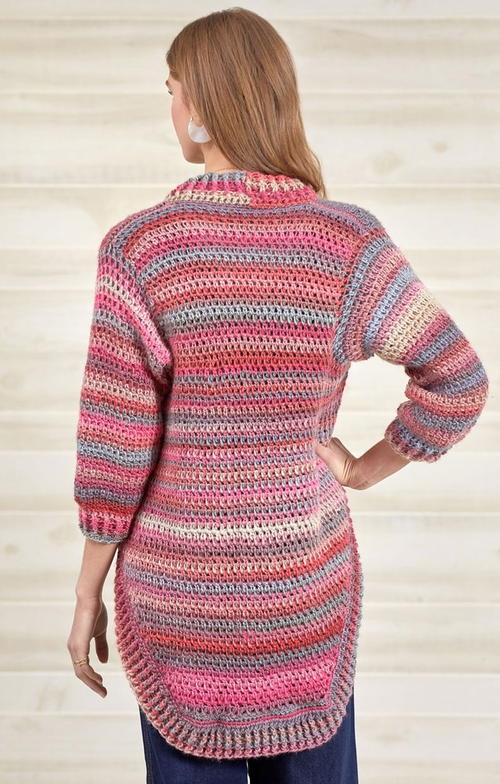
Make a free crochet shrug pattern to span every season. This beautiful tutorial is figure-flattering and comfortable for any breezy night. If you don't have a cozy cardigan to throw on any time there's a nip in the air, you're missing out! This delicious pattern is a great intermediate project to work up. It's great on summer nights, fall afternoons, and spring mornings! This pattern is fairly forgiving when it comes to gauge, too. Gauge is important, but you do have flexibility with making this project that you wouldn't have if you were making something more fitted. So, give this Season-Spanning Crochet Shrug Pattern a try today!
From Red Heart: "This shrug looks great on a wide variety of body types, so we sized it for small to 3X. See the beautiful range of Unforgettable yarn colors and choose your favorite!"
Chart:
NotesDirections are for size Small/Medium. Changes for sizes Large/X-Large, and 2X-Large/3X-Large are in parentheses.
To Fit Bust: 34/38 (42/46, 50/54)" [86.5/96.5,106.5/117, 127/137) cm]
Finished Bust: 38 (46½, 54½)" [96.5 (118, 138.5) cm], including outer bands
Finished Length: 28½ (31, 33)" [72.5 (78.5, 84) cm], including outer bands

Crochet HookK/10.5 or 6.5 mm hook
Yarn Weight(4) Medium Weight/Worsted Weight and Aran (16-20 stitches to 4 inches)
Crochet Gauge19 sts = 4" [10 cm]; 14 rows = 4" [10 cm] in (esc, ch1) pattern. 16 sts = 4" [10 cm] in (Fpdc, Bpdc) pattern. CHECK YOUR GAUGE. Use any size hook to obtain the gauge.
Materials List
- RED HEART® Unforgettable™: 6 (8, 10) balls 3939 Heirloom.
- Susan Bates® Crochet Hook: 6.5mm [US K-10½]
- Yarn needle
Instructions
Notes
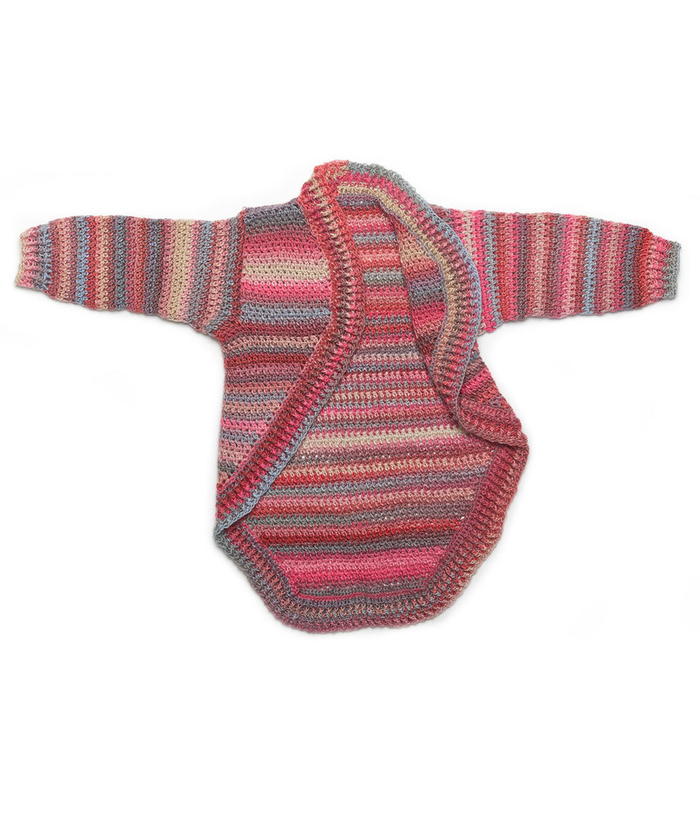
- Body of shrug is worked in one piece from lower edge upwards. Piece is divided at underarm then fronts and back are worked separately up to shoulders.
- Sleeves are worked directly into armholes and are worked from shoulder downwards.
- After body and sleeves are completed an outer band of post stitch ribbing is worked all the way around the outer edge of piece forming neck band, front bands, and lower edging.
BODY
Ch 40 (74, 102) sts.
-
Row 1 (right side): Esc in 2nd ch from hook and in each remaining ch across—39 (73, 101) esc.
-
Row 2 (increase row): Ch 1, turn, 2 esc in first esc, *ch 1, skip next esc, esc in next esc; repeat from * across to last 2 esc, ch 1, skip next esc, 2 esc in last esc—22 (39, 53) esc and 19 (36, 50) ch-1 spaces
-
Rows 3–62 (66, 70) (increase rows): Ch 1, turn, 2 esc in first st, *ch 1, skip next esc, esc in next ch-1 space; repeat from * to last 2 esc, ch 1, skip next esc, 2 esc in last st—82 (103, 121) esc and 79 (100, 118) ch-1 spaces.
Right Front
-
Row 1 (right side): Ch 3 (counts as esc, ch 1), turn, skip first 2 esc, esc in next ch-1 space, [ch 1, skip next esc, esc in next ch-1 space] 13 (17, 21) times; leave remaining sts unworked for underarms, back, and left front—15 (19, 23) esc (counting 1 esc for the beginning ch) and 14 (18, 22) ch-spaces (counting 1 chspace for the beginning ch).
-
Rows 2-12 (16, 20): Ch 3 (counts as esc, ch 1), turn, skip first esc, esc in next ch-1 space, *ch 1, skip next esc, esc in next ch-1 space; repeat from * across working last esc in beginning ch-space.
Shape Neck
-
Row 1 (decrease row): Ch 1 (does not count as a st), turn, skip first esc, esc in next ch-1 space, *ch 1, skip next esc, esc in next ch-1 space; repeat from * across working last esc in beginning ch-space—14 (18, 22) esc and 13 (17, 21) ch-spaces.
-
Row 2: Ch 3 (counts as esc, ch 1), turn, skip first esc, esc in next ch-1 space, *ch 1, skip next esc, esc in next ch-1 space; repeat from * to last esc; leave last esc unworked.
-
Rows 3-12: Repeat Rows 1 and 2 for 5 more times—9 (13, 17) esc and 8 (12, 16) ch-spaces.
-
Row 13: Ch 1, turn, sc in each esc and ch-1 space to beginning ch-space, 2 sc in beginning ch-space—17 (25, 33) sc. Fasten off.
Back
With right side facing, join yarn with slip st in 11th unworked ch-1 space of body following end of Row 1 of right front.
Note: The 21 sts left unworked between right front and back form one underarm.
-
Row 1 (right side): Ch 3 (counts as esc, ch 1), skip next esc, esc in next ch-1 space, [ch 1, skip next esc, esc in next ch-1 space] 29 (42, 52) times; leave remaining sts unworked for second armhole and left front—31 (44, 54) esc and 30 (43, 53) ch-1 spaces.
-
Rows 2-24 (28, 32): Ch 3 (counts as esc, ch 1), turn, skip first esc, esc in next ch-1 space, *ch 1, skip next esc, esc in next ch-1 space; repeat from * across working last esc in beginning ch-space.
-
Row 25 (29, 33): Ch 1, turn, sc in each esc and ch-1 space to beginning chspace, 2 sc in beginning ch-space—61 (87, 107) sc.
-
Fasten off.
Left Front
With right side facing, join yarn with slip st in 11th unworked ch-1 space of body following end of Row 1 of back.
Note: The 21 sts left unworked between back and left front form the second underarm.
-
Row 1 (right side): Ch 3 (counts as esc, ch 1), skip next esc, esc in next ch-1 space, *ch 1, skip next esc, esc in next ch-space; repeat from * to last 2 esc, ch 1, skip next esc, esc in last esc—15 (19, 23) esc and 14 (18, 22) ch-spaces.
-
Rows 2-12 (16, 20): Ch 3 (counts as esc, ch 1), turn, skip first esc, esc in next ch-1 space, *ch 1, skip next esc, esc in next ch-1 space; repeat from * across working last esc in beginning ch-space.
Shape Neck
-
Row 1: Ch 3 (counts as esc, ch 1), turn, skip first esc, esc in next ch-1 space, *ch 1, skip next esc, esc in next ch-1 space; repeat from * to last esc; leave last esc unworked—14 (18, 22) esc and 13 (17, 21) ch-spaces.
-
Row 2 (decrease row): Ch 1 (does not count as a st), turn, skip first esc, esc in next ch-1 space, *ch 1, skip next esc, esc in next ch-1 space; repeat from * across working last esc in beginning ch-space—13 (17, 21) esc and 12 (16, 20) ch-spaces.
-
Row 3: Ch 3 (counts as esc, ch 1), turn, skip first esc, esc in next ch-1 space, *ch 1, skip next esc, esc in next ch-1 space; repeat from * to last esc; leave last esc unworked.
-
Rows 4–11: Repeat Rows 2 and 3 for 4 more times—9 (13, 17) esc and 8 (12, 16) ch-spaces.
-
Row 12: Ch 3 (counts as esc, ch 1), turn, skip first esc, esc in next ch-1 space, *ch 1, skip next esc, esc in next ch-1 space; repeat from * across working last esc in beginning ch-space.
-
Row 13: Ch 1, turn, sc in each esc and ch-1 space to beginning ch-3 space, 2 sc in beginning ch-3 space—17 (25, 33) sc.
-
Fasten off.
SLEEVES (work 2)
Sew shoulders seams.
With right side facing, join yarn with slip st in 6th unworked ch-1 space of one underarm.
-
Round 1 (right side): Ch 3 (counts as esc, ch 1), skip next esc, esc in next ch-1 space, [ch 1, skip next esc, esc in next ch-1 space] 3 times, ch 1, skip next esc; working in ends of rows up side of armhole edge, esc in end of first row, *ch 1, skip end of next row, esc in end of next row; repeat from * to shoulder seam, ch 1, skip shoulder seam; working in ends of rows down other side of armhole edge, esc in end of first row, **ch 1, skip end of next row, esc in end of next row; repeat from ** to underarm; ch 1, esc in first ch-1 space of underarm, [ch 1, skip next esc, esc in next ch-1 space] 4 times, ch 1; join with slip st in 2nd ch of beginning ch-3—36 (40, 44) esc and 36 (40, 44) ch-1 spaces. Note: The exact number of esc and ch-1 spaces worked around the armhole edge can vary. It is most important that the stitches are worked evenly around the edge and the fabric doesn't pucker or flare. If the number of sts you have differs from the stitch count given, do not worry, just know that your stitch count will continue to differ from the stitch counts given in the following decrease rounds.
-
Rounds 2–7: Turn, slip st in first ch-1 space, ch 3 (counts as esc, ch 1), skip next esc, esc in next ch-1 space, *ch 1, skip next esc, esc in next ch-1 space; repeat from * to last esc, ch 1, skip last esc; join with slip st in 2nd ch of beginning ch-3.
-
Round 8 (decrease round): Turn, slip st in first ch-1 space, ch 3 (counts as esc, ch 1), skip next esc, esc2tog-overspaces, *ch 1, skip next esc, esc in next ch-1 space; repeat from * to last 3 esc, skip next esc, esc2tog-over-spaces, ch 1, skip last esc; join with slip st in 2nd ch of beginning ch-3—34 (38, 42) esc and 34 (38, 42) ch-1 spaces (2 esc decreased).
-
Rounds 9–15: Repeat Round 2 for 7 more times.
-
Round 16: Repeat Round 8—32 (36, 40) esc and 32 (36, 40) ch-1 spaces.
-
Rounds 17–40 (40, 48): Repeat Rounds 9-16 for 3 (3, 4) more times—26 (30, 32) esc and 26 (30, 32) ch-1 spaces.
-
Next Round: Ch 2 (does not count as a st), turn, hdc in each esc around (skipping the ch-1 spaces); join with slip st in top of beginning ch-2—26 (30, 32) hdc. Note: If looser cuffs are desired, work hdc in some of the ch-1 spaces for a greater number of hdc around. Take care to have an even number of hdc in the round.
-
Next Round: Ch 2 (does not count as a st) turn, Fpdc around first hdc, Bpdc around next hdc, *Fpdc around next hdc, Bpdc around next hdc; repeat from * around; join with slip st in top of beginning ch-2.
-
Next 3 Rounds: Ch 2 (does not count as a st), turn, *Fpdc around next post st, Bpdc around next post st; repeat from * around; join with slip st in top of beginning ch-2.
-
Next Round: Ch 1, turn, sc in each st around.
-
Fasten off.
FINISHING - Outer Bands
With right side facing, join yarn with slip st in lower right corner.
-
Round 1 (right side): Ch 1, work sc evenly spaced all the way around the outer edge; join with slip st in first sc. Notes: Work sc stitches as evenly spaced as possible so that the fabric does not pucker or flare. Designer recommends working 2 sc in the end of each row along front edges, sc in each esc and ch-1 space along back neck, and sc in each ch along opposite side of beginning ch. For best results, make an even number of sts in this round.
-
Round 2: Ch 2 (does not count as a st), turn, hdc in each st around; join with slip st in top of beginning ch-2.
-
Rounds 3–7: Ch 2 (does not count as a st), turn, *Fpdc around next st, Bpdc around next st; repeat from * around; join with slip st in top of beginning ch-2.
-
Fasten off.
-
Weave in ends. Wash and lay flat to block.

Special Stitches and Abbreviations
- Bpdc (Back post double crochet)
- Yarn over, insert hook from back side of work to front and to back again around the post of indicated stitch; yarn over and pull up a loop (3 loops on hook), [yarn over and draw through 2 loops on hook] twice. Skip the stitch "in front of" the Bpdc.
- esc (extended single crochet)
- Insert hook in indicated stitch, yarn over and pull up a loop, yarn over and draw through 1 loop on hook, yarn over and draw through both loops on hook.
- esc2tog-over-spaces (extended single crochet 2 stitches together worked over 2 ch-1 spaces)
- Insert hook in next ch-1 space, yarn over and pull up a loop, yarn over and draw through one loop on hook (2 loops remain on hook), skip next esc; insert hook in next ch-1 space, yarn over and pull up a loop, yarn over and draw through one loop on hook; yarn over and draw through all 3 loops on hook
- Fpdc (Front post double crochet)
- Yarn over, insert hook from front side of work to back and to front again around post of indicated stitch, yarn over and pull up a loop (3 loops on hook), [yarn over and draw through 2 loops on hook] twice. Skip the stitch "behind" the Fpdc.
- ch
- chain
- hdc
- half double crochet
- sc
- single crochet
- st(s)
- stitch(es)
- [ ]
- work directions in brackets the number of times specified
- *
- repeat whatever follows the * as indicated
What colors would you use to make this lovely shrug? Let us know in the comments!
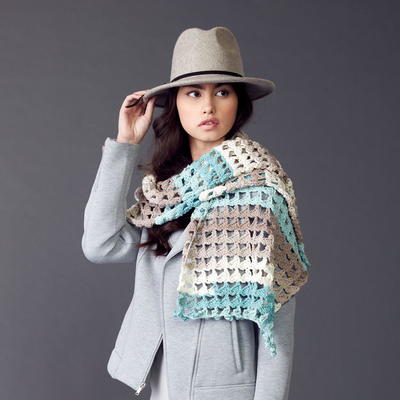
Read NextSimply Savvy Crochet Ruana Pattern