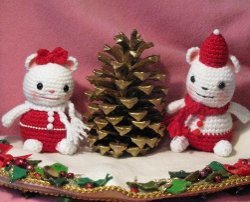
Mr. and Mrs. Christmas Mouse
Give Mr. and Mrs. Christmas Mouse a spot in your Christmas decor this year. Crochet an easy amigurumi with this free crochet pattern. Aren't they cute!
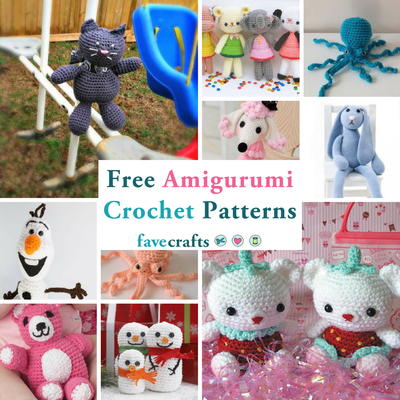
Find this and other fun amigurumi patterns at "19 Free Amigurumi Crochet Patterns"!

Materials:
- Size US-E/3.5mm Crochet Hook
- Lion Brand Pound of Love - White
- Bernat Satin – Crimson
- Pink & Black embroidery floss
- Polyester Fiberfill
- 4 - 8mm Safety Eyes
- Blunt darning needle
- 3 Small Red Pompoms For Mr. Mouse’s Top
- 1 Small White Pompom For Mr. Mouse’s Hat
- Small Amount of Pearl String For Mrs. Mouse
- 3 Small White Pompoms for Mrs. Mouse’s Blouse
- Aleene’s Tacky Glue
- Face Blush and Cotton Swab
Abbreviations:
SC = Single Crochet
HDC = Half Double Crochet
Ch = Chain
Rnd(s) = Round(s)
Beg = Beginning Sts = Stitches
2tog = Crochet 2 stitches together (decrease)
* = Repeat stitches from * to end of *
2nd = Second
Notes: Worked in continuous rounds; do not join and do not turn unless specified. Use stitch marker to indicate beginning of rounds. Yarn and hook listed is what I used – size may vary with other yarns or different size hook.
Steps:
Head: (Make 2)
Ch 2
Rnd 1: Work 5 sc in 2nd ch from hook = 5 sc
Rnd 2: Work 2 sc in each sc around = 10 sc
Rnd 3: *Sc in first sc, 2 sc in 2nd sc*, repeat from * around = 15 sc
Rnd 4: *Sc in next 2 sc, 2 sc in next sc*, repeat from * around = 20 sc
Rnd 5: *Sc in next 3 sc, 2 sc in next sc*, repeat from * around = 25 sc
Rnd 6: *Sc in next 4 sc, 2 sc in next sc*, repeat from * around = 30 sc
Rnd 7: *Sc in next 5 sc, 2 sc in next sc*, repeat from * around = 35 sc
Rnds 8-13: Sc in each sc around
Rnd 14: *Sc in next 5 sc, sc 2tog*, repeat from * around = 30 sc
Rnd 15: *Sc in next 4 sc, sc 2tog*, repeat from * around = 25 sc
Rnd 16: *Sc in next 3 sc, sc 2tog*, repeat from * around = 20 sc
Rnd 17: *Sc in next 2 sc, sc 2tog*, repeat from * around = 15 sc
Fasten off, leaving a long tail for sewing; insert safety eyes and stuff head firmly.
Ears: (Make 4)
Ch 2
Rnd 1: Work 5 sc in 2nd ch from hook = 5 sc
Rnd 2: Work 2 sc in each sc = 10 sc
Fasten off, leave a long tail.
Body: (For Mrs. Mouse)
With Red Yarn, Ch 2
Rnd 1: Work 5 sc in 2nd ch from hook = 5 sc
Rnd 2: Work 2 sc in each sc around = 10 sc
Rnd 3: *Sc in first sc, 2 sc in 2nd sc*, repeat from * around = 15 sc
Rnd 4: *Sc in next 2 sc, 2 sc in next sc*, repeat from * around = 20 sc
Rnd 5: *Sc in next 3 sc, 2 sc in next sc*, repeat from * around = 25 sc
Rnd 6: *Sc in next 4 sc, 2 sc in next sc*, repeat from * around = 30 sc
Rnd 7: *Sc in next 5 sc, 2 sc in next sc*, repeat from * around = 35 sc
Rnds 8-12: Sc in each sc around
Rnd 13: *Sc in next 4 sc, sc 2tog*, repeat from * around = 25 sc
Rnd 14: *Sc in next 3 sc, sc 2tog*, repeat from * around = 20 sc
Rnd 15: *Sc in next 2 sc, sc 2tog*, repeat from * around = 15 sc
Fasten off leaving a long tail for sewing; stuff firmly. Sew opening closed (this will be the bottom). Flatten bottom so Mouse can stand. Weave in ends. Attach Mrs. Mouse’s head to body.
Body: (For Mr. Mouse)
With White Yarn, Ch 2
Rnd 1: Work 5 sc in 2nd ch from hook = 5 sc
Rnd 2: Work 2 sc in each sc around = 10 sc
Rnd 3: *Sc in first sc, 2 sc in 2nd sc*, repeat from * around = 15 sc
Rnd 4: *Sc in next 2 sc, 2 sc in next sc*, repeat from * around = 20 sc
Rnd 5: *Sc in next 3 sc, 2 sc in next sc*, repeat from * around = 25 sc
Rnd 6: *Sc in next 4 sc, 2 sc in next sc*, repeat from * around = 30 sc
Rnd 7: *Sc in next 5 sc, 2 sc in next sc*, repeat from * around = 35 sc
Rnds 8: Sc in each sc around
Join Red Yarn
Rnds 9-12: Sc in each sc around
Rnd 13: *Sc in next 4 sc, sc 2tog*, repeat from * around = 25 sc
Rnd 14: *Sc in next 3 sc, sc 2tog*, repeat from * around = 20 sc
Rnd 15: *Sc in next 2 sc, sc 2tog*, repeat from * around = 15 sc
Fasten off leaving a long tail for sewing; stuff firmly. Sew opening closed (this will be the bottom). Flatten bottom so Mouse can stand. Weave in ends. Attach Mr. Mouse’s head to body.
Arms: (Make 4)
With White Yarn, Ch 2
Rnd 1: Work 5 sc in 2nd ch from hook = 5 sc
Rnd 2-8: Sc in each sc around
Fasten off leaving a long tail for sewing. Do not stuff arms.
Legs: (make 4)
With White Yarn, Ch 2
Rnd 1: Work 5 sc in 2nd ch from hook = 5 sc
Rnd 2-6: Sc in each sc around
Fasten off, leave long tail. Stuff legs lightly.
Sew arms and legs on Mr. and Mrs. Mouse.
Scarf: (Make 2)
Make 1 in red for Mr. Mouse and 1 in white for Mrs. Mouse.
Rnd 1: Ch 35
Rnd 2: Sc in 2nd ch from hook, sc in each sc across
Fasten off. Tie ends of scarf with fringe. I used 6 strands of yarn for the fringe.
Bow: (Make 1) For Mrs. Mouse
Rnd 1: Ch 6
Rnd 2: Sc in 2nd ch from hook, ch 1, turn.
Rnd 3-6: Sc in each sc across, ch 1, turn – do not ch 1 at the end of the last rnd.
Fasten off, leave long tail for sewing.
To Form Bow:
1. Weave in short piece of yarn (where ch was started) to center;
2. Weave in long tail to center;
3. Pinch center and wrap long tail around 4 times;
4. Thread long tail through blunt needle and secure by running under the wrapped part, bringing it out; secure firmly. Sew bow on top of Mrs. Mouse’s head.
Hat: (Make 1) For Mr Mouse
With Red Yarn, ch 2
Rnd 1: Work 5 sc in 2nd ch from hook = 5 sc
Rnd 2: Sc in each sc around
Rnd 3: Work 2 sc in each sc = 10 sc
Rnd 4: Sc in each sc around
Rnd 6: *Sc in first sc, 2 sc in next sc*, repeat from * around = 15 sc
Rnd 7-9: Sc in each sc around
Fasten off, leaving a long tail for sewing. Lightly stuff the tip of the hat. Sew hat onto head. Glue a small white pompom on tip of hat, allow to dry.
Cut a small piece of string pearl (enough to go around Mrs. Mouse’s middle). Glue the ends together, allow to dry. Then dab a small amount of glue on the front and the 2 sides of the pearl string on the body – allow to dry.
Glue 3 red small pompoms on Mr. Mouse’s top (front) and 3 white pompoms on Mrs. Mouse’s top (front). Position the last pompom on the string pearl for Mrs. Mouse. Allow to dry.
TIP: Glue the first pompom a little below the head – allow room for the scarf for both.
With black embroidery floss, embroider the nose and mouth for Mr. Mouse and with pink embroidery floss, embroider the nose and mouth for Mrs. Mouse.
Blush:
Using a cotton swab, apply a small amount of blush on the inside of the ears and the cheeks for Mr. & Mrs. Mouse.
TIP: I used regular face blush.
Wrap red scarf around Mr. Mouse and white scarf around Mrs. Mouse. Tie to the side to allow the pompoms to show.
Mr. & Mrs. Mouse are done to adorn your holidays! Measures approximately 4-1/2” tall, not including bow or hat.
Happy Crocheting!

This work is licensed under the Creative Commons Attribution-Noncommercial-Share Alike 3.0 United States License. To view a copy of this license, visit http://creativecommons.org/licenses/by-nc-sa/3.0/us/ or send a letter to Creative Commons, 171 Second Street, Suite 300, San Francisco, California, 94105, USA.
COPYRIGHT © CRAFTS BY AP
ALL RIGHTS RESERVED 2007
http://apdesigns.etsy.com
http://craftsbyap.artfire.com
http://arminas-aminals.blogspot.com/
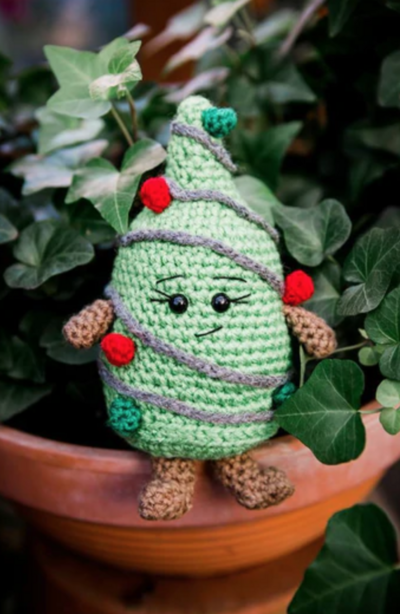
Read NextAmigurumi Christmas Tree Pattern

Thanks for your comment. Don't forget to share!
mholden3 2295343
Sep 02, 2013
I would really like the pattern for Mr. and Mrs. Christmas Mouse, but I can't seem to print it out properly. PLEASE help me.
superwoman
Sep 28, 2010
I have tried three times to print this pattern and it will not print. I really want the pattern and am dissappointed that it will not print.
Report Inappropriate Comment
Are you sure you would like to report this comment? It will be flagged for our moderators to take action.
Thank you for taking the time to improve the content on our site.