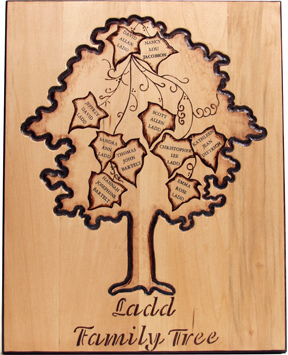
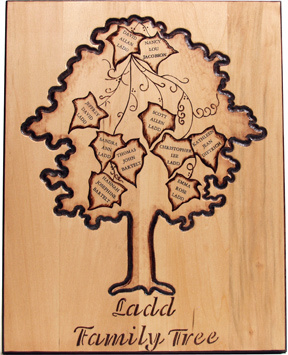
Woodburned Family Tree
Create a cherished heirloom which reflects the different branches of the family with wood-burned leaves and stenciled names. This is a great gift for grandparents.
Materials:
- Walnut Hollow® #27173 Family Tree Plaque
- Walnut Hollow® #23906 The Creative Versa-Tool™
- Delta Stencil Magic #956170012
- Laser Computer Printout of all family member’s names (image reversed)
- Other Supplies: container for hot points, eraser, paper towel, pencil, sandpaper, scissors, spray varnish, tape, wood sealer
Instructions:
- To prepare wood, use sandpaper to lightly sand entire wood surface. Remove dust with paper towel.
- Using the stencil and a pencil, trace the name of the family tree across the bottom of the plaque.
- Determine how many leaves are necessary to match the members of the family. Use a pencil to draw a leaf for each member, starting with the mother and father. Draw free hand or use a stencil. Make sure it’s big enough to accommodate the name. Draw a line down to each child. Add spouses next to children. Draw more lines for grandchildren. The amount of family members will determine how large the names should be printed.
- Print family member’s names using a laser printer. Be sure to reverse the image as they will be transferred onto the wood using the Creative Versa-Tool™. Leave an inch of space around the names for easily handling when transferring.
- Before using hot tool, read through and follow all safety precautions on packaging. Attach the Transfer Point to tool. Tighten with pliers. Secure stand to hard surface with tape. Press switch to “ON”. Place tool on stand. Plug into electric outlet. Let heat for 4-5 minutes.
- Use scissors to cut out the first name to be transferred. Tape across the top so that the name fits inside a leaf. Use the Transfer Point to transfer the image of the name onto the wood. Lightly rub the back of the paper with the point. Keep the point moving to keep from burning the wood. The paper will become a little discolored from the heat. Lift the bottom of the paper to determine the progress of the transfer. If the paper sticks a little, just apply a little heat and lift. (If for some reason the name gets smudged, it can be sanded off and redone.) If the name goes over the pencil lines of the leaf, the leaf can easily be erased and made to fit the name. When all the names are satisfactory, unplug tool and let cool.
- Remove the Transfer Point. If still warm, use pliers and drop the Point into a glass or metal container. Attach the Universal Point to the tool. Follow directions for use as stated in #5. Burn the pencil lines around the leaves. Lightly shade inside the lines by tipping the point a little and using the side of the Universal Point. Burn the lines connecting the children to parents.
- Use the Universal Point to burn the stenciled name of the family tree. When complete, unplug tool and let cool. Remove Universal Point.
- Attach Flow Point to tool. Tighten with pliers and proceed as stated in #5. Use Flow Point to burn the indented area around the edge of the tree. When complete, unplug tool and let cool.
- Attach Shading Point. Use Shading Point to burn the outer edges of the plaque. The Shading Point is also used for lightly shading inside the indented area. When all burning is complete, turn “OFF”. Unplug tool and let cool.
- Use eraser to remove any visible pencil lines.
- Apply 2-3 coats of spray varnish for a protective finish.
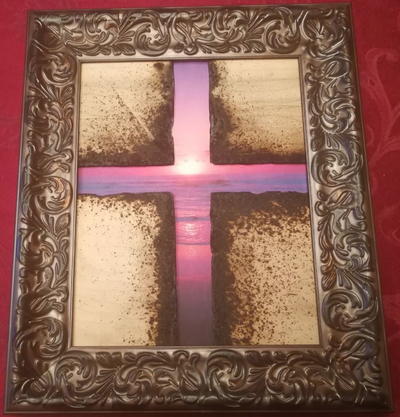
Read NextPurple Sunrise Decorative Cross
Your Recently Viewed Projects
Thanks for your comment. Don't forget to share!
Report Inappropriate Comment
Are you sure you would like to report this comment? It will be flagged for our moderators to take action.
Thank you for taking the time to improve the content on our site.