This project was submitted by one of our readers, just like you.
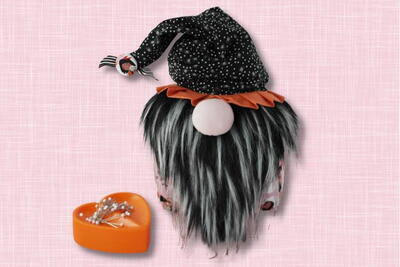
Holiday Gnome

Holiday Gnome
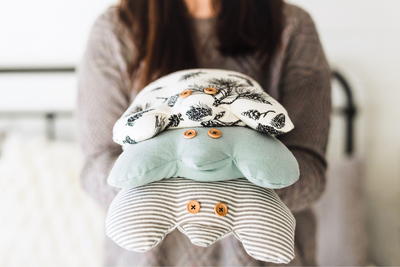
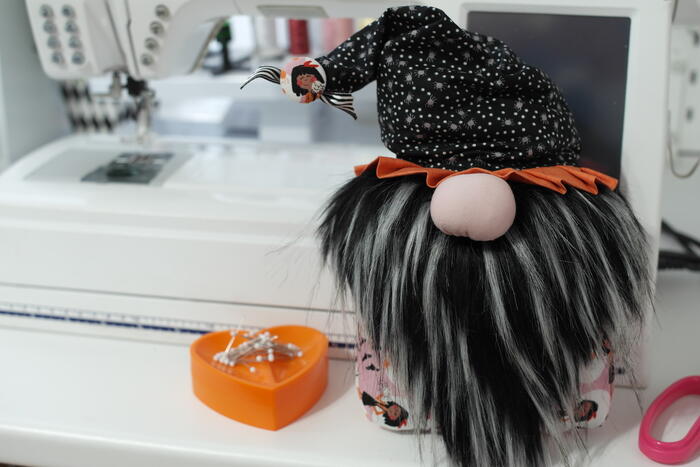
"Everybody loves Gnomes! This little guy has a soft squishy nose, and pleated ruffle hat. No pattern is needed - if you can cut rectangles, circles and triangles - you’re good to go! You’ll even learn how to make simple, folded box corners so the gnome will sit flat for you. I’ve used some adorable Halloween themed fabrics by Clothworks but these little guys make great gifts or décor for any Holiday!"
Primary TechniqueSewing

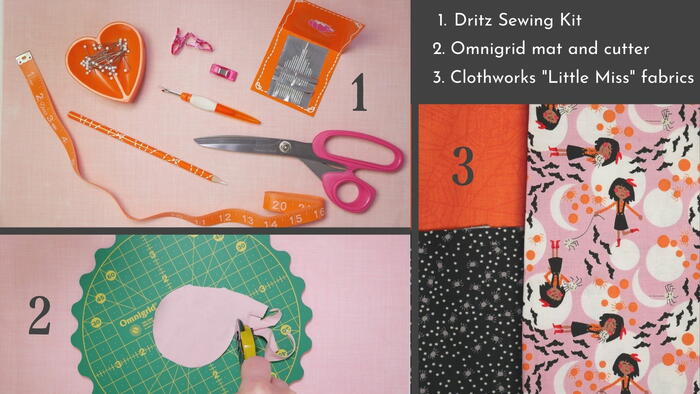
Materials List
- Cloth works Fabric “Little Miss” (body is moons in black, hat is spiders in black, and ruffle is cobwebs in orange)
- 3” circle of stretchy fabric
- Dritz sewing kit with scissors, pins, needles, clips, & measuring tape
- Sewing machine/Vivilux laser (optional)
- Omnigrid cutting mat, 8” ruler & rotary cutter
- Faux fur for beard
- Fiberfill and weighted filler for the bottom
- Strong thread
Instructions
-
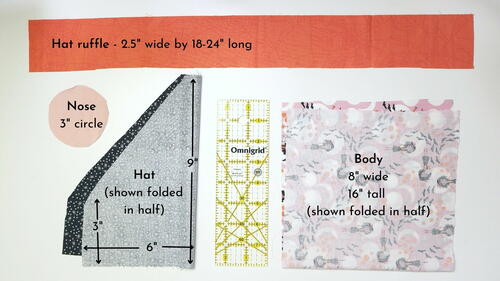
Cut out your fabrics (the photo diagram will help) 8” wide x 16” high rectangle for body, will be folded at the bottom; 3” circle of stretch fabric for nose (the omnigrid rotating mat makes it easy to cut circles); 9” tall by 12” wide for hat, folded to 9”x6” and cut off corner 3” from bottom (see photo); 2.5” wide x 18-24” long strip to make pleated hat ruffle; faux fur beard 8” wide by 5” tall triangle (see instructions)
-
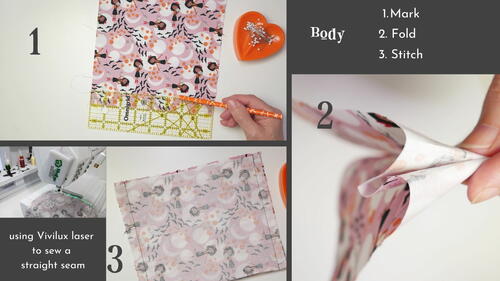
Fold body fabric with wrong sides together and mark a line across the bottom 1” from the fold. Then flip over and mark another line 1” up from the fold on other side.
-
Keep the bottom fold in place, then fold the fabric down again at the lines you marked so it’s right sides together. Do this on both sides and pin. You will have a “W” shape at the bottom which will become a boxed corner after it’s stitched.
-
Stitch both side seams with ½” seam allowance
-
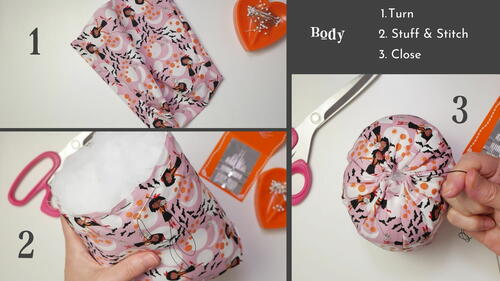
Fill the bottom with weighted filler (glass beads or poly pellets, but food products are not recommended because they attract critters!) Then firmly stuff the body with fiberfill. Be sure the boxed corners at the bottom are nicely filled out..
-
With needle and strong thread, make long running stitches ½” from the top edge all the way around. Pull tightly on the thread to gather the opening until it closes the top of the gnome. Take a few more stitches to secure and tie off the thread. (this top area will not show on the finished gnome)
-
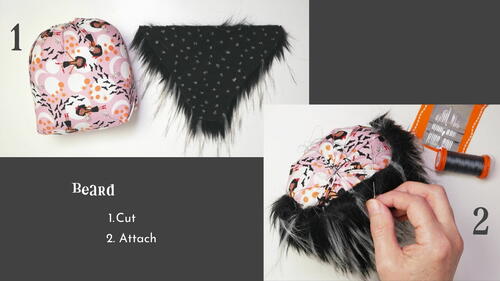
For a fur beard, cut a piece of faux fur 8” wide and 5” long. (TIP:cut only the backing of the fur so it will hang over the cut edges and look nice) Hand stitch or glue the beard to the top front of the gnome.
-
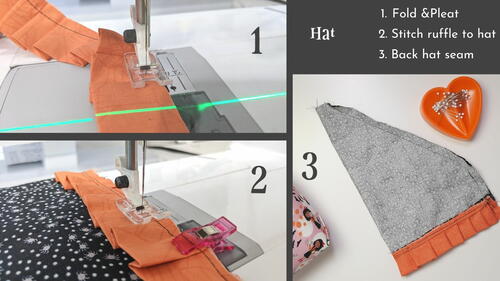
For the Hat: Fold the long strip of fabric in half lengthwise with wrong sides together to make a folded strip. Gather or pleat the strip so it’s 12” long when completed. I’m using the Vivilux laser to mark my pleat folds rather than measuring - super handy! If doing this by machine, baste ¼” from the raw edges so those stitches will not show on the finished hat.
-
Stitch the pleated ruffle to the base of the hat with right sides together using a ½” seam allowance.
-
Flip the ruffle down and away from the hat and press. Fold the hat in half, match the raw edges and Stitch the back seam of the hat with ½” seam allowance. I like to leave an opening in the top so I can insert a pipe cleaner to bend the hat and attach an embellishment, but you could also stitch it closed.
-
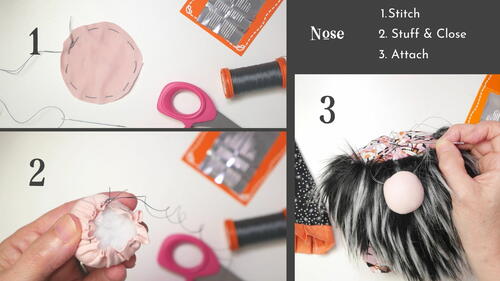
To make the nose: Hand stitch long running stitches all the way around the nose fabric with a needle and strong thread. Put some fiberfill in the center and pull the threads to close up the circle with the fiber inside. Knot the thread so the nose stays closed, then use the remainder of the thread to sew the nose onto the gnome beard, near the top center of the body.
-
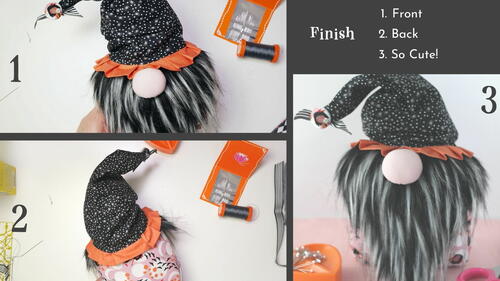
Place the hat on the head so the front ruffle is just sitting on top of the nose. Pull down the hat in the back, and scrunch the hat so it looks like it’s too big and has fallen over the gnome’s eyes. You can add fiberfill to the hat if you’d like. Hand stitch or glue the hat in place.
-
Embellish however you like! Add buttoms, bows, bells, flowers… I used a scrap of the "Little Miss" fabric from Clothworks to make a fabric-covered button for embellishing the hat. Then I added a striped bow.

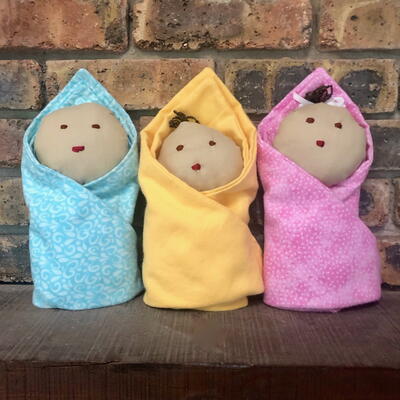
Read NextSwaddle Babies